Table of Contents
Backpacking on a student budget doesn’t mean you have to sacrifice safety, comfort, or quality sleep in the backcountry. While your classmates might blow their semester savings on fancy tents with built-in LED lights and vestibules bigger than dorm rooms, savvy student adventurers know that a simple tarp offers unmatched versatility, ultralight packability, and—most importantly—serious cash savings. For less than the cost of a textbook, you can score a reliable shelter that’ll keep you dry through surprise mountain storms and double as a sunshade for those inevitable post-graduation beach trips.
But here’s the thing: not all budget tarps are created equal. That $15 hardware store blue tarp might seem tempting when you’re surviving on ramen, but it’ll weigh you down, sound like a trash bag in wind, and likely leave you soaked by 2 a.m. The sweet spot—quality backpacking tarps under $70—exists in a goldilocks zone where smart material choices, essential features, and student-friendly pricing converge. This guide will walk you through everything you need to know to choose a tarp that’ll outlast your college career without requiring a student loan.
Top 10 Backpacking Tarps
Detailed Product Reviews
1. FREE SOLDIER Waterproof Portable Tarp Multifunctional Outdoor Camping Traveling Awning Backpacking Tarp Shelter Rain (Brown 10×10.5ft)
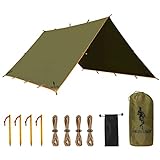
Overview: The FREE SOLDIER Waterproof Portable Tarp is a robust 10×10.5-foot shelter built for demanding outdoor conditions. Constructed from 210T ripstop polyester with a 2500mm PU waterproof coating, this tarp prioritizes durability over ultralight weight. At 1.2kg (42oz), it provides substantial coverage for two people while offering versatile configuration options with 19 guy points and 5 reinforced grommets, making it suitable for everything from hammock camping to base camp shelters.
What Makes It Stand Out: This tarp distinguishes itself through its military-grade construction and heat-sealing process that creates a seamless bond at ridgelines, virtually eliminating leak points. The extensive 24 anchor points allow for unmatched setup versatility, from A-frame hammock shelters to ground sheets. Its puncture-resistant fabric and reinforced seams demonstrate engineering focused on storm-worthy performance rather than minimalist weight savings, appealing to tactical users and serious campers.
Value for Money: Positioned in the mid-range price bracket, this tarp justifies its cost through exceptional durability and multi-functionality. While heavier than backpacking-specific options, it eliminates the need for separate ground cloths or additional reinforcements. The included accessories—four guy lines with tensioners and a stuff sack—provide immediate deployment capability without extra purchases, making it a cost-effective solution for car camping and extended outdoor operations.
Strengths and Weaknesses: Strengths include outstanding durability, versatile setup configurations, reliable waterproofing, and comprehensive anchor points. The brown color blends well in natural environments. Weaknesses are its relatively heavy weight for long-distance backpacking and a 2500mm rating that trails some competitors’ 3000mm standards. The fabric thickness, while durable, contributes to the weight penalty.
Bottom Line: Ideal for car camping, base camps, or tactical applications where durability trumps weight concerns. A reliable workhorse tarp that delivers storm-worthy protection for serious outdoor enthusiasts.
2. Unigear Hammock Rain Fly, 16.5/14.4/13.1/9.8ft Camping Tarp, UV Protection & Waterproof & Lightweight for Camping, Backpacking and Outdoor Adventure (Brown, 9.8 * 9.8ft)

Overview: The Unigear Hammock Rain Fly delivers reliable protection in a compact 9.8×9.8-foot square design. Built from 210D ripstop Oxford fabric with a 3000mm PU waterproof rating, this tarp balances weight and weather resistance for backpacking and camping adventures. The package includes six stakes and six ropes, enabling immediate setup as a hammock shelter, ground sheet, or kitchen cover without requiring additional purchases.
What Makes It Stand Out: Unigear’s innovative triangle dual-layer reinforcement at all eight fix points sets this tarp apart, dramatically increasing tear resistance at high-stress areas. Double-reinforced stitching throughout prevents leaking and structural failure during extreme weather. The UV-protective coating extends its utility as a sunshade, making it a true four-season accessory that performs equally well blocking rain or harsh sunlight in exposed campsites.
Value for Money: This tarp offers excellent value for its sub-$40 price point, particularly given the included accessories and 3000mm waterproof rating. Comparable tarps often require separate stake purchases or lack the sophisticated reinforcement system. Its versatility eliminates the need for multiple specialized shelters, making it an economical choice for backpackers building a comprehensive gear kit on a budget.
Strengths and Weaknesses: Strengths include superior waterproofing, intelligent stress-point engineering, UV protection, and comprehensive accessory inclusion. The 9.8-foot span adequately covers most hammocks but may prove limiting for larger groups or diagonal setups. Some users report the included stakes are functional but not premium quality. The brown color provides good camouflage but limited visibility in low-light conditions.
Bottom Line: A versatile, well-engineered tarp perfect for solo backpackers and hammock campers seeking reliable weather protection without breaking the bank. Delivers professional-grade features at an accessible price.
3. Clostnature Tent Footprint - Waterproof Camping Tarp, Heavy Duty Tent Floor Saver, Ultralight Ground Sheet Mat for Hiking, Backpacking, Hammock, Beach - Storage Bag Included

Overview: The Clostnature Tent Footprint redefines ultralight protection at just 9.8 ounces. Measuring 87×59 inches, this 190T poly tarp is engineered primarily as a tent floor saver but doubles as a minimalist shelter. Its ripstop construction with superior waterproof coating packs down to cellphone size, making it ideal for ounce-counting backpackers who prioritize tent longevity over standalone shelter capability and need maximum packability.
What Makes It Stand Out: This footprint’s extraordinary weight-to-protection ratio is its defining characteristic. At less than 10 ounces, it provides essential protection for your tent investment without burdening your pack. The material’s balance of waterproofing and compactness demonstrates focused design—protecting expensive tent floors from abrasion and moisture while serving secondary functions as a sunshade, beach mat, or emergency bivy in survival situations.
Value for Money: Exceptionally priced under $25, this footprint delivers targeted value for tent owners. While not designed as a primary rain fly, it prevents costly tent damage and extends gear lifespan significantly. For backpackers already carrying a primary shelter, this represents insurance against gear failure at minimal cost and weight penalty, making it one of the best value propositions in specialized ground protection.
Strengths and Weaknesses: Strengths include ultralight weight, incredible packability, multi-use versatility, and affordability. The included storage bag is conveniently sized. Weaknesses are its limited size for group shelter use, lower durability compared to heavy-duty tarps, and insufficient coverage for comprehensive rain protection. The 190T fabric prioritizes weight savings over bombproof construction, making it less suitable for abrasive surfaces.
Bottom Line: Essential for backpackers seeking to protect their tent investment. Best as a supplementary ground cloth rather than primary shelter, excelling at its specialized purpose while offering surprising versatility for weight-conscious adventurers.
4. Unigear Hammock Rain Fly Waterproof Tent Tarp, 9.8x9.8ft, UV Protection and PU 3000mm Waterproof, Lightweight for Camping, Backpacking and Outdoor Adventure

Overview: This Unigear Hammock Rain Fly mirrors its sibling product with a 9.8×9.8-foot square design built from 210D ripstop Oxford fabric. The 3000mm PU waterproof rating ensures reliable protection against heavy downpours and snow. Packaged with six stakes and six ropes, it deploys quickly as a survival tarp, hammock shelter, or ground cover for diverse outdoor scenarios, providing immediate utility for campers and backpackers.
What Makes It Stand Out: The engineering focus on reinforcement shines through triangle dual-layer construction at all eight fix points, creating exceptional tear resistance where failure typically occurs. Double-stitched seams combined with PU inner coating provide both waterproof integrity and UV protection. This systematic approach to durability at stress points demonstrates thoughtful design for unpredictable wilderness conditions where equipment failure is not an option.
Value for Money: Offering complete out-of-the-box functionality, this tarp eliminates hidden costs. The inclusion of stakes, ropes, and a stuff sack at a competitive price point represents strong value. Its multi-configuration capability replaces several single-purpose camping accessories, effectively amortizing its cost across multiple gear functions and making it a smart purchase for budget-conscious adventurers building their kit.
Strengths and Weaknesses: Strengths include robust waterproofing, intelligent reinforcement engineering, versatile application, and complete accessory package. The square shape limits diagonal hammock coverage compared to rectangular options. While adequate for solo use, two-person coverage requires careful positioning. The included cordage is functional but upgrade-worthy for serious users who demand maximum tensioning capability.
Bottom Line: A dependable, well-accessorized tarp for solo adventurers and hammock campers seeking immediate, reliable deployment. Delivers consistent performance across multiple configurations without requiring additional investment.
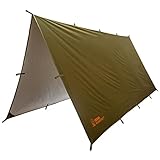
5. Wise Owl Outfitters Hammock Rain Fly – Waterproof Camping Tarp Cover with Tent Stakes & Carry Bag, Ultralight Shelter for Backpacking & Outdoor Shade

Overview: Wise Owl Outfitters delivers a premium hammock rain fly built from ripstop nylon with fully taped seams. The 3000mm PU-coated construction weighs just 26 ounces and packs remarkably small. This 10×10-foot tarp includes six 10-foot guy lines, aluminum stakes, stake pouch, and waterproof carry bag—providing professional-grade accessories for serious backpackers who demand reliability without excessive weight.
What Makes It Stand Out: Fully taped seams represent a significant quality upgrade over standard stitched constructions, virtually eliminating leak points along seam lines. The inclusion of aluminum stakes rather than steel or plastic demonstrates attention to weight-conscious users. Wise Owl’s reputation for outdoor gear quality assurance provides confidence in materials and workmanship, backed by actual field testing in harsh conditions.
Value for Money: Positioned at a slight premium, this tarp justifies its cost through superior seam sealing and premium accessories. The aluminum stake set alone represents a $15-20 value upgrade. For backpackers facing unpredictable weather, the taped seam construction offers insurance against failure that cheaper alternatives cannot match, making it a worthwhile investment for serious adventurers who prioritize performance over initial cost savings.
Strengths and Weaknesses: Strengths include excellent waterproofing, taped seam construction, quality aluminum stakes, lightweight packability, and brand reliability. Weaknesses include nylon’s tendency to sag when wet and a price point slightly above basic competitors. The grey color offers neutral aesthetics but shows dirt more readily than earth tones, requiring occasional cleaning to maintain appearance.
Bottom Line: A top-tier choice for serious backpackers and hammock campers who demand premium construction and reliable performance in harsh conditions. The taped seams and quality accessories justify the modest price premium.
6. FREE SOLDIER Camping Tarp Waterproof Portable Multifunctional Outdoor Camping Traveling Awning Backpacking Shelter Rain Tarp (Dark Green 10×10.5ft)

Overview: The FREE SOLDIER Camping Tarp delivers heavy-duty protection for outdoor enthusiasts who prioritize durability over ultralight weight. Measuring 118" × 126", this 210T ripstop polyester shelter provides ample coverage for two people while withstanding harsh conditions across multiple seasons.
What Makes It Stand Out: This tarp’s 2500 PU waterproof rating and heat-sealed seams create exceptional weather resistance. The 19 guy points and 5 reinforced grommets offer versatile pitching configurations, from A-frame shelter to ground sheet. Unlike minimalist options, the puncture-resistant fabric handles rough terrain without compromise, making it ideal for extended basecamp use and unpredictable environments.
Value for Money: At 1.2kg, it’s heavier than premium ultralight alternatives costing twice as much, but the robust construction justifies the trade-off. Comparable heavy-duty tarps often exceed this price point, while cheaper options lack the reinforced ridgeline and comprehensive tie-out system. It’s a mid-range investment for serious campers who need reliability.
Strengths and Weaknesses: Strengths include superior tear resistance, excellent waterproofing, multiple anchor points, and complete accessory inclusion. The dark green color provides natural camouflage. Weaknesses center on weight—it’s unsuitable for ounce-counting backpackers—and the bulk when packed. The 10×10.5ft size may also prove excessive for solo minimalist trips.
Bottom Line: Perfect for car campers, hunters, and survivalists who need reliable, bombproof shelter. If you value durability and weather protection over pack weight, this tarp delivers exceptional performance. For ultralight trekkers, look elsewhere.
7. JAICOM Waterproof Camping Tarp - 10X10ft Hammock Rain Fly, Ultralight & Portable & UV Protection Backpacking Tarp, Multifunctional for Outdoor Adventure, Hiking, Tent, Hammock

Overview: The JAICOM Camping Tarp strikes an impressive balance between weight savings and functionality for backpacking enthusiasts. This 10×10ft shelter weighs just 2.1lbs, making it a compelling choice for hikers seeking versatile protection without significant pack burden across three-season adventures.
What Makes It Stand Out: Eleven sets of double-reinforced webbing straps provide unmatched configuration flexibility. Each corner features enhanced stitching that prevents tear-out under tension—a common failure point in lighter tarps. The comprehensive kit includes six aluminum stakes and eight adjustable ropes, eliminating the need for separate purchases and enabling immediate field deployment.
Value for Money: This all-in-one package offers remarkable convenience for beginners and veterans alike. Comparable ultralight tarps often require separate accessory purchases, quickly inflating costs. While not the absolute lightest option available, the included components and build quality represent smart economics for budget-conscious adventurers prioritizing simplicity.
Strengths and Weaknesses: Strengths include the lightweight design, versatile pitching options, complete accessory set, and responsive customer service promise. The 210T fabric provides adequate durability for most users. Weaknesses include the 10×10ft footprint, which may feel cramped for two people in severe weather, and questions about long-term durability compared to heavier alternatives.
Bottom Line: An excellent entry-to-mid-level tarp for ultralight backpackers and casual campers. The thoughtful design and complete kit make it ideal for those wanting hassle-free setup without sacrificing quality. Perfect for three-season use and hammock camping.
8. Texas Bushcraft Emergency Camping Tarp, Waterproof 10x10 Emergency Shelter for Backpacking and Hiking, 70D Ripstop Nylon Survival Tarp with Reflective Aluminized Polymer and Loop Ties with Grommets
Overview: Engineered for survival scenarios, the Texas Bushcraft Emergency Tarp prioritizes life-sustaining protection over minimalist weight savings. This 10×10ft shelter employs advanced materials to create a four-season refuge for serious adventurers and preparedness enthusiasts facing potentially hostile environments.
What Makes It Stand Out: The industry-leading 15,000mm waterproof rating and aluminized polymer coating deliver dual benefits: exceptional weather protection and heat reflection for thermal regulation. The reflective side preserves body heat in emergencies while reducing UV absorption in summer. Fourteen perimeter loops plus five ridgeline attachments provide versatile rigging options for complex survival configurations.
Value for Money: Premium survival gear commands higher prices, but this tarp’s specialized features justify the investment. Standard tarps offer basic rain protection; this provides thermal management and extreme waterproofing. For survivalists, the cost is negligible compared to its potential life-saving utility in critical situations.
Strengths and Weaknesses: Strengths include unparalleled waterproofing, reflective thermal properties, robust 70D ripstop nylon construction, and fire-resistant characteristics. The multiple tie-out points enable creative shelter solutions. Weaknesses include weight and packed size, which exceed ultralight standards, and a price point above casual camping gear.
Bottom Line: Essential equipment for survivalists, bushcraft practitioners, and those venturing into unpredictable environments. If you might face life-threatening weather, this tarp’s advanced features are worth every ounce and dollar. For fair-weather campers, simpler options suffice.
9. Rain Fly 12x10 Lightweight Survival Camping Tarp; 100% Waterproof; Makes a Great Backpacking Tarp or Hammock Shelter; Comes in Multiple Colors, Survival Bracelet Included; OD-Green

Overview: This 12×10ft Rain Fly targets budget-conscious backpackers seeking maximum coverage without weight penalty. Weighing just 1.65lbs, it extends shelter space beyond standard 10×10 models while maintaining pack-friendly portability for extended wilderness travel and hammock camping setups.
What Makes It Stand Out: The generous dimensions provide superior coverage for hammock camping or duo shelter systems. Diamond ripstop construction enhances tear resistance, while the included survival bracelet adds unexpected utility. The comprehensive kit features aluminum stakes, carabiners, and adjustable ropes—everything needed for immediate deployment without additional purchases.
Value for Money: No other tarp in this price range offers 120 square feet of coverage with a complete accessory package. The bonus survival bracelet and dual storage sacks demonstrate exceptional value. While the TPU coating may not match PU longevity, the initial performance-to-price ratio is outstanding for entry-level users and occasional adventurers.
Strengths and Weaknesses: Strengths include the expansive coverage, true ultralight weight, complete setup kit, and bonus survival gear. The OD-green color suits tactical and nature applications. Weaknesses involve potential durability concerns with TPU coating over extended use and limited brand reputation compared to established manufacturers with proven track records.
Bottom Line: An unbeatable value proposition for new backpackers, festival-goers, and casual campers. The size and weight combination excel for hammock setups. Accept some longevity trade-offs for the affordable price and comprehensive package. Perfect for occasional use and gear experimentation.
10. Azarxis Waterproof Camping Tent Tarp Hammock Rain Fly Footprint Ground Cloth Shelter Sunshade Beach Picnic Blanket Mat for Outdoor Camping Park Lawn (Army Green, 5 x 7 ft)

Overview: The Azarxis Camping Tarp distinguishes itself through exceptional durability and size versatility, offering a 420D Oxford cloth option in multiple dimensions. The compact 5×7ft model serves as a robust ground cloth or minimalist shelter for solo adventurers prioritizing toughness over expansive coverage in their outdoor activities.
What Makes It Stand Out: The 420D fabric—double the denier of typical 210T tarps—provides outstanding puncture resistance for rocky campsites and abrasive surfaces. Multiple size options, including the convenient 5×7ft, cater to specific needs from footprint to beach blanket. Metal grommet eyelets ensure reliable tie-downs without tearing under stress.
Value for Money: As one of the most affordable options, it delivers targeted functionality without premium features. The heavy-duty fabric outlasts lighter alternatives, making it cost-effective for frequent use in harsh conditions. However, the 5×7ft size limits versatility compared to larger, similarly-priced tarps offering more coverage area.
Strengths and Weaknesses: Strengths include superior fabric durability, compact packed size, multiple configuration options, and budget-friendly pricing. The waterproof treatment handles moderate rain effectively. Weaknesses involve limited coverage area, heavier weight per square foot than ultralight models, and basic feature set without advanced reinforcements or accessories.
Bottom Line: Ideal as a dedicated ground cloth, beach mat, or emergency backup. Car campers and day-trippers will appreciate its durability and compactness. Backpackers should choose larger, lighter options for primary shelter. A practical secondary tarp for protecting gear or creating small covered spaces in established campsites.
Why Choose a Tarp for Budget Backpacking?
Tarps represent the ultimate expression of minimalist, budget-conscious outdoor philosophy. Unlike traditional tents that lock you into a single configuration, a tarp transforms from a simple rain fly to a cooking shelter, gear storage area, or emergency stretcher. For students juggling tuition, rent, and the occasional pizza fund, this adaptability means one purchase covers multiple scenarios. The weight savings alone—often under a pound compared to three-plus pounds for entry-level tents—translate to less strain on your back and more energy for actually enjoying those weekend escapes from campus life.
Financially, tarps make even more sense when you consider their lifespan. A well-maintained silnylon or silpoly tarp can easily survive four years of undergrad adventures, whereas budget tents often develop zipper failures and torn floors within a couple of seasons. The repairability factor matters too; patching a tarp requires basic tenacity tape, not specialized pole splints or complex zipper replacements. When every dollar counts toward next semester’s lab fees, investing in gear that lasts becomes a form of financial planning.
Understanding Tarp Materials on a Budget
The Silnylon vs. Silpoly Debate
The material conversation starts with these two synthetic champions, both offering waterproof performance at student-friendly price points. Silnylon (silicone-impregnated nylon) dominated the budget tarp market for years, prized for its exceptional strength-to-weight ratio and ability to stretch just enough to shed wind without tearing. However, it absorbs water, sagging when saturated and gaining weight in prolonged rain—less than ideal when you’re counting every ounce for that 15-mile approach to an alpine lake.
Silpoly (silicone-impregnated polyester) emerged as the savvy student’s alternative, maintaining tautness even when soaked and drying significantly faster. While slightly heavier and less tear-resistant than silnylon, silpoly’s dimensional stability means fewer midnight adjustments during storms. For under $70, you’ll find both materials, but understanding their trade-offs helps you prioritize: choose silnylon for weight-conscious solo trips, silpoly for wet climates where consistent pitch matters more than minimal pack weight.
Polyethylene and Other Entry-Level Options
Don’t dismiss coated polyethylene entirely—modern versions with ripstop grids offer surprising durability at rock-bottom prices. These tarps typically weigh more and pack bulkier, but they laugh off abrasion from tree branches and rocky campsites that might compromise lighter fabrics. For car-assisted basecamp trips or introductory backpacking courses where weight isn’t paramount, a sub-$30 polyethylene tarp frees up funds for other essentials like a quality sleeping bag.
Dyneema Composite Fabric (DCF) remains out of reach in this price range, but understanding its existence helps contextualize what you’re sacrificing: DCF offers incredible weight savings and waterproofing but costs 3-5 times our budget. Think of it as the gear you’ll graduate to after landing that first post-college job. For now, focus on maximizing the performance of accessible materials rather than lusting after unobtainium.
Tarp Shapes and Their Real-World Applications
Flat Tarps: Maximum Versatility
The rectangular flat tarp serves as the Swiss Army knife of shelter systems, offering infinite pitch configurations limited only by your creativity and knot-tying skills. For students learning backcountry skills, a 9x9 or 8x10 foot flat tarp provides an excellent classroom—practice A-frames, lean-tos, diamond pitches, and plow-point configurations without buying multiple shelters. The learning curve steeps initially, but mastering a flat tarp builds confidence and problem-solving abilities that transfer to every outdoor scenario.
Budget flat tarps often skimp on tie-out points, so prioritize models with reinforced grommets or webbing loops every 2-3 feet along the perimeter and at least one central ridgeline loop. This flexibility becomes crucial when dealing with irregular terrain or unexpected weather shifts. A flat tarp’s ability to pitch close to the ground for storm protection or high and wide for ventilation makes it particularly valuable for students exploring diverse environments from desert canyons to coastal rainforests.
Shaped Tarps: Foolproof Weather Protection
Shaped tarps—often marketed as “tarp tents” or “pyramid tarps”—sacrifice some configurability for simplified setup and enhanced weather resistance. These come pre-cut with catenary curves along the ridgeline and edges, reducing fabric flutter and creating taut pitches with minimal adjustment. For students intimidated by complex guyline systems or those primarily camping in bug-free zones, a shaped tarp offers tent-like protection at a fraction of the cost and weight.
The trade-off involves commitment to a specific pitch style; you can’t reconfigure a pyramid tarp into a sprawling group kitchen shelter. However, the time saved during setup after a exhausting day of classes and driving to the trailhead shouldn’t be underestimated. Many shaped tarps under $70 include integrated bug netting or floor options, blurring the line between tarp and tent while staying within budget.
Size Matters: Selecting the Right Coverage
Solo Student Adventures
For solo backpacking, the 7x9 foot tarp represents the minimalist sweet spot—providing adequate coverage for you and your pack without excess material flapping in the wind. Students under six feet tall can squeeze into a 6x8 foot model, saving weight and cash, but taller individuals should stick to 7x9 or larger to prevent feet or head from becoming weather targets. Remember that tarp dimensions refer to flat fabric size; the actual covered area depends on your pitch configuration, with A-frames offering less usable space than diamond pitches.
Consider your sleeping style too. Active sleepers who sprawl or shift need more coverage than those who remain mummy-like through the night. Your gear also demands protection—a 7x9 tarp pitched as an A-frame barely covers a sleeping pad and pack, leaving boots vulnerable. Budget tarps often run slightly small, so when in doubt, size up. That extra foot of fabric adds negligible weight but significantly expands your living space and configuration options.
Duo and Group Shelters
Sharing gear costs epitomizes student budgeting wisdom, and a 10x10 or 8x10 foot tarp comfortably shelters two hikers and their gear for under $35 each. For group trips, a large rectangular tarp becomes a communal space for cooking and storm-bound card games, fostering the social connections that make college outdoor programs so valuable. The key involves coordinating with potential partners before purchasing—there’s no point in carrying a two-person tarp if your regular hiking buddy already invested in a solo model.
When sizing for pairs, account for the reality that most budget tarps lack bathtub floors or bug protection. You’ll need separate ground sheets and potentially head nets, which add cost and complexity. However, the shared weight of a larger tarp often still beats two individual tents, leaving room in both budget and pack for those creature comforts that prevent mutiny on day three of a wilderness orientation trip.
Essential Features That Maximize Value
Reinforced Tie-Out Points
The difference between a $25 tarp that lasts one season and a $60 tarp that survives graduation lies largely in tie-out reinforcement. Look for bar tacked webbing loops or reinforced grommet patches that distribute stress across multiple fabric layers. Cheap tarps often feature simple metal grommets pressed into single-layer fabric—these pull out under moderate tension, rendering your shelter useless miles from the trailhead. Test tie-outs by gently pulling; if the fabric distorts or grommets feel loose, keep shopping.
Mid-corner reinforcement patches deserve special attention, as these points bear maximum load during windy conditions. Some budget tarps incorporate hypalon or similar abrasion-resistant materials at high-stress points, a feature worth a few extra dollars. Remember that you can always add aftermarket reinforcement with tenacity tape, but starting with robust tie-outs saves weight and hassle.
Guyline Systems and Tensioners
A tarp without guylines functions as an expensive ground cloth. Quality budget tarps include at least four pre-attached guylines, though six to eight provides better versatility. Reflective tracers in the cordage prevent midnight trip hazards—a feature you’ll appreciate when stumbling out for a bathroom break. The cordage material matters: nylon stretches when wet, potentially loosening your pitch during storms, while polyester or Dyneema blends maintain tension better.
Tensioners separate frustrating tarp experiences from seamless ones. Simple trucker’s hitches work, but pre-installed line tensioners or micro cord locks allow minute adjustments from inside your sleeping bag. Some budget tarps include plastic tensioners that crack in cold weather; consider replacing these with lightweight aluminum versions or learning proper knot craft. The ability to quickly retighten a sagging ridgeline during a midnight downpour transforms a potentially miserable night into a minor inconvenience.
Stuff Sacks and Storage Solutions
Never underestimate the value of a well-designed stuff sack. Budget tarps often come with basic drawcord bags that work fine but offer no compression. Seek out models with rectangular or envelope-style sacks that pack flat against your pack’s back panel, improving weight distribution. Some innovative designs integrate a small pocket for storing guylines and stakes separately, preventing tangled messes and lost hardware.
Waterproof stuff sacks provide an extra layer of protection for your tarp when packed inside a non-waterproof backpack—a common scenario for students repurposing school bags for weekend trips. If your chosen tarp includes a flimsy sack, consider upgrading to a budget-friendly dry bag or even a heavy-duty freezer bag. Proper storage extends fabric life by preventing mold and mildew growth during those weeks between adventures when your gear lives under a dorm bed.
The Weight vs. Durability Equation
Student budgets force uncomfortable compromises, and nowhere is this more apparent than the weight-durability balancing act. Ultralight tarps under a pound exist in our price range, but they typically use thinner fabrics (0.9 oz/yd²) that demand careful site selection and gentle handling. Thicker materials (1.4+ oz/yd²) add 6-8 ounces but shrug off branches, crampons, and the general abuse that comes with learning outdoor skills between classes.
Consider your typical trip profile. If you’re mostly doing fair-weather overnights within a few miles of the parking lot, prioritize durability over weight savings. The extra ounces won’t matter on short approaches, but the enhanced tear resistance proves invaluable when you’re still mastering pitch techniques. Conversely, if you’re planning end-of-semester thru-hike attempts or multi-day traverses, those weight savings become worth the delicate handling required.
The middle ground—1.1 oz/yd² silnylon or silpoly—offers the best compromise for most student backpackers. This weight class survives normal use while keeping pack weight reasonable for longer trips. Remember that tarp weight specifications often exclude guylines and stakes, so add 4-6 ounces for a complete system when calculating base weight. Budget tarps that include lightweight aluminum stakes provide exceptional value, saving you an additional $15-20 purchase.
Mastering Tarp Setup Without Breaking the Bank
The Classic A-Frame Configuration
The A-frame serves as your tarp’s default setting—simple, stable, and surprisingly weather-resistant. Pitch it by stringing a ridgeline between two trees or trekking poles, then staking out the four corners at roughly 45-degree angles. For budget-conscious students, this configuration requires minimal additional gear; even hardware store paracord works adequately for the ridgeline, though dedicated cordage performs better.
The key to a storm-worthy A-frame lies in orientation: position the ridgeline perpendicular to prevailing winds with the lower end facing the wind direction. This creates a aerodynamic shape that sheds gusts while preventing rain from blowing straight into your sleeping area. Practice this pitch in your backyard or campus quad before relying on it in the backcountry; muscle memory builds confidence when you’re racing fading light and approaching weather.
Lean-To and Asymmetrical Pitches
When trees outnumber open ground, the lean-to configuration maximizes natural shelter while minimizing setup time. Tie one edge of your tarp along a horizontal branch or between two trees at head height, then stake the opposite edge to the ground, creating a sloped roof. This pitch excels in light to moderate rain but struggles in heavy wind, making it ideal for forested areas where natural windbreaks exist.
Asymmetrical diamond pitches offer another versatile option, particularly with square tarps. Tie one corner to a high anchor point, the opposite corner to the ground at your feet, and the remaining two corners outward to form a wedge shape. This configuration provides excellent weather protection for one person while using minimal stakes and cordage—perfect for quick lunch stops or emergency shelter during afternoon thunderstorms that seem to target field labs specifically.
Storm-Worthy Low Pitches
When the forecast promises meteorological drama, drop your tarp’s profile to the ground. The storm pitch involves setting your ridgeline just high enough to sit up underneath, then staking all edges directly to the ground or weighing them down with rocks. This creates a low, aerodynamic shape that deflects wind and rain while trapping warmth. The trade-off involves ventilation; expect condensation in humid conditions, but stay dry and secure when horizontal rain threatens.
Practice converting from a standard A-frame to storm pitch quickly; the ability to lower your shelter without breaking down the entire setup proves invaluable during sudden squalls. Some budget tarps feature mid-panel tie-outs that let you create “porch” configurations—partially raising one side for ventilation while keeping the windward edge pinned down. These hybrid pitches demonstrate why tarps outshine tents in adaptability, especially when you’re working with limited funds and need gear that performs across multiple scenarios.
Common Budget Tarp Pitfalls to Avoid
The most expensive tarp is the one you have to replace mid-season. Avoid corner-cutting on critical features like reinforced ridgelines; center seams bear enormous stress, and a simple sewn seam without additional sealing or reinforcement fails catastrophically. Inspect potential purchases for taped or double-stitched seams with bar tacking at stress points. If shopping online, scrutinize product photos for these details—reputable manufacturers highlight robust construction.
Beware of exaggerated waterproof ratings. “Waterproof” technically means anything over 1,000mm hydrostatic head, but serious weather protection requires 2,000mm minimum, with 3,000mm+ preferred for mountain use. Some budget tarps achieve low prices by using coatings that degrade after a few UV exposures, leaving you with a mesh-like water filter by spring break. Look for silicone impregnation rather than simple PU coatings; while both work initially, silicone lasts significantly longer and remains flexible in cold temperatures.
Size deception plagues budget gear listings. A “10-foot” tarp might measure 10 feet along the hem but only 9 feet 6 inches of usable fabric due to rolled edges or seam allowances. When possible, verify actual dimensions in user reviews or contact manufacturers directly. That six-inch shortfall could mean the difference between your sleeping bag staying dry or soaking up groundwater during a storm.
Weatherproofing Strategies for Students
Even the best budget tarp benefits from user-added weatherproofing. Seam sealing represents the most critical upgrade; manufacturers rarely fully seal budget tarps, leaving needle holes vulnerable to water intrusion. A $5 tube of silicone seam sealer and an hour of application creates a truly waterproof shelter. Apply it thinly along all stitched seams, focusing on ridgelines and tie-out reinforcements. Do this at home weeks before your trip—seam sealer off-gases and needs curing time.
DWR (durable water repellent) coatings degrade with use, causing water to pool rather than bead off. Revive performance with a spray-on treatment like Nikwax Tent & Gear SolarProof, which also adds UV protection to extend fabric life. For students in rainy regions, this $10 investment pays dividends by reducing packed weight (water-soaked fabric adds pounds) and preventing misting during heavy precipitation.
Ground conditions affect weatherproofing as much as the tarp itself. Always use a ground sheet—an old shower curtain, painter’s tarp, or purpose-made footprint—to prevent groundwater from seeping upward. In snow or heavy rain, dig a shallow trench around your sleeping area to divert runoff. These techniques, borrowed from mountaineering traditions, cost nothing but dramatically improve comfort and dryness.
Multi-Functionality: Getting More Bang for Your Buck
Student budgets demand gear that earns its place through multiple uses. Your backpacking tarp transforms into a picnic blanket for campus events, a sunshade for music festivals, and emergency rain gear when your cheap rain jacket fails. In winter, string it as a windbreak while ice fishing or building snow shelters. The same cordage and stakes serve multiple purposes—use guylines for clotheslines in camp or bear bag hangs (properly executed, of course).
Some creative students repurpose tarps as pack liners, though this adds wear. Better multi-use applications include using your tarp as a makeshift sled for hauling gear across snowfields or as a portable privacy screen for changing clothes at crowded trailheads. The ability to create shade in treeless campsites proves invaluable during desert geology field trips or summer research projects in exposed terrain.
Consider color choice for multi-functionality. Bright colors like orange or yellow increase visibility for emergency signaling and group management, while earth tones blend into Leave No Trace campsites. Some budget tarps come in reversible colors—silver on one side for heat reflection, dark on the other for stealth. This feature, while seemingly gimmicky, actually provides real adaptability for students who camp in both developed campgrounds and remote backcountry.
Care and Maintenance for Longevity
Proper care transforms a $60 tarp into a four-year investment. Always dry your tarp completely before storage, even if it means spreading it across your dorm room floor for an afternoon. Mildew not only smells terrible but digests fabric coatings, creating permanent dark spots and weakening waterproofing. If mildew appears, treat immediately with a dilute vinegar solution or specialized cleaner—never bleach, which destroys silicone coatings.
Clean your tarp gently with a sponge and mild soap, avoiding harsh detergents that strip protective coatings. Never machine wash or dry; the agitation and heat delaminate fabrics and melt delicate coatings. For tree sap or stubborn grime, isopropyl alcohol on a cotton ball works wonders without damaging waterproofing. Store loosely in a breathable cotton sack rather than compressed in its stuff sack—prolonged compression stresses coatings and creates permanent creases.
Inspect tie-out points seasonally, reinforcing any loose stitching with tenacity tape or hand-sewn repairs. Replace worn guylines before they fail catastrophically at 3 a.m. during a storm. A few minutes of maintenance between trips prevents expensive replacements and ensures your gear performs when finals stress drives you to seek solace in the wilderness.
Where Students Can Find the Best Deals
Campus outdoor recreation programs often sell off rental gear at end-of-semester sales, providing lightly-used tarps at 50-70% off retail. These programs sometimes purchase quality gear rather than budget models, meaning you might score a premium tarp within your price range. Join your school’s outing club for early access to these sales and potential group discounts on new purchases.
Online marketplaces require caution but reward patience. Look for sellers with detailed photos showing actual condition rather than stock images. Ask specific questions about seam sealing, tie-out integrity, and waterproof rating verification. Avoid tarps with patched holes unless the repair uses proper tenacity tape and the price reflects the damage. Many students sell barely-used gear after one trip reveals they prefer car camping—capitalize on their misguided purchases.
Retailers frequently discount last season’s colors or slightly updated models. Sign up for newsletters from reputable outdoor gear sellers, but wait for major sale events like end-of-summer clearances or Black Friday. Some manufacturers offer student discounts through verification services—always check before paying full price. Consider buying slightly above budget during sales; a $90 tarp marked down to $65 outperforms and outlasts a $60 tarp at full price.
Frequently Asked Questions
1. Can I really stay dry under a tarp in heavy rain?
Absolutely, but success depends on proper site selection, pitch configuration, and seam sealing. A low A-frame or storm pitch sheds water effectively, while a well-sealed ridgeline prevents drips. Practice setups at home and always carry a backup emergency blanket. Tarps actually excel in heavy rain by eliminating tent condensation issues—no more waking up with a damp sleeping bag from internal moisture.
2. What’s the lightest tarp I can get for under $70?
Expect weights around 12-16 ounces for a solo-sized silnylon or silpoly tarp in this price range, not including stakes or guylines. Some minimalist options dip to 10 ounces but sacrifice durability. Focus on total system weight—add 4-6 ounces for cordage and stakes. Ultralight enthusiasts can trim weight by using natural anchors and reducing tie-outs, but beginners should prioritize robust construction over minimal weight.
3. Do I need a bug net with my tarp?
In mosquito-heavy regions during summer, yes. Budget solutions include a standalone bug bivy (around $30-40) or a simple head net paired with treated clothing. Some tarps offer integrated bug netting for slightly above our $70 target—worth considering if you camp frequently in buggy conditions. For shoulder seasons or arid regions, skip the netting and save money and weight.
4. How do I pitch a tarp without trees?
Trekking poles serve as excellent tarp supports; set them to 48-52 inches for sitting height or 36-40 inches for storm-worthy low pitches. Alternatively, learn to use sticks found on-site (check regulations) or consider budget tent poles from gear manufacturers. Some creative pitches use your bicycle as an anchor point for bikepacking trips. Always practice ground-based pitches before relying on them in remote areas.
5. Are budget tarps durable enough for regular use?
Yes, if you choose wisely and care for them properly. Look for 1.1 oz/yd² or heavier fabric, reinforced tie-outs, and silicone impregnation rather than simple coatings. Avoid the absolute cheapest options under $20 unless you’re only doing occasional fair-weather trips. With proper seam sealing and storage, a quality budget tarp easily handles 50+ nights over several years.
6. What’s the difference between a tarp and a tarp tent?
Tarp tents are shaped tarps that often include a sewn-in floor and bug netting, functioning more like a traditional tent. They offer easier setup and better weather protection but sacrifice the versatility of a flat tarp. In our under-$70 range, true tarp tents are rare; most are simple shaped tarps requiring a separate ground sheet. The terminology gets blurry, so focus on actual features rather than marketing labels.
7. How many stakes do I need for a typical pitch?
Carry at least six stakes for a basic A-frame, but eight to ten provides flexibility for more complex pitches or backup if you lose some. Budget aluminum shepherd’s hook stakes cost about a dollar each and weigh nearly nothing. In a pinch, use rocks, logs, or sand-filled stuff sacks as deadman anchors. Always pack a couple extras; stakes mysteriously vanish exactly when you need them most.
8. Can I use a tarp in winter conditions?
Tarps excel in winter when pitched low to shed snow and block wind. Use ski poles or avalanche probes as supports, and create snow walls for additional protection. The lack of interior condensation is a major advantage in cold conditions. However, ensure your tarp can handle snow load—thicker fabric and strong tie-outs are non-negotiable. Practice snow-specific pitches like the wedge or modified A-frame before committing to overnight winter trips.
9. How do I repair a torn tarp in the field?
Carry a small roll of tenacity tape or a repair kit with adhesive patches. Clean the area, round the corners of your patch to prevent peeling, and apply pressure for several minutes. For larger tears, use a combination of tape on both sides or sew with strong thread then seal with seam grip. Duct tape works as a temporary fix but leaves residue and fails quickly. Practice repairs at home so you can execute them confidently in rain or darkness.
10. Is a blue hardware store tarp a viable budget option?
For car camping or emergency backup, yes. For backpacking, absolutely not. Those tarps weigh 2-3 pounds, pack larger than a sleeping bag, and lack reinforced tie-outs suitable for trekking pole pitches. The noise alone—crinkling like a chip bag with every breeze—ruins sleep and wilderness experience. Spend the extra $30-40 on a proper backpacking tarp; your back, ears, and camping partners will thank you.
See Also
- 10 Most Durable Backpacking Tarps for Tarp Shelters on the PCT in 2026
- 10 Best Budget Backpacking Hammocks Under 2 lbs in 2026
- 10 Best Backpacking Tarps for Couples Seeking Shared Shelter in 2026
- 10 Best Value Backpacking Tarps for Couples Sharing Gear in 2026
- We Tested 50 Backpacking Tarps—Here Are the 10 Best for Solo Hikers