Table of Contents
There’s something uniquely humbling about watching a standard flat tarp turn into a flapping, snapping liability the moment it crests a ridgeline. The wind doesn’t just whistle up there—it assaults, probes for weaknesses, and exploits every millimeter of slack with the precision of a structural engineer. For those who seek the panoramic payoff of exposed campsites, the difference between a peaceful night and a midnight gear disaster often comes down to one critical design element: the catenary curve. As we look toward 2026, the evolution of catenary-cut tarps represents not just incremental improvements in outdoor gear, but a fundamental shift in how we think about creating shelter in the planet’s most demanding microclimates.
The ridge line has always been the ultimate proving ground for camping equipment. Here, wind speeds can double valley readings, direction shifts happen without warning, and the very terrain that delivers breathtaking views conspires to create Venturi effects that test the absolute limits of fabric and engineering. Catenary-cut tarps—those with a subtle, curved edge that mirrors the natural drape of tensioned fabric—have emerged as the gold standard for these environments not through marketing hype, but through pure physics. Understanding what makes these shelters perform when others fail isn’t just gearhead trivia; it’s essential knowledge that keeps you safe, dry, and sleeping soundly while the mountain does its worst.
Top 10 Catenary Cut Tarp Shelter
Detailed Product Reviews
1. ALPS Mountaineering Ultra-Light Tarp Shelter - Charcoal/Red
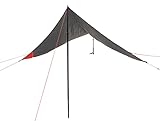
Overview: The ALPS Mountaineering Ultra-Light Tarp Shelter delivers serious weather protection at a feathery 15-ounce minimum weight. Measuring 12'6" x 9'8", this charcoal and red tarp employs a 20D 380T nylon ripstop fly with a 3000mm silicone/PU coating, offering reliable defense against rain, wind, and UV exposure for ultralight backpackers and minimalist campers.
What Makes It Stand Out: The six-point catenary cut design dramatically improves wind stability and keeps the tarp taut in adverse conditions, eliminating the dreaded flap that plagues flat tarps. Fully taped seams and the high-tech fabric blend provide premium weather resistance without the weight penalty. The compact 4" x 10" packed size disappears in any pack, making it ideal for thru-hikers and ounce-counters who refuse to sacrifice protection.
Value for Money: Positioned in the premium tier, this tarp justifies its higher price through exceptional materials and engineering. While budget options weigh twice as much, the ALPS tarp’s 15-ounce weight savings alone justifies the investment for serious backpackers. Comparable ultralight shelters often cost significantly more, making this a smart mid-range choice for weight-conscious adventurers.
Strengths and Weaknesses: Pros: Exceptionally lightweight, stable catenary cut, premium 20D fabric, fully taped seams, compact packed size. Cons: Higher price point, limited color options, requires skill to pitch optimally, no included stakes or guy lines, smaller coverage area than some competitors.
Bottom Line: An excellent investment for ultralight enthusiasts seeking professional-grade weather protection without the ultralight price premium. Perfect for solo backpackers and minimalist pairs.
2. GEERTOP Large 17 x 10 ft Tarp Waterproof Portable Hammock Rain Fly Outdoor Awning Backpacking Tarp Shelter for Camping Traveling

Overview: The GEERTOP tarp shelter dominates in coverage, spanning a massive 17.2 x 10 feet to shelter entire campsites, multiple hammocks, or even vehicles. Constructed from rugged 210T polyester with a 3000mm waterproof rating and UV50+ protection, this tarp transforms any outdoor space into a protected living area for groups and car camping enthusiasts who prioritize space over portability.
What Makes It Stand Out: Sheer size makes this tarp exceptional—it’s large enough to cover a four-person tent or create a spacious communal area. The eight included reflective guy lines and aluminum stakes provide immediate setup capability, while the tear-resistant plaid fabric withstands serious abuse. Thoughtful details like UV protection and reflective cords enhance safety and longevity in exposed environments.
Value for Money: This tarp delivers outstanding value for car campers and group users. The generous dimensions, included accessories, and robust construction rival products costing twice as much. While too bulky for backpacking, its versatility for base camps, beach outings, and backyard use makes it a cost-effective multi-purpose shelter solution that eliminates the need for multiple smaller tarps.
Strengths and Weaknesses: Pros: Massive coverage area, complete accessory package, UV50+ protection, durable fabric, excellent for group camping. Cons: Too heavy and bulky for backpacking, packed size is substantial, requires multiple poles for optimal setup (not included), overkill for solo use.
Bottom Line: Ideal for families, car campers, and group outings where maximum coverage and durability matter more than weight. A versatile, value-packed shelter for base camp scenarios.
3. FREE SOLDIER Waterproof Portable Tarp Multifunctional Outdoor Camping Traveling Awning Backpacking Tarp Shelter Rain (Brown 10×10.5ft)
Overview: The FREE SOLDIER tarp balances heavy-duty construction with practical portability in a 10×10.5-foot footprint. Weighing 42 ounces, this brown tarp uses 210T ripstop polyester with a 2500mm PU coating, targeting outdoor enthusiasts who need reliable protection without premium pricing. Its 19 guy points and five reinforced grommets enable versatile configurations for camping, hunting, or emergency shelter.
What Makes It Stand Out: This tarp’s strength lies in its reinforced construction and tactical brown coloration that blends into natural environments. The heat-sealed ridgeline seam prevents connector failure during storms, while puncture-resistant fabric handles rough terrain. With 19 attachment points, it offers more pitching options than most competitors in its class, adapting to everything from A-frame setups to lean-to configurations.
Value for Money: Positioned as a mid-range workhorse, this tarp delivers excellent durability per dollar. The 2500mm rating suffices for most three-season conditions, and the robust fabric outlasts thinner ultralight alternatives. While not the lightest option, its heavy-duty credentials and versatile anchor points make it a smart purchase for budget-minded adventurers prioritizing reliability over ounces.
Strengths and Weaknesses: Pros: Durable 210T fabric, numerous attachment points, tactical color, reinforced seams, versatile setup options. Cons: Heavier than ultralight models, lower waterproof rating than some rivals, limited included accessories, brown color absorbs heat in summer.
Bottom Line: A rugged, versatile tarp perfect for hunters, bushcrafters, and budget-conscious campers who need dependable shelter without ultralight premiums. Great for vehicle-based adventures.
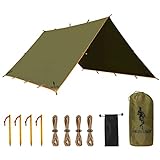
4. Waterproof Camping Tarp 10 x 10ft Survival Tent Backpacking Portable Tarp Multifunctional Anti-UV Shelter for Outdoor (Mud Green)

Overview: The AICALL tarp delivers military-grade durability in a compact 10×10-foot package. Constructed from dense 150D ripstop polyester with a 3000mm waterproof rating and UV50+ protection, this mud-green shelter weighs just 2.2 pounds. Nineteen reinforced hanging points with nylon webbing reinforcement provide exceptional setup versatility for campers seeking a balance between ruggedness and portability.
What Makes It Stand Out: The 150D fabric density exceeds typical 210T tarps, offering superior tear and abrasion resistance for harsh environments. Double-needle reinforced splices and nylon-webbing-strengthened stress points ensure stability in high winds. The complete kit includes eight aviation-grade aluminum stakes and eight four-meter windproof ropes, providing everything needed for immediate deployment without additional purchases.
Value for Money: This tarp punches above its weight class in durability while maintaining competitive pricing. The 150D fabric extends lifespan significantly compared to thinner alternatives, while the comprehensive accessory package eliminates hidden costs. For campers who venture into abrasive environments or expect frequent use, the enhanced durability translates to better long-term value than cheaper, thinner options.
Strengths and Weaknesses: Pros: Heavy-duty 150D fabric, complete stake and rope kit, UV50+ protection, 19 reinforced attachment points, excellent waterproof rating. Cons: Slightly heavier than 210T competitors, mud green limits visibility, packed size could be more compact, may be overbuilt for casual users.
Bottom Line: An excellent choice for rugged terrain and frequent use. Perfect for adventurers who prioritize durability and complete kits over ultralight minimalism. Great value for serious campers.
5. KALINCO Waterproof Camping Tarp Tent Hammock Rain Fly, 10X10FT/10X15FT, Mutifunctional Tent Footprint Lightweight Tarp for Camping, Hiking and Survival Shelter

Overview: The KALINCO tarp offers versatile protection in a lightweight 10×10-foot design weighing just 1.8 pounds. Made from 210T polyester with a 3000mm PU coating and taped central seam, this tarp balances weather resistance with packability. Six included guy lines and stakes enable quick setup for solo campers and couples seeking an affordable, multi-functional shelter solution for diverse outdoor activities.
What Makes It Stand Out: Exceptional versatility defines this tarp—it functions as a hammock rain fly, tent footprint, ground sheet, or sunshade with equal proficiency. The 19 reinforced attachment loops, including three on the ridgeline, provide comprehensive pitching options without the complexity of more expensive systems. Quick-drying fabric and a taped central seam deliver reliable performance in sudden downpours, while the lightweight design won’t burden backpackers.
Value for Money: This tarp represents outstanding entry-level value, offering premium features like 3000mm waterproofing and multiple attachment points at a budget-friendly price. While the included accessories are minimal compared to some competitors, the low cost allows users to customize their setup. For beginners or those needing a secondary tarp, it’s hard to beat this combination of functionality and affordability.
Strengths and Weaknesses: Pros: Lightweight and packable, 3000mm waterproof rating, versatile applications, 19 attachment points, affordable price. Cons: Fewer included accessories, thinner fabric than heavy-duty options, requires careful staking in wind, best for light to moderate use.
Bottom Line: Perfect for beginners, backpackers, and anyone seeking a lightweight, versatile tarp without breaking the bank. An excellent starter shelter that punches above its price point.
6. Rhino Valley Waterproof Tent Tarp, 9.8 × 9.8 Ft Large Outdoor Shelter Cover with Light Strings, Lightweight Portable Tarp Shelter Rain Tarp Camping Canopy for Hiking Traveling Backpacking, Black

Overview: The Rhino Valley Waterproof Tent Tarp delivers a unique blend of functionality and ambiance for outdoor enthusiasts. This 9.8×9.8ft square tarp features integrated LED light strings, creating an inviting atmosphere for evening campsite gatherings. Constructed from durable polyester with reinforced tie-downs, it accommodates 2-3 people comfortably while serving multiple purposes from rain shelter to picnic mat.
What Makes It Stand Out: The built-in light strings differentiate this tarp from standard offerings, providing 10 meters of illumination that transforms your campsite after dark. The package includes 20 fixing clips for versatile configuration options, while the four ground stakes and six ropes enable secure pitching in various conditions. Its foldable design packs into an included carrying bag, making it exceptionally travel-friendly for hikers and backpackers.
Value for Money: Priced competitively in the mid-range segment, this tarp justifies its cost through multi-functionality and the unique lighting feature. Comparable tarps without illumination cost only slightly less, making the integrated LEDs a worthwhile upgrade for those who camp frequently. The comprehensive accessory package eliminates additional purchases, representing solid value for casual campers and weekend warriors.
Strengths and Weaknesses: Strengths: Integrated LED lighting creates ambiance; versatile 9.8ft square coverage; lightweight and highly portable; includes 20 fixing clips for flexible setup; multi-purpose design serves as ground cover or shelter.
Weaknesses: Light strings require power source (not included); polyester material less durable than ripstop nylon; 9.8ft size may feel cramped for three adults; waterproof rating not specified in product details.
Bottom Line: The Rhino Valley tarp excels for car campers and festival-goers prioritizing atmosphere and versatility over technical performance. While not ideal for serious backpacking, its unique lighting feature and user-friendly design make it a compelling choice for recreational outdoor use.
7. Camping Tarp by NatEtoile - Versatile 10X10 ft Portable Rain Fly for Hammock with 19 Tie-Outs,PU 5000mm Waterproof Sunproof Tarp Shelter - Ideal for Camping, Hiking, Backpacking, and Hammock Cover

Overview: The NatEtoile Camping Tarp positions itself as a technical workhorse for serious outdoor adventurers. This 10×10ft square tarp features an impressive 19 tie-out points, enabling countless pitching configurations from A-frame shelters to hammock rain flies. Crafted from 210T ripstop polyester with a PU5000mm waterproof coating, it delivers reliable three-season protection for backpacking and camping expeditions.
What Makes It Stand Out: Exceptional versatility defines this tarp. The 19 reinforced tie-outs allow creative pitching angles that adapt to terrain and weather conditions. Weighing just 1.06kg, it balances durability with packability. The package includes a comprehensive rigging kit: eight aluminum tensioners, multiple guylines (including a 26ft ridgeline), and two bonus carabiners. UPF50+ sun protection and taped seams demonstrate attention to technical detail.
Value for Money: This tarp offers outstanding value for technical users. The PU5000mm rating exceeds many competitors in this price bracket, while the extensive tie-out system rivals premium brands costing significantly more. The complete accessory kit eliminates hidden costs. For backpackers needing reliable weather protection without breaking the bank, it represents a smart investment.
Strengths and Weaknesses: Strengths: 19 tie-outs enable versatile configurations; PU5000mm waterproof rating; lightweight at 1.06kg; comprehensive rigging kit included; UPF50+ sun protection; taped ridgeline seams.
Weaknesses: 10×10ft size may be insufficient for larger groups; aluminum stakes could be longer for loose soil; setup complexity may overwhelm beginners; dark color options absorb heat in direct sun.
Bottom Line: The NatEtoile tarp suits experienced backpackers and hammock campers seeking maximum configurability at a reasonable price. Its technical features and complete kit make it a reliable choice for three-season adventures where adaptability matters most.
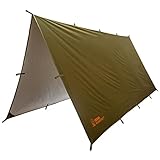
8. Kelty Noah’s Tarp Sun Shelter and Multi-Use Awning Rainfly, Portable Canopy UV Protection, Waterproof + Durable, 3 Sizes for Customized Pitch (12ft)

Overview: Kelty’s Noah’s Tarp represents decades of outdoor gear expertise in a minimalist package. Available in 9ft, 12ft, and 16ft square options, this tarp caters to solo backpackers and large groups alike. The 12ft version reviewed here uses 68D polyester with fully taped seams, delivering proven durability for minimalist camping, hammock setups, and group shelter needs.
What Makes It Stand Out: Kelty’s reputation for reliable construction shines through. The tarp features reinforced guyout points and attached corner guylines with storage pockets—thoughtful details that simplify setup and prevent tangling. The three-size range allows users to select optimal coverage, while the 12ft square hits a sweet spot for versatility. Sturdy construction handles wind and moderate rain without flapping or sagging.
Value for Money: As a premium brand, Kelty commands higher prices than generic alternatives, but the build quality justifies the investment. The Noah’s Tarp lasts season after season, making it cost-effective for frequent campers. However, the basic package includes minimal hardware, requiring separate stake and guyline purchases. Factor in these additions when evaluating total cost.
Strengths and Weaknesses: Strengths: Proven brand reliability; multiple size options; durable 68D polyester construction; taped seams; attached corner guylines with pockets; stable in windy conditions; minimalist design.
Weaknesses: Hardware not included; heavier than ultralight alternatives; limited color choices; premium price point; requires experience for optimal pitching.
Bottom Line: The Noah’s Tarp excels for dedicated campers who prioritize durability and brand reliability over ultralight weight. Its size options and robust construction make it ideal for basecamp setups and group outings where proven performance matters more than pack weight.
9. Texas Bushcraft Emergency Camping Tarp, Waterproof 10x10 Emergency Shelter for Backpacking and Hiking, 70D Ripstop Nylon Survival Tarp with Reflective Aluminized Polymer and Loop Ties with Grommets
Overview: The Texas Bushcraft Emergency Tarp targets survivalists and serious backpackers needing maximum protection in adverse conditions. This 10×10ft tarp features a dual-sided design: camo-patterned 70D ripstop nylon with a 15,000mm waterproof PU coating, and a reflective aluminized polymer side for thermal management. Fourteen perimeter loops plus five ridgeline loops provide versatile anchor points for emergency shelters.
What Makes It Stand Out: The extreme 15,000mm waterproof rating sets this apart from typical camping tarps, ensuring protection in torrential downpours. The reflective side serves multiple functions: preserving body heat when used as an emergency blanket, reducing UV absorption in summer, and offering fire-resistant protection from embers. Nylon webbing reinforcement along heat-taped seams adds durability where competitors use basic stitching.
Value for Money: Priced in the premium range, this tarp justifies its cost through specialized survival features and exceptional waterproofing. Standard tarps cost less but can’t match the 15,000mm rating or thermal reflectivity. For preppers and wilderness professionals, the investment is warranted. Casual campers may find the survival-oriented features unnecessary for fair-weather use.
Strengths and Weaknesses: Strengths: Industry-leading 15,000mm waterproof rating; reflective thermal layer; 70D ripstop nylon construction; 19 total anchor points; fire-resistant properties; reinforced seams with webbing; versatile survival applications.
Weaknesses: Heavier than ultralight options; premium pricing; reflective side limits stealth camping; 10×10ft size restricts group use; overbuilt for casual campers.
Bottom Line: This tarp suits survivalists, bushcraft practitioners, and four-season backpackers who demand maximum weather protection and thermal management. Its specialized features and bulletproof construction make it overkill for weekend warriors but essential for those preparing for worst-case scenarios.
10. Rain Fly12x10 Lightweight Survival Camping Tarp; 100% Waterproof; Makes a Great Backpacking Tarp or Hammock Shelter; Comes in Multiple Colors, Survival Bracelet Included; Grey

Overview: This 12×10ft rectangular tarp balances generous coverage with backpacking-friendly weight. Constructed from 210T polyester with TPU coating and Diamond Ripstop reinforcement, it delivers 100% waterproof protection at just 1.65 pounds. The package includes six aluminum stakes, seven adjustable ropes, carabiners, and a bonus survival bracelet, creating a complete shelter system for outdoor enthusiasts.
What Makes It Stand Out: The 12×10ft rectangular shape provides more coverage than standard square tarps, offering superior protection for hammock camping or extended ground shelters. The Diamond Ripstop pattern enhances tear resistance while maintaining packability. The included survival bracelet with fire starter and whistle adds value for preparedness-minded users. Multiple color options allow personalization while the grey version reviewed here blends into varied environments.
Value for Money: This tarp delivers excellent bang-for-buck with its oversized dimensions and complete accessory kit. Comparable rectangular tarps often cost more or lack the included hardware. The survival bracelet is a nice touch, though the core value lies in the tarp’s generous coverage and lightweight design. Budget-conscious backpackers get premium features without the brand-name markup.
Strengths and Weaknesses: Strengths: Generous 12×10ft coverage; ultralight at 1.65lb; 100% waterproof TPU coating; complete rigging kit included; Diamond Ripstop reinforcement; bonus survival bracelet; multiple color options; affordable pricing.
Weaknesses: Rectangular shape limits some pitching configurations; 210T polyester less durable than higher-denier nylon; stakes could be upgraded; no specified waterproof rating (mm); seam taping not mentioned.
Bottom Line: This tarp excels for hammock campers and budget backpackers needing maximum coverage at minimum weight. Its rectangular design and comprehensive kit make it a practical choice for three-season adventures where space and cost matter more than extreme weather resistance.
Understanding Catenary-Cut Tarps: The Physics of Wind Resistance
What Makes a Catenary Cut Different?
The catenary curve isn’t a random aesthetic choice—it’s the shape a rope or chain makes when suspended between two points under its own weight. When applied to tarp design, this curve pre-tensions the fabric along its edges, eliminating the flat planes that act like sails in high winds. Unlike traditional tarps with straight hems that develop slack and flutter, the catenary edge distributes wind loading progressively across the entire panel. This means instead of concentrating stress at corner tie-outs, the force disperses along a continuous gradient, dramatically reducing the likelihood of catastrophic failure.
Why Wind Loves to Destroy Traditional Tarps
Flat tarps create perfect lift-generating surfaces. Even a slight breeze creates pressure differentials—high pressure on the windward side, low pressure leeward—that generate lift and flapping. Each flutter cycle stresses the fabric and stitching, creating a fatigue failure loop that accelerates exponentially with wind speed. Ridge camps amplify this effect; the terrain acts as a ramp, compressing airflow and increasing velocity just where you need reliability most. A traditional tarp’s first gust might hold, but the oscillation it creates becomes a ticking clock on its structural integrity.
The Ridge Camp Dilemma: Why Wind Exposure Demands Specialized Gear
Microclimates and Wind Tunnel Effects on Ridges
Ridges don’t just experience wind—they modify it. As air masses are forced over and around these topographical features, they accelerate, creating localized wind speeds that can be 50-100% higher than forecasted valley conditions. The shape of the ridge matters: convex crests create upward deflection, while saddles and gaps funnel wind into concentrated streams. A catenary tarp’s aerodynamic profile isn’t just about handling wind; it’s about harmonizing with these microclimatic forces rather than fighting them head-on.
The Real Cost of Gear Failure at Altitude
When a tarp fails on a ridge, the consequences cascade quickly. Beyond the immediate exposure to elements, you’re now dealing with potential equipment loss as gear scatters down slopes, hypothermia risk in suddenly unprotected conditions, and the psychological toll of a compromised shelter when retreat isn’t an option. The investment in proper catenary design isn’t measured in dollars—it’s measured in the confidence that your shelter becomes a secure base rather than a constant source of anxiety.
Fabric Fundamentals: Material Science for Exposed Campsites
Silnylon vs Dyneema: The Wind Performance Showdown
Silnylon (silicone-impregnated nylon) offers excellent stretch characteristics that can actually benefit catenary designs—when properly tensioned, the slight elasticity allows the fabric to absorb wind gusts without transferring full force to anchor points. However, this same stretch requires retensioning as conditions change. Dyneema Composite Fabrics (formerly Cuben Fiber) provide zero stretch and exceptional tear strength, creating a hyper-stable platform that holds its catenary shape perfectly under load. The trade-off? Cost and a crinkly handling experience that some find less forgiving during setup.
Coatings and Treatments That Matter
For 2026, pay attention to PU (polyurethane) coatings on the underside of silnylon tarps—they improve water resistance but can degrade flexibility in cold temperatures. Siliconized coatings on both sides maintain pliability but sacrifice some waterproofing under prolonged pressure (hydrostatic head). New hybrid treatments are emerging that bond polymers at the molecular level, offering the best of both worlds. For ridge camping, prioritize coatings that maintain performance across temperature swings, as altitude can swing 40°F between day and night.
Denier Ratings: Finding Your Durability Sweet Spot
Denier measures fiber thickness, but higher isn’t always better for catenary tarps. 20D fabrics offer ultralight packability but require perfect pitch and protected sites. 30D strikes the optimal balance for most ridge applications, providing enough abrasion resistance for rocky ground contact without excessive weight. 40D and above serve expedition-grade needs where the tarp might face not just wind, but ice-laden gusts and snow loading. The key is matching denier to your risk tolerance and the specific ridge environment—exposed granite ridges in Patagonia demand different specs than forested Appalachian balds.
Geometry Matters: Catenary Depth and Wind Deflection
The Mathematics of Curve Efficiency
The depth of the catenary curve—how much it deviates from a straight line—directly impacts performance. Too shallow, and you lose the tensioning benefits; too deep, and you create fabric waste and reduce usable interior space. Optimal catenary depth typically runs 2-4% of the span length. For a 10-foot ridge line, that’s a 2.4-4.8 inch drop at the center. This seemingly minor curve creates enough mechanical advantage to maintain tension across wind speeds up to 40-50 mph when properly anchored.
How Much Catenary is Too Much?
Aggressive curves beyond 5% start creating problems. They reduce headroom disproportionately and can cause the tarp to “cup” wind rather than deflect it, creating a low-pressure pocket that pulls the fabric upward. Designers in 2026 are using computational fluid dynamics to model these effects, resulting in variable catenary profiles that are deeper at stress points and shallower along less-loaded edges. When evaluating tarps, look for this nuanced shaping—it’s the hallmark of serious wind-worthy design.
Reinforcement Engineering: Stress Points and Failure Prevention
Guy-Out Point Construction
The strongest catenary tarp fails at its weakest guy-out point. Look for bar-tacked reinforcement patches that distribute load across multiple stitch lines. Triple-stitched box patterns with bonded backing patches prevent the “zipper effect” where a single failing stitch propagates across the entire hem. In 2026, many premium tarps are moving toward bonded (rather than sewn) attachment points for Dyneema models, eliminating needle holes that can become stress concentrators.
Edge Binding and Hemming Techniques
Rolled hems with double-needle stitching create a tube that can accommodate flexible reinforcement cord inside the edge—this is the gold standard for catenary tarps. The internal cord acts as a secondary load path, carrying tension when fabric fibers begin to stretch or fatigue. Avoid single-fold hems with single stitching; they rely entirely on thread strength and fail catastrophically when that thread abrades or UV-degrades.
Panel-Loading vs Point-Loading Dynamics
Traditional tarps are point-loaded: all stress concentrates at corners. Catenary designs enable panel-loading, where the curved edge distributes force across the entire perimeter. This requires precise manufacturing—the curve must be cut and sewn under tension to ensure the load transfers smoothly. When inspecting a tarp, gently pull along the catenary edge; you should feel consistent resistance, not spots where the fabric goes slack or, conversely, where it feels over-tensioned and ready to tear.
Setup Strategies for Maximum Wind Resistance
The A-Frame Configuration for Ridge Lines
The A-frame pitch aligns the tarp’s ridge with the wind direction, presenting the smallest possible profile. For catenary tarps, this means the wind flows over the apex and down both sides, following the natural curve. The key is orienting the tarp so the catenary edges are the sides, not the ridge line—this uses the curve to shed wind laterally. Use a continuous ridge line rather than end-point suspension; it allows the tarp to move as a unit rather than transferring stress to single points.
Lean-To Orientation Relative to Prevailing Winds
When wind direction is consistent, a lean-to with the catenary curve along the top edge creates a remarkably stable pitch. The curve prevents the dreaded “flap” at the top, while the open face allows you to monitor conditions. Angle the tarp at 45-60 degrees to the ground—shallow enough to reduce wind loading but steep enough to prevent uplift. The critical detail is ensuring the windward edge is pegged down every 12-18 inches, creating a seal that prevents air from getting underneath.
The C-Fly and Other Advanced Pitching Techniques
The C-fly pitch uses a catenary tarp’s curves to create a semi-elliptical shelter that presents a continuously varying angle to the wind, disrupting laminar flow. This requires a tarp with multiple catenary cuts on both ridge and sides. Newer designs include “floating” tie-outs mid-panel that allow you to create three-dimensional shapes, essentially turning your tarp into a tensioned shell rather than a flat plane. Mastering these pitches transforms your tarp from a simple cover into an active wind-management system.
Anchor Systems: Holding Fast in Unforgiving Terrain
Stake Selection for Rocky Ridge Lines
Ridge camps often mean rocky, shallow soil where standard stakes pull easily. Y-beam titanium stakes offer the best penetration and holding power in compacted earth between rocks. For true bedrock camps, carry a selection of rock-climbing nuts and cams that can be wedged into cracks, creating bombproof anchors far stronger than any soil stake. Pair these with 2mm Dyneema guy lines that have virtually no stretch; catenary tarps rely on consistent tension, and elastic cord defeats the purpose.
Deadman Anchors and Natural Features
When the ground won’t hold stakes, bury gear sacks filled with rocks (deadman anchors) attached to your guy lines. On ridges, natural features become your best friends: sturdy shrubs, rock horns, and ground depressions all offer anchor opportunities. The trick is protecting your guy lines from abrasion where they contact rock—use short sections of old bike inner tube or dedicated line sleeves at all contact points. A catenary tarp’s distributed loading means each anchor point sees less force, making marginal anchors more viable.
Guyline Dynamics: Tensioning Systems That Work
Static knots like the trucker’s hitch allow precise tensioning but can be slow to adjust as conditions change. For ridge camping, consider a hybrid system: static knots on leeward points, and mechanical tensioners like LineLoks or micro carabiners on windward points where you’ll need to make adjustments without re-tying. Use reflective 2mm Dyneema for visibility in headlamp beams, and always carry 25% more guy line than you think you need—ridge winds have a way of finding the weak link in your geometry.
Ventilation vs Protection: The Breathability Paradox
Managing Condensation in High Winds
Windy ridge camps create a condensation paradox: the wind cools the tarp’s exterior while your body heat warms the interior, creating a temperature differential that drives moisture formation. Catenary tarps excel here because their tensioned pitch prevents fabric from sagging onto your sleeping bag, maintaining an air gap. Pitch your tarp with the sides 8-12 inches off the ground—high enough to allow cross-ventilation but low enough to block wind-driven rain. The curve ensures this gap remains constant, even under load.
Pitch Height and Airflow Management
In sustained winds above 25 mph, consider pitching your tarp lower than usual—just enough height to sit up. This reduces the volume of air your body heat must warm and minimizes the tarp’s wind profile. The catenary shape becomes even more critical here, as lower pitches put more stress on the fabric. Use your trekking poles at their lowest usable height, and if using a pyramid pitch, ensure the apex guy-out is directly over your sleeping position to maximize headroom where you need it most.
Weight vs Durability: The Ultralight Compromise
When Every Ounce Matters on Long Approaches
For multi-day approaches where you’re carrying everything on your back, a 7-8 ounce Dyneema catenary tarp feels like a revelation compared to a 1.5-pound silnylon alternative. The weight savings comes at a cost—not just financial, but in noise (Dyneema is louder in wind) and repairability (silnylon patches more easily). For ridge camps, though, the Dyneema’s stability often outweighs these drawbacks; the fabric doesn’t absorb water, so it doesn’t sag when wet, maintaining catenary tension through storms.
The Multi-Trip Investment Philosophy
Consider your tarp purchase across expected trips, not just weight. A $400 Dyneema tarp used on 20 ridge camps costs $20 per use; a $150 silnylon tarp that fails on trip three and needs replacement actually costs more per successful deployment. For 2026, modular designs are emerging where you can swap panels or reinforcement patches, extending lifespan. This approach recognizes that ridge camping concentrates wear in specific areas, and targeted replacement beats full tarp retirement.
Seasonal Considerations: From Summer Gusts to Winter Gales
Three-Season vs Four-Season Ratings
Three-season catenary tarps prioritize ventilation and lighter weight, often using catenary cuts only on the primary wind edges. Four-season models feature curves on all edges, reinforced panels, and often include snow skirt extensions that can be buried for anchor points. The distinction matters less for wind performance than for snow loading—winter ridge camps see both. A true four-season catenary tarp uses a shallower curve to maintain usable interior volume under snow load while still shedding wind.
Snow Load vs Wind Load: Different Engineering
Snow is static load; wind is dynamic. Catenary curves optimized for wind often have deeper drops to create tension, but this reduces the roof area available to support snow. The 2026 design trend is asymmetric catenary profiles—deeper curves on windward edges, shallower on leeward—to handle both threats. When evaluating tarps, consider your primary use case: high-altitude summer ridges demand wind-first design, while winter camping requires a hybrid approach that doesn’t sacrifice snow-shedding ability.
Budget Breakdown: What Your Money Actually Buys
Entry-Level vs Premium Construction
Sub-$150 catenary tarps typically use 68D polyester with PU coatings and basic catenary curves cut via standard templates. They work, but the curves aren’t optimized for specific sizes, and reinforcements are minimal. Mid-range ($150-$300) offers 30D silnylon, computer-modeled curves, and bar-tacked reinforcements. Premium ($300+) brings Dyneema, bonded construction, asymmetric curves, and often includes custom pitch templates. For ridge camping, the sweet spot is mid-range: you get the critical engineering without the expedition-grade overbuild.
The Hidden Costs of Repairs and Replacements
A cheap tarp that tears in wind requires field repair tape ($15), replacement guy lines ($20), and possibly a new stake set ($30). If it fails completely, you’re looking at emergency bivy gear or a rushed descent. Factor these potential costs into your budget. Premium tarps often include repair kits, extra fabric patches, and detailed pitch guides that reduce the learning curve. The 2026 market sees more manufacturers offering wind damage warranties specifically for ridge camping, recognizing that this is the ultimate test of their engineering.
Maintenance and Field Repairs: Extending Your Tarp’s Life
Seam Sealing and Re-Coating
Even factory-taped seams can fail under ridge wind loading’s constant flexing. Annually re-seal all seams with a flexible seam sealer, paying special attention to catenary curves where stitching runs along the bias (diagonal to fabric weave), creating microscopic stress points. For silnylon, consider a DWR (durable water repellent) refresh every two seasons; wind-driven rain can overwhelm coatings that have lost their beading ability, leading to water pooling that adds weight and sag.
Patching in Adverse Conditions
Carry pre-cut patches of matching material with adhesive already applied (just peel and stick). For silnylon, Tenacious Tape works remarkably well even on wet fabric. Dyneema requires specialized repair tape; standard options won’t bond to the polyethylene matrix. Practice patching at home in comfortable conditions—doing it for the first time in 30 mph winds with numb fingers is a recipe for failure. Store patches in multiple locations: one in your repair kit, one in your pack lid, one in your first aid kit.
Storage Practices That Prevent Degradation
Never store a catenary tarp compressed in its stuff sack long-term. The permanent curves need to relax to maintain their shape memory. Hang it loosely in a cool, dry place, or store it in a large cotton sack that allows air circulation. UV exposure is the silent killer of ridge-camped gear; even a few hours of direct sun while drying can degrade coatings. Always dry tarps in shade, and consider a UV-protective storage bag if you frequently camp above treeline.
Common Mistakes That Doom Ridge Camp Setups
The Over-Tensioning Trap
Catenary curves work because they allow some dynamic response to wind. Cranking every guy line to maximum tension creates a drum-tight surface that transfers all wind energy directly to anchor points. Instead, tension until the catenary edge just smooths out, then add one extra half-turn. The tarp should “sing” slightly in gusts, not reverberate like a snare drum. This preserves the fabric’s ability to subtly reshape and shed vortices.
Ignoring Wind Direction Shifts
Ridge winds are fickle. A setup that works perfectly at sunset can become a disaster when nocturnal katabatic winds reverse direction. Always pitch with the ability to adjust: leave extra guy line coiled at stakes, position anchors so you can re-orient the tarp 90 degrees without moving everything, and consider a pitch that offers protection from multiple directions (like a low A-frame with extended beaks). The catenary shape helps here, as its efficiency isn’t directionally dependent like a flat edge.
Poor Site Selection Red Flags
That perfect flat spot on the ridge crest is a wind tunnel, not a campsite. Look for micro-depressions just below the crest on the leeward side, rock outcroppings that create eddies of calm air, or clusters of stunted trees that act as natural windbreaks. Your catenary tarp can handle wind, but giving it a fighting chance with smart site selection multiplies its effectiveness. Avoid convex slopes where wind accelerates; concave areas create turbulence that actually reduces sustained wind speeds.
The Evolution of Tarp Design: What’s Coming in 2026
Emerging Fabric Technologies
Hybrid laminates combining Dyneema’s strength with silnylon’s hand-feel are entering production, offering the best properties of both. These fabrics use Dyneema grid reinforcement within a silnylon matrix, creating stretch-controlled zones that optimize catenary performance. We’re also seeing the first commercial application of shape-memory polymers that actively tighten the catenary curve when temperatures drop, counteracting the natural loosening of cold fabric.
Smart Tensioning Systems
Mechanical automatic tensioners that respond to wind gusts are becoming integrated into guy-out points. These devices use spring-loaded cams to pay out line during peak gusts (reducing shock loading) and retract during lulls (maintaining pitch). While adding minimal weight (2-3 ounces total), they transform how catenary tarps handle dynamic loads, potentially increasing wind resistance by 30-40% without user intervention. The trade-off is complexity and cost, but for serious ridge campers, this could be the difference between sleeping and surviving.
Frequently Asked Questions
1. Can I modify a flat tarp to have catenary cuts myself?
While technically possible with a steady hand and sewing machine, DIY catenary cuts rarely achieve the precision needed for true wind performance. The curve must be mathematically derived for your specific tarp dimensions and cut under tension to maintain shape. Home modifications often create weak points where the new seam meets the original fabric. If you’re determined, practice on silnylon scraps first, and accept that your first attempt will be a learning experience, not expedition-ready gear.
2. How do I know if my catenary tarp is pitched correctly for wind?
The catenary edge should appear smooth and uniform, with no visible sag or puckering. In moderate wind, you should hear a consistent low hum, not irregular flapping. Lightly tap the fabric—it should feel drum-tight but still have a tiny bit of give. If you see the curve flattening or deepening during gusts, your anchor points are too rigid; add some dynamic give to the system. The ultimate test: after 30 minutes in wind, the pitch should look identical to when you set it up.
3. Are catenary tarps worth the weight penalty over flat tarps for calm conditions?
For exclusively calm conditions, no—the weight and cost aren’t justified. But ridges are never truly calm; even “calm” forecasts include sudden gusts and thermal winds. The weight difference between a quality catenary tarp and a flat tarp of equal coverage is typically 2-4 ounces. That’s the weight of a Snickers bar. On a ridge, that small penalty buys you insurance against the conditions that can end trips. Consider it a non-negotiable safety margin, not optional luxury.
4. What’s the minimum number of guy-out points for a wind-worthy pitch?
For a standard 9x9 foot tarp, you need at least eight well-placed points: four corners, two mid-side points on windward edges, and two ridge line supports. More is better—premium tarps offer 12-16 points, allowing you to create a “web” of tension. For ridge camping, never rely on less than six points, and always double-anchor the windward corners (two stakes per point in a V-pattern). The catenary curve’s efficiency is wasted if you don’t provide enough anchor opportunities to utilize it.
5. How does elevation affect catenary tarp performance?
Elevation impacts performance through three mechanisms: reduced air density (slightly less wind force), greater UV intensity (accelerates fabric degradation), and extreme temperature swings (affects tension). The catenary curve actually becomes more efficient at altitude because the thinner air creates less drag for a given wind speed. However, UV damage is your real enemy—consider a tarp with UV inhibitors woven into the fabric, not just applied as a coating, for trips above 10,000 feet.
6. Can catenary tarps handle snow loads as well as wind loads?
It depends on the design. Deep catenary curves optimized for wind create a shallow roof angle that sheds snow poorly. Four-season models use asymmetric curves or hybrid flat-catenary designs that maintain steep roof sections while wind-proofing edges. For mixed conditions, look for tarps with catenary cuts only on the lower 1/3 of the sides, leaving the upper panels flat for better snow shedding. Never let snow accumulate—brush it off regularly, as the weight will negate the catenary’s tension.
7. Why are catenary tarps so much more expensive than flat tarps?
The cost reflects manufacturing complexity. Each catenary edge must be computer-modeled, die-cut under tension, and sewn with specialized equipment that maintains the curve’s integrity. The reinforcement patches are placed by hand to match stress maps. A flat tarp can be cut from a bolt of fabric in minutes; a catenary tarp requires hours of precision work. You’re paying for engineering and labor, not just materials. For ridge camping, this premium directly translates to performance and safety.
8. How do I clean my catenary tarp without damaging the curve’s shape memory?
Never machine wash—agitators stretch the catenary edge unevenly. Hand wash in a bathtub with mild, non-detergent soap (Nikwax Tech Wash or equivalent). Gently swish, don’t scrub. The critical step: hang it to dry using the ridge line tie-outs, weighted slightly at the corners to maintain tension on the curves. This lets the fabric “remember” its shape. Store it this way overnight before packing. Never use heat to dry, as it can reset the fabric’s thermal memory and flatten the curve.
9. What’s the lifespan of a catenary tarp used primarily on ridges?
With proper care, a quality silnylon catenary tarp lasts 5-7 years of regular ridge use before UV and flex fatigue degrade performance. Dyneema extends this to 10+ years due to its inherent UV resistance and zero stretch. The catenary curve itself doesn’t degrade, but the fabric’s ability to hold tension does. Inspect annually by pitching in calm conditions and measuring the curve depth—if it’s reduced by more than 10% from spec, the fabric has stretched beyond its elastic limit and wind performance will suffer.
10. Are there any ridge environments where a catenary tarp is NOT the best choice?
In dense, low-elevation forests where wind isn’t a factor, a simple flat tarp or even a poncho tarp suffices. Similarly, on ridges with predictable, moderate winds below 15 mph, the complexity of catenary design may be overkill. The one environment to avoid entirely is extremely abrasive terrain—sharp volcanic scoria or knife-edge granite serrations can shred any tarp. In these cases, a freestanding tent with a robust footprint offers better protection. For all other ridge scenarios, catenary design is the current state-of-the-art for a reason.
See Also
- The 10 Ultimate Best Canvas Tarp Shelters for Winter Camps in 2026
- 10 Fire-Resistant Tarp Shelters for Leave-No-Trace Fireside Camps in 2026
- 10 Best Canvas Tarp Shelters for Winter Bushcraft Camps in 2026
- 10 Top-Rated Tarp Shelters for Hunting Camps That Blend Into Woods in 2026
- 10 Premium Tarp Shelters Worth the Splurge for Overlanders in 2026