Table of Contents
Six months on trail is no weekend warrior escapade—it’s a marriage to your gear, and your backpack is the partner you’ll sleep with, sweat on, and depend on for every mile. The difference between a pack that disappears on your back and one that becomes a daily torture device isn’t just about padding or price tags; it’s about understanding how a complex system of geometry, materials, and biomechanics either harmonizes with your body or declares war on it.
Comfort on a thru-hike isn’t a luxury—it’s survival. When you’re carrying 30-45 pounds of shelter, food, water, and the few possessions that keep you sane across 2,000+ miles, your backpack transforms from simple luggage into a critical piece of life-support equipment. The stakes are higher than a sore shoulder; we’re talking nerve compression, chronic joint stress, and the kind of fatigue that can end a dream. This guide dismantles the marketing fluff and dives into the engineering realities that separate expedition-worthy packs from pretenders.
Top 10 Expedition Backpacks
Detailed Product Reviews
1. Bseash 80L Waterproof Hiking Camping Backpack with Rain Cover, Lightweight Outdoor Sport Travel Daypack for Climbing Touring (Army Green)

Overview: The Bseash 80L backpack targets hikers needing maximum capacity without the weight penalty. At just 3 pounds, this pack offers expedition-level volume for extended trips. The ergonomic S-type shoulder straps and breathable back panel provide decent comfort, while eight external straps secure sleeping bags and gear. The included rain cover and water-resistant polyester construction offer adequate weather protection, and the separate shoe compartment keeps dirty items isolated.
What Makes It Stand Out: What distinguishes this pack is its exceptional size-to-weight ratio—80 liters at only 3 lbs is impressive for budget gear. The drawstring closure main compartment prevents item spillage, and the hydration bladder compatibility adds convenience. The eight adjustable external straps provide versatile gear attachment options rarely found at this price point, making it highly adaptable for various outdoor activities.
Value for Money: Priced competitively, this pack undercuts premium brands by hundreds while delivering similar capacity. However, the 33-pound maximum load rating and lack of internal frame limit its utility for heavy loads. For occasional hikers or those prioritizing volume over durability, it presents solid value that’s hard to match in the large-capacity category.
Strengths and Weaknesses: Strengths include massive capacity, lightweight design, included rain cover, and external attachment points. Weaknesses involve the modest load capacity, absence of a frame structure, and potential long-term durability questions with heavy use. The materials feel adequate but not premium.
Bottom Line: This pack suits budget-conscious hikers needing maximum volume for occasional multi-day trips. While not built for extreme conditions or heavy loads, its capacity and features make it a practical choice for entry-level adventurers prioritizing space over ruggedness.
2. WoneNice 50L(45+5) Waterproof Hiking Backpack - Outdoor Sport Daypack with Rain Cover

Overview: The WoneNice 50L backpack serves as a straightforward, no-frills option for weekend warriors and entry-level hikers. This pack balances essential features with affordability, offering a main compartment, sleeping bag storage, and multiple pockets for organized packing. The adjustable chest and waist belts accommodate various body types, while the ergonomic S-type shoulder straps provide basic comfort for moderate loads on 2-3 day trips.
What Makes It Stand Out: Its standout quality is the logical internal layout that simplifies gear organization for those new to backpacking. The clear compartmentalization helps users learn proper packing techniques without confusion. Additionally, the universal adjustability makes it suitable for both youth and adult adventurers, a rare feature in this price bracket that enhances its family-friendly appeal.
Value for Money: This pack delivers commendable value by including a rain cover and offering 50L capacity at an entry-level price point. While materials won’t match premium brands, they suffice for occasional use and fair-weather hiking. It’s an ideal starter pack before investing in high-end gear, providing essential features without financial commitment.
Strengths and Weaknesses: Strengths include intuitive organization, gender-neutral adjustability, lightweight construction, and included rain protection. Weaknesses encompass basic polyester fabric that may wear faster than ripstop alternatives, minimal ventilation features, and lack of advanced suspension systems for heavier loads.
Bottom Line: Perfect for beginners testing the waters of multi-day hiking. This pack covers the fundamentals without overwhelming users with complexity or cost. Experienced hikers will find it limited, but for casual adventures, it performs admirably.
3. Under Armour Unisex Hustle 6.0 Backpack, (308) Expedition Green/Expedition Green/Orange Base, One Size Fits Most

Overview: The Under Armour Hustle 6.0 represents a different category entirely—a daily commuter pack with outdoor-inspired water resistance. This 30-liter urban backpack features UA Storm technology, protecting contents from light rain and splashes. The dedicated 16-inch laptop sleeve and secondary shoe/laundry compartment cater to gym-goers and students, while the 32oz water bottle pocket adds hydration convenience for active lifestyles.
What Makes It Stand Out: What sets it apart is Under Armour’s premium water-resistant coating combined with everyday functionality. The dual-purpose secondary compartment solves the common problem of separating dirty shoes or clothes from electronics and books. The soft-touch material coating enhances durability against daily abrasion, and the brand’s reputation for quality ensures reliable zippers and stitching that outlast cheaper alternatives.
Value for Money: At its price point, you’re paying for brand engineering and urban-focused features rather than wilderness capability. It costs more than basic school backpacks but delivers genuine water resistance and thoughtful organization that commuters value. However, it lacks waist straps and capacity for serious hiking, limiting its outdoor utility.
Strengths and Weaknesses: Strengths include excellent water resistance for urban use, superior laptop protection, versatile shoe compartment, and durable construction. Weaknesses involve limited capacity for outdoor adventures, no load-bearing hip belt, and premium pricing relative to capacity.
Bottom Line: Ideal for students, professionals, and gym enthusiasts needing weather protection and organization. This is not a hiking backpack, but a premium daily carrier that handles unexpected showers and active lifestyles exceptionally well.
4. kookoomia 50L Military Tactical Backpack Large Day Backpack for Men Molle Army 3 Days Assault Pack Bug Out Bag Water Resistant and Heavy Duty Hiking Treeking Rucksack - Black

Overview: The kookoomia 50L tactical backpack bridges military durability with outdoor versatility. Measuring 21.6" x 12.9" x 12.6", this pack features double-stitched, water-resistant construction with heavy-duty zippers designed for harsh conditions. Multiple compartments, MOLLE webbing, and a hidden back pocket provide extensive organization options for 3-5 day excursions or daily tactical use in demanding environments.
What Makes It Stand Out: Its primary distinction lies in the authentic tactical feature set. The MOLLE system allows unlimited customization with pouches and gear, while the included US flag patch and attachment points target military enthusiasts. The reinforced handles and compression straps demonstrate true tactical engineering rather than cosmetic imitation. Two 500ml bottle holders and bottom webbing enhance practical field utility significantly.
Value for Money: This pack offers strong value for those wanting genuine tactical functionality without premium brand pricing. It competes with packs costing twice as much while delivering comparable durability and features. The trade-off is brand recognition and potentially refined ergonomics versus raw functionality, making it a smart budget tactical choice.
Strengths and Weaknesses: Strengths include rugged construction, authentic MOLLE system, versatile organization, and tactical readiness. Weaknesses involve a military aesthetic unsuitable for urban travel, potential overbuilding for casual hikers, and weight penalty from heavy-duty materials.
Bottom Line: Perfect for tactical enthusiasts, hunters, and survivalists prioritizing durability and customization. Casual hikers may find it excessive, but those needing a pack that withstands serious abuse will appreciate its military-grade construction and adaptability.
5. Mardingtop 50L Hiking Survival Backpack,Backpacking Backpack with Rain Cover for Hiking,Backpacking,Rucking,Camping,Survival
Overview: The Mardingtop 50L survival backpack merges tactical utility with hiking ergonomics. Constructed from 600D polyester with YKK zippers and buckles, this pack features an internal frame, MOLLE webbing, and a front U-zipper for luggage-style main compartment access. A dedicated hydration bladder pocket doubles as a 15.6" laptop sleeve, while the included rain cover adds weather protection for unpredictable conditions.
What Makes It Stand Out: Its defining feature is the premium hardware combined with rapid-access design. YKK components ensure zipper reliability under load, while the front panel opening surpasses top-loading packs for convenience. The internal frame provides structure without excessive weight, and the adjustable sternum strap and hip belt distribute loads effectively for extended wear on multi-day trips.
Value for Money: This pack delivers excellent mid-range value by integrating tactical features with hiking comfort at a reasonable price. YKK hardware alone justifies the cost over budget competitors, and the versatile design functions as both a trail pack and urban survival bag. It’s priced competitively with tactical packs but offers better ergonomics than most.
Strengths and Weaknesses: Strengths include premium YKK hardware, quick front access, internal frame support, hydration compatibility, and versatile MOLLE webbing. Weaknesses involve survival branding that may not appeal to traditional hikers, tactical aesthetic limitations, and moderate capacity for extended expeditions.
Bottom Line: Ideal for hikers wanting tactical durability without sacrificing comfort. The quality hardware and thoughtful access design make it a smart investment for both trail use and emergency preparedness, bridging two pack categories effectively.
6. REEBOW GEAR Military Tactical Backpack Large Army 3 Day Assault Pack Molle Bag Backpacks

Overview: The REEBOW GEAR Military Tactical Backpack is a 40-liter pack designed for tactical enthusiasts and outdoor adventurers seeking versatility. Measuring 13"x20"x11", this assault pack balances capacity with maneuverability, making it suitable for day trips, range sessions, or short-duration missions. Constructed from high-density water-resistant fabric, it delivers military-inspired functionality at an accessible price point.
What Makes It Stand Out: The comprehensive MOLLE webbing system sets this pack apart, offering unlimited customization options for attaching pouches and gear. The double-stitched construction with heavy-duty zippers and utility cord pulls ensures durability under demanding conditions. The ventilated mesh padding on the back panel and shoulder straps provides breathable comfort during extended wear, while hydration bladder compatibility adds essential functionality for tactical and outdoor use.
Value for Money: Positioned as a budget-friendly tactical option, this backpack delivers exceptional value. Comparable military-style packs often cost twice as much, yet the REEBOW maintains essential features like MOLLE integration and reinforced stitching. While it lacks premium materials found in higher-end brands, the price-to-feature ratio makes it an attractive entry point for tactical users and casual hikers.
Strengths and Weaknesses: Strengths include versatile MOLLE system, robust construction, comfortable ventilation, and multi-purpose design. Weaknesses involve unspecified fabric density (only “high density”), no included rain cover, and basic suspension system that may struggle with loads over 30 pounds. The hydration bladder is also not included.
Bottom Line: This pack excels as an affordable, versatile tactical backpack for users prioritizing customization and basic durability. Ideal for range days, short hikes, or emergency preparedness kits, though serious backpackers or heavy-load carriers should consider options with more advanced suspension systems.
7. Mardingtop 50L Hiking Survival Backpack,Backpacking Backpack with Rain Cover for Hiking,Backpacking,Rucking,Camping,Survival

Overview: The Mardingtop 50L Hiking Survival Backpack targets serious adventurers needing extended capacity for multi-day excursions. Built from 600D polyester with YKK hardware, this internal-frame pack includes a rain cover and offers 50 liters of organized storage. Its front-loading design provides suitcase-style access, bridging the gap between tactical functionality and traditional backpacking.
What Makes It Stand Out: The combination of front-panel zipper access and MOLLE webbing creates rare versatility in this price category. The dedicated hydration compartment accommodates either a 5-liter bladder or 15.6-inch laptop, showcasing its dual-use potential. An integrated survival guide in the top pocket demonstrates thoughtful design for emergency preparedness, while the included rain cover adds value uncommon in tactical-style packs.
Value for Money: This pack delivers remarkable value, packing premium YKK zippers, a rain cover, and 50-liter capacity at a competitive price. Similar-featured backpacks from established outdoor brands typically command 50-100% higher prices. The 600D polyester construction offers durability without the premium cost of higher-denier fabrics, making it cost-effective for regular outdoor use.
Strengths and Weaknesses: Strengths include YKK hardware reliability, front-loading convenience, included rain cover, adjustable suspension, and MOLLE customization. Weaknesses involve heavier 600D fabric weight, limited ventilation compared to premium hiking packs, and tactical aesthetics that may not suit traditional backpackers. The hydration bladder is not included.
Bottom Line: An excellent choice for budget-conscious adventurers wanting tactical features with backpacking functionality. Perfect for 3-5 day trips, bug-out bags, or rucking training. The front access and rain cover make it more practical than pure tactical packs, though dedicated ultralight backpackers should look elsewhere.
8. The North Face Terra 55 Backpack - Unisex Hiking Pack, Cinch-Top Opening with Zipper, Pole & Ice Axe Attachments, Forest Olive/New Taupe Green-NPF, Large/X-Large

Overview: The North Face Terra 55 is a purpose-built multi-day backpacking pack designed for serious thru-hikers and backcountry enthusiasts. Available in two sizes (53L and 57L), this unisex pack combines traditional top-loading design with modern convenience features. With a focus on comfort and organization, it represents The North Face’s commitment to accessible, high-performance outdoor gear.
What Makes It Stand Out: The full-length two-way U-zipper provides exceptional access to the cinch-top main compartment, eliminating the frustration of digging through top-loaded gear. The removable lid converts to a summit pack, while dedicated attachments for hiking poles and ice axes demonstrate true trail-ready design. The breathable, padded suspension system with load lifters and removable frame sheet offers customizable support that rivals more expensive packs.
Value for Money: While priced higher than tactical alternatives, the Terra 55 delivers legitimate backpacking value. Comparable packs from Osprey or Gregory with similar features cost significantly more. The 4-pound weight is reasonable for its capacity and feature set, and the durable construction ensures years of reliable service, justifying the investment for frequent backpackers.
Strengths and Weaknesses: Strengths include superior comfort and ventilation, excellent organization, premium brand reliability, and versatile access. Weaknesses involve higher price point, lack of MOLLE customization, no included rain cover, and weight slightly heavier than ultralight options. The cinch-top design may frustrate users preferring full-front access.
Bottom Line: The Terra 55 is an outstanding mid-range backpacking pack for dedicated hikers. Its comfort and access features make it ideal for multi-day trips and thru-hikes. While tactical users may miss MOLLE webbing, traditional backpackers will appreciate its refined design and reliable performance. Highly recommended for those prioritizing comfort over military styling.
9. NWT XPEDITION Military Tactical Backpack,Sturdy Work & Molle Laptops Rucksack, Heavy Duty Pack for Hiking Camping Travel Fishing Gym,Black

Overview: The NWT XPEDITION Military Tactical Backpack is a 40-liter pack emphasizing construction quality and warranty support for demanding users. Measuring 12.6" x 9.6" x 19.6" and weighing 3.2 pounds, this pack uses 900D oxford fabric with precision stitching. It targets outdoor enthusiasts who prioritize durability and manufacturer backing over brand recognition.
What Makes It Stand Out: The 3mm precision stitching with double-needle reinforcement and cross-stitching at critical stress points demonstrates exceptional attention to durability. The 900D tear-resistant oxford fabric offers superior abrasion resistance compared to typical 600D packs. A unique foam-padded shoulder phone pocket provides quick device access, while the 2-year guarantee with 24-hour response commitment shows manufacturer confidence uncommon in this category.
Value for Money: This pack delivers strong value through material quality and warranty protection. While priced slightly above basic tactical packs, the 900D fabric and reinforced construction justify the premium. The 2-year guarantee adds tangible value, effectively insuring your purchase against manufacturing defects. Comparable durability-focused packs often cost 30-50% more without warranty coverage.
Strengths and Weaknesses: Strengths include 900D fabric durability, reinforced stitching, phone pocket convenience, water resistance, and comprehensive warranty. Weaknesses involve no included rain cover, basic suspension system, lack of hydration bladder, and limited brand presence for long-term support. The tactical aesthetic may not appeal to traditional hikers.
Bottom Line: Ideal for users prioritizing construction quality and warranty security in a tactical package. The reinforced stitching and 900D fabric make it suitable for rugged outdoor work, fishing, or heavy-duty travel. While not a premium backpacking pack, it exceeds expectations for tactical durability. The warranty provides peace of mind that competitors lack.
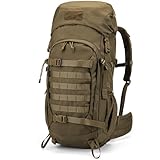
10. ALPS OutdoorZ Commander + Pack Bag – 5,250 in³ Hunting Backpack with Freighter Frame, Rifle Holder, Spotting Scope Pocket, Ripstop Fabric, Adjustable Coyote Brown Pack

Overview: The ALPS OutdoorZ Commander is a specialized hunting pack combining an 86-liter pack bag with a detachable freighter frame designed for serious backcountry hunters. This dual-function system allows gear transport into camp and meat hauling on exit, addressing unique hunting requirements. Built from ripstop fabric with an anodized aluminum frame, it’s engineered for extreme loads and rugged terrain.
What Makes It Stand Out: The freighter frame with integrated shelf and lashing straps transforms this from a standard pack into a load-bearing system capable of hauling hundreds of pounds of meat. Purpose-built hunting features include a rifle holder, spotting scope pocket, and game bag attachment points. The cotter-and-clevis pin adjustment system enables fast torso customization (17-23"), while the horizontal divider and lower door access provide organization rare in hunting packs.
Value for Money: For dedicated hunters, this pack offers exceptional value by combining two systems in one. Purchasing separate pack and freighter frame would cost significantly more. While expensive compared to standard backpacks, its specialized functionality justifies the price for those who regularly pack out game. The durable ripstop construction ensures longevity through harsh hunting seasons.
Strengths and Weaknesses: Strengths include dual pack/freighter functionality, heavy-duty construction, hunting-specific features, adjustable frame, and excellent load distribution. Weaknesses involve substantial weight (over 7 pounds), overkill for non-hunters, complex adjustment system, and premium pricing. The tactical appearance and bulk limit everyday versatility.
Bottom Line: An indispensable tool for serious backcountry hunters who need to transport gear and game efficiently. The freighter frame capability sets it apart from any standard backpacking pack. While unsuitable for casual hikers or tactical users, hunters will find the specialized features and robust construction worth every penny. Not recommended outside hunting applications.
Understanding Expedition Backpacks for Extended Journeys
What Makes a Pack “Expedition-Grade”?
Expedition backpacks operate in a different category than their weekend or even multi-week counterparts. The designation isn’t about volume alone—it’s about structural integrity under chronic load, repairability in remote locations, and comfort systems designed for 150+ consecutive days of use. Manufacturers build these packs with reinforced stitching patterns, replaceable components, and suspension systems tested for extended load-bearing, not just brief loaded carries in a showroom.
The materials tell the real story. You’ll find base fabrics starting at 210 denier and climbing past 500 denier in high-abrasion zones, with specialized ripstop weaves and high-tenacity nylon that resist the death-by-a-thousand-cuts from brush, rocks, and constant friction. Hardware becomes critical—metal stays and buckles replace plastic in key stress points because a broken buckle 800 miles from a replacement isn’t an inconvenience, it’s a expedition-ending failure.
The 6-Month Thru-Hike Reality Check
Your body changes dramatically during a half-year trek. Most hikers lose 10-20 pounds, redistribute muscle mass, and develop a completely different posture from daily load carrying. A pack that fits perfectly in Week 1 can become a sloppy, pressure-point nightmare by Week 12. This is why the most comfortable expedition packs feature micro-adjustability at every contact point and torso systems that can be modified without tools.
The psychological component is equally real. When you’re putting on the same pack for the 150th morning in a row, minor irritations become major grievances. A strap that rubs slightly wrong, a hip belt pocket that’s just out of reach, a lid that flaps annoyingly—these accumulate into daily resentment. The best expedition designs anticipate this fatigue with intuitive adjustments you can make half-asleep and features that become extensions of your muscle memory.
Capacity Considerations: How Much Space Do You Really Need?
Volume Breakdown: 65L vs 75L vs 85L+
The capacity conversation for six-month hikes triggers heated debates in trail shelters worldwide. A 65-liter pack represents the sweet spot for experienced ultralight hikers with sub-10-pound base weights and meticulous packing discipline. It forces ruthless gear scrutiny but can feel claustrophobic when you’re carrying 7 days of food through a long waterless stretch or insulating layers for unexpected mountain weather.
The 75-liter range offers the most versatility for thru-hikers. It provides breathing room for food carries, water capacity in desert sections, and the psychological comfort of not having to jam every item in with force. Most importantly, it allows you to carry a bear canister (required on many long trails) without it consuming half your main compartment. The extra volume doesn’t automatically mean extra weight—you can compress dead space, but you can’t magically create space in an overstuffed 65L.
Pushing into 85 liters and beyond typically signals either specialized winter gear, camera equipment, or a tendency to carry “just in case” items that multiply over months. While some hikers successfully use these larger volumes, the empty space often gets filled simply because it exists, turning into a 50-pound anchor that grinds down joints and morale.
The Ultralight Debate on Long Trails
Ultralight philosophy revolutionized backpacking, but six months introduces variables that challenge pure ultralight dogma. Your pack needs to survive not just the weight savings but the durability demands of daily use. A 1-pound pack made from 70D fabric might survive a thru-hike with careful handling, but one slide down a scree slope or brush with a blown-down tree can end its journey.
The comfort equation shifts when you’re not just carrying light, but carrying light every single day. A frameless pack works brilliantly for a 15-pound total weight, but after resupply with 8 days of food and 4 liters of water, you’re suddenly at 30 pounds with zero structure. Expedition comfort often means accepting a 3-4 pound pack that provides load-hauling confidence across the full spectrum of trail conditions you’ll encounter.
The Science of Pack Fit: Your Foundation for Comfort
Torso Length Measurement: Getting It Right
Forget your height—torso length is the non-negotiable measurement that determines whether a pack rides on your hips or crushes your lower back. Measure from your C7 vertebra (the bony bump at the base of your neck when you tilt your head forward) to the top of your iliac crest (the highest point of your hip bones). This range, typically 15-22 inches, dictates your pack size category.
The critical detail: measure while standing in a slight hiking posture, not military straight. Your trail posture includes a natural forward lean that changes the relationship between these points. Most quality expedition packs offer 3-4 inches of torso adjustment, but this is for fine-tuning, not compensating for the wrong size. A pack sized for an 18-inch torso forced onto a 16-inch torso will never transfer weight properly, regardless of strap adjustments.
Hip Belt Fundamentals: Carrying the Load
Your hips should carry 70-80% of your pack weight—this isn’t suggestion, it’s biomechanical fact. The hip belt system determines whether this weight transfer happens efficiently or creates pressure points that leave you numb and bruised. Look for belts that wrap around your iliac crest, not sitting on top of it. The padding should extend at least 5 inches on either side of the center buckle, distributing pressure across a wide surface area.
Belt stiffness creates a paradox: too soft and the pack sags, transferring weight to your shoulders; too rigid and it digs into your hip bones. Premium expedition packs use dual-density foam—firm EVA on the pack side for structure, softer PU foam against your body for comfort. Some incorporate thermo-moldable belts that can be custom-shaped to your anatomy in specialty stores, a game-changer for hikers with non-standard hip structures.
Shoulder Strap Anatomy and Adjustment
Shoulder straps on expedition packs serve stabilization, not weight-bearing. They should cup your shoulders without digging into your collarbone or compressing the brachial plexus (the nerve bundle that causes numbness in your arms). The S-curve design, contoured to follow the natural shape of female and male shoulders differently, prevents the straight-across pressure of basic straps.
Strap width matters more than padding thickness. A 3-inch wide strap distributes pressure better than a 2-inch strap with twice the foam. The attachment point to the pack body should sit 1-2 inches below your C7 vertebra when properly adjusted, creating a 45-degree angle for the load lifters to function correctly. Too high and the pack pulls backward; too low and it sags forward.
Suspension Systems Demystified
Internal vs External Frames: Modern Realities
The external frame pack isn’t dead—it’s evolved into specialized hunting and military applications where awkward, heavy loads are the norm. For thru-hiking, internal frames dominate because they hug your body for better balance in technical terrain and fit more easily in crowded trailhead shuttles. Modern internal frames use perimeter tubing, vertical stays, and frame sheets in combinations that create structure without weight.
The key distinction: “frame” versus “suspension.” The frame is the rigid structure that prevents collapse; the suspension is the system of straps, belts, and tensioning that connects you to that frame. A pack can have an excellent frame but poor suspension, creating a stable but uncomfortable carry. Expedition-grade packs invest equally in both, often using 7000-series aluminum stays that can be bent to custom-fit your spinal curvature.
Frame Stays, Rods, and Sheets: Load Transfer Explained
Vertical frame stays run parallel to your spine, transferring weight from the pack body to the hip belt. Most expedition packs use two stays, but some heavy-load specialists use three or a single robust stay. The magic happens at the stay-to-belt junction—premium designs channel the stays into reinforced sleeves that integrate directly with the hip belt wings, creating a continuous load path.
Frame sheets, typically made from high-density polyethylene or composite materials, prevent barreling (when the pack bulges outward away from your back). They work with the stays but serve a different purpose: maintaining the pack’s shape and keeping the load close to your center of gravity. Some packs feature removable sheets, letting you shave ounces when carrying lighter loads but reinforcing the structure for heavy food carries.
Dynamic Suspension: Marketing Hype or Real Comfort?
“Dynamic suspension” and “floating packs” promise to move with your body, but the implementation varies wildly. True dynamic systems use pivot points at the hip belt or shoulder harness, allowing the pack to shift slightly as you twist and bend. This reduces the feeling of fighting your pack on scrambles and steep switchbacks, but adds complexity and potential failure points.
For six-month reliability, simpler often proves better. A well-designed static suspension that fits properly beats a complex dynamic system with wear-prone pivots. The exception: hikers with significant back issues sometimes find that a properly tuned dynamic system reduces spinal compression. Test these extensively with realistic loads before committing—they can feel amazing in the store but develop squeaks and looseness after 500 miles.
Weight vs Durability: The Eternal Tradeoff
Fabric Denier: What Those Numbers Actually Mean
Denier measures fiber thickness, not necessarily strength. A 210-denier high-tenacity nylon can outperform 420-denier standard nylon due to tighter weaves and superior yarn quality. Expedition packs typically use 210D-420D for the main body, balancing weight with abrasion resistance, and 500D-1000D for the bottom, side pockets, and high-wear zones.
The weave pattern matters as much as the denier. Ripstop grids prevent small tears from spreading, while plain weaves offer better puncture resistance. Some manufacturers use laminated fabrics with internal reinforcement scrims, creating waterproof barriers that also add tear strength. For six months of continuous use, prioritize packs with reinforced bartacking at all stress points—those zigzag stitch patterns at strap attachments can be the difference between a field repair and a pack replacement.
Reinforcement Zones: Where Packs Fail First
The bottom panel fails first, dragged across rocks and set down on abrasive surfaces 150+ times. Look for double-layer construction with a replaceable “foot” panel. Side pockets rip next, caught on branches and overstuffed with water bottles. The best expedition designs use stretch-woven fabric that gives before tearing, reinforced with bartacked seams.
Hip belt wings develop stress cracks where they attach to the pack body—this is where load concentration meets flex. Premium packs use multiple layers of fabric and reinforced stitching patterns that distribute stress. Shoulder strap attachment points see constant cyclic loading; metal hardware here outlasts plastic, and wide, spread-out attachment patterns prevent the “pull-through” failures common in budget packs.
Access and Organization Strategies
Top-Loading vs Panel-Loading: Trail Implications
Top-loading packs dominate expedition use for good reason: fewer zippers to fail, simpler construction, and better compression. The downside is that everything you need is at the bottom when you need it. Panel-loading packs (with front U-zip access) solve this but introduce zipper failure points and often less structural integrity when partially loaded.
The hybrid approach wins for long trails: a top-loading main compartment with a floating lid, combined with a front vertical zipper for emergency access to mid-pack items. This gives you 90% of the reliability of pure top-loading while saving you from unpacking your entire sleep system to retrieve a first-aid kit. Some designs incorporate a separate sleeping bag compartment with its own zipper, useful for keeping insulation dry but adding another failure point.
Brain Lids, Roll-Tops, and Hybrid Designs
The “brain” (removable top lid) serves multiple functions: weather protection, extra storage, and a daypack conversion on some models. For thru-hiking, a floating lid that adjusts up and down accommodates varying load volumes between resupplies. Detachable brains sound clever but often get left in hiker boxes after the first month when hikers realize the attachment buckles rattle and the extra weight isn’t worth occasional convenience.
Roll-top closures, borrowed from dry-bag design, eliminate zipper failure and provide excellent weather resistance. They work best on packs with side compression straps that secure the rolled section, preventing it from unrolling. The downside: accessing anything requires unrolling, which becomes tedious when you’re grabbing snacks hourly. Some expedition packs use a hybrid roll-top with a small vertical zipper on one side for quick access—a brilliant compromise for long-distance use.
External Pockets and “Brain” Organization
Side pockets must securely hold 1-liter bottles while allowing one-handed access on the move. The best designs use tensioned fabric that grips bottles but releases with a deliberate pull, and angled openings that prevent contents from dumping when you lean forward. Stretch-woven pockets outperform mesh, which snags and tears in brush.
Hip belt pockets should fit a smartphone, snacks, and maybe a small camera without bouncing. Look for pockets with curved zippers that follow the belt’s contour—straight zippers create stress points and fail prematurely. The brain compartment organizes small essentials: headlamp, map, permits, toiletries. Multiple compartments prevent the “dump-and-search” routine that wastes time and scatters gear in wind.
The Hip Belt: Your Weight-Bearing Workhorse
Padded vs Minimalist Hip Belts for Long Distances
Minimalist hip belts, popular in ultralight circles, use 1/4-inch foam and thin webbing. They work for loads under 25 pounds but become instruments of torture at expedition weights. Six months of 30+ pound loads demand substantial padding—minimum 1/2-inch of dual-density foam with a wide, supportive wing that extends 6-8 inches from the center.
The padding density progression matters: firm at the pack connection, medium through the wing, soft at the edges. This prevents the “shelf” effect where a stiff belt digs into your iliac crest. Some expedition belts incorporate gel inserts or air-channel designs, but these add weight and can develop leaks. Simple, high-quality foam with ergonomic shaping outperforms gimmicks over the long haul.
Hip Belt Pockets and Attachment Points
Belt pockets must be accessible without removing the pack or contorting your arms. Position them slightly forward of your hip bones—this keeps them from bouncing while allowing natural arm reach. The pocket opening should face upward at a 30-degree angle, preventing items from spilling when you sit.
Attachment points on the belt serve two purposes: gear loops for carabiners or bear spray, and compression straps for stabilizing the belt itself. Avoid belts with plastic gear loops—they snap under load. Sewn-in webbing loops are lighter and bombproof. Some belts feature removable pockets, letting you customize position or remove them entirely to save ounces on lighter carries.
Removable Hip Belts: Pros and Cons
Removable belts allow pack customization and replacement if damaged. The downside: the attachment system adds weight and potential squeak points. For six-month hikes, integrated belts often prove more reliable—fewer moving parts, no hardware to lose, and a more seamless load transfer. If you choose removable, test the attachment extensively with heavy loads; some systems develop play that creates annoying micro-movements with each step.
Shoulder Straps and Upper Body Comfort
S-Curve vs J-Curve: Ergonomic Differences
S-curve straps follow the natural S-shape of your shoulder and chest, wrapping around pectoral muscles and avoiding the brachial plexus. This design, originally developed for female anatomy, proves superior for most body types on long hikes. J-curve straps offer a simpler, more vertical path that works for narrow, straight torsos but can compress nerves on broader builds.
The curve radius matters more than the general shape. Straps too aggressively curved for your body create pressure points at the bend; too straight and they slip off. When fitting, load the pack and watch where the strap leaves your shoulder—it should make contact for 3-4 inches before curving away, distributing pressure without restricting arm movement.
Strap Width, Padding, and Material Choices
Strap width should match your frame size: 2.5-3 inches for medium builds, 3-3.5 inches for larger frames. Narrow straps on broad shoulders concentrate pressure like a rope; overly wide straps on small frames restrict arm movement and chafe the chest/underarm area. Padding thickness follows the same principle as hip belts: 3/8-inch minimum, with softer foam against the body and firmer foam near the pack.
The fabric covering the foam affects comfort significantly. Brushed tricot feels soft initially but pills and traps sweat. Monofilament mesh stays cooler and dries faster, though it feels less plush. Some expedition straps use spacer mesh—3D woven fabric that creates air channels between foam and cover, dramatically reducing sweat buildup during humid climbs.
Load Lifter Angle and Effectiveness
Load lifters, the small straps connecting the top of the shoulder harness to the pack body, serve to pull the pack’s weight forward onto your hips. For them to work, they must angle between 30-45 degrees from your shoulder. Steeper angles lose mechanical advantage; shallower angles pull the pack into your back instead of up.
The attachment point on the pack body should sit 1-2 inches above your collarbone. Many hikers wear packs too low, rendering load lifters useless. When adjusted correctly, you should feel a gentle lift on your shoulders without the pack pulling away from your back. Test this by loosening the load lifters completely, then slowly tightening until you feel the weight shift—any further tightening just creates pressure.
Ventilation and Back Panel Design
Mesh Suspension Systems: Breathability Tradeoffs
Ventilated back panels, pioneered by brands like Osprey with their Anti-Gravity system, use tensioned mesh to hold the pack away from your back. This creates a 1-2 inch air gap that dramatically reduces sweat in hot climates. The tradeoff: the pack sits further from your center of gravity, requiring more torso strength to control and feeling less stable on technical terrain.
For six-month hikes spanning multiple climates, this tradeoff becomes significant. That ventilation feels divine in the desert but creates a cold air channel in freezing temperatures, chilling your back. Some modular designs allow you to remove the mesh frame sheet, converting to a direct-contact back panel for winter sections. If you choose a ventilated design, ensure the mesh is replaceable—it’s the first component to wear out from friction and UV exposure.
Framed vs Frameless Back Panels
Framed back panels incorporate a solid sheet or ladder of stays that maintain shape regardless of load. This consistency means the pack carries the same way whether stuffed full or nearly empty. Frameless panels rely on your sleeping pad or a foam insert for structure, saving weight but creating a pack whose comfort varies dramatically with loading.
For expedition use, framed panels provide reliability. You know exactly how the pack will feel each morning, regardless of whether you’re carrying 3 days of food or 8. The weight penalty (8-12 ounces) is negligible compared to the comfort consistency. Look for frames with vertical channels or cutouts that reduce weight while maintaining rigidity—honeycomb-patterned HDPE sheets offer an excellent strength-to-weight ratio.
Weather Protection Strategies
Waterproof Fabrics vs Pack Covers
Cuben Fiber (now Dyneema Composite Fabric) and laminated nylons offer true waterproofing at the fabric level. However, seams remain vulnerable unless taped, and waterproof zippers add cost and stiffness. Most “waterproof” packs are more accurately “highly water-resistant,” handling rain but failing in full submersion or prolonged downpours.
Pack covers, the rain-fly for your backpack, add 4-8 ounces but provide comprehensive protection. Their fatal flaw: they catch wind like a sail, and in heavy brush, they tear and snag. Many thru-hikers abandon them in favor of a liner system. If you choose a cover, get one with an elasticized edge and multiple attachment points—simple drawstring designs blow off in the first storm.
Liner Systems: The Thru-Hiker’s Secret Weapon
The most reliable waterproofing strategy uses a trash compactor bag (thick, 2-3 mil plastic) as a liner inside the main compartment. This weighs 2 ounces, costs pennies, and can be replaced every few weeks when it develops holes. Critical gear goes in waterproof stuff sacks inside the liner for redundancy. This system accepts that your pack will get wet but keeps your insulation and electronics dry.
Some expedition packs now integrate removable waterproof liners—essentially a pack within a pack. While clever, they add weight and complicate packing. The trash bag method, despite its inelegance, allows you to pack quickly and see all your gear at once. For external pockets, use silnylon or Dyneema stuff sacks that clip inside the pocket, keeping contents dry while allowing drainage.
Modular Systems and Customization
Removable Components: Shaving Ounces
The ability to remove the brain, hip belt pockets, frame stays, and even shoulder straps appeals to the ultralight mindset. In practice, most thru-hikers configure their pack once at the start and never modify it. The time spent removing and storing components rarely justifies the minimal weight savings. However, removable frame stays are valuable—if one bends in a fall, you can replace it in town rather than retiring the entire pack.
Focus on modularity that enhances function, not just saves weight. Removable hip belt pockets that convert to a hip pack for town runs are genuinely useful. Lids that become summit packs work well for side trips. Avoid packs where critical structural components are removable—the temptation to leave them behind “just for this section” can lead to injury when you inevitably need them.
Compression Systems and Load Stability
Compression straps do more than reduce volume—they stabilize the load, preventing gear from shifting and throwing off your balance. Vertical side compression straps should anchor at multiple points, allowing you to compress a half-full pack without creating dead space. Horizontal straps across the front prevent barreling and keep the load close to your spine.
The best expedition designs use a “cinch-and-strap” system: a drawstring closure on the main compartment that compresses the load inward, followed by external straps that secure everything in place. This creates a solid, non-shifting mass that feels like part of your body. Avoid packs with compression straps that only attach to the brain—these pull upward, not inward, and do little to stabilize heavy loads.
Gear Attachment Points: Daisy Chains and Beyond
Daisy chains (the webbing loops running vertically on pack fronts) offer infinite lashing options for bulky items like crampons or snowshoes. For thru-hiking, they’re less critical but still useful for carrying wet tents or foam pads. Horizontal “gear loops” on the hip belt work better for frequently accessed items like bear spray or water bottles.
Ice axe loops and shaft holders, while designed for mountaineering, prove invaluable for trekking poles on technical sections where you need your hands free. Look for packs with removable bungee systems on the front—useful for drying damp clothing while hiking, but easily removed when not needed. The key is having options without clutter; too many attachment points create snag hazards in dense vegetation.
Gender-Specific and Body Type Considerations
Women’s Specific Designs: More Than Just Colors
Women’s packs address real anatomical differences: narrower shoulder width, shorter torso lengths, wider hip angles, and chest contours. The hip belt sits differently on female pelvises, requiring a more pronounced curve and different padding distribution. Shoulder straps use an S-curve that routes around the chest rather than compressing it.
However, “women’s specific” is a starting point, not a prescription. Many women with broader shoulders or longer torsos fit better in men’s packs, and many slender men prefer women’s designs. The key is ignoring labels and focusing on measurements. Try both versions if possible; the pack doesn’t care about your gender, only your geometry.
Adjustable Torso Systems for Body Changes
During a six-month hike, your body will shrink and reshape. Adjustable torso systems, once a budget feature, become essential for long trails. Look for ladder-style adjustments that offer 4-6 inches of range in one-inch increments. The adjustment mechanism should be simple enough to modify with cold fingers but secure enough to never slip under load.
Some premium packs use tool-free adjustments with locking cams; others require a screwdriver or Allen key. While tool-free is convenient, the simpler screw-through-hole systems often prove more reliable over time. The adjustment points should sit away from your spine, preventing pressure points. Test the system fully extended and fully collapsed—some packs develop weird geometry at extremes that compromises comfort.
Budget Realities and Investment Value
Price Tiers and What You’re Paying For
Expedition packs cluster in three tiers: $200-300 (entry-level expedition), $300-450 (mid-range workhorses), and $450+ (premium materials and features). The entry tier offers durable fabrics and basic suspension but uses heavier materials and simpler hip belts. These packs weigh 4.5-6 pounds but will survive the trail. They’re ideal for hikers uncertain about future use or on tight budgets.
The mid-range ($300-450) represents the sweet spot for most thru-hikers. You get 210D-420D body fabrics, adjustable suspensions, replaceable components, and weight in the 3.5-4.5 pound range. These packs offer 90% of premium performance at 60% of the cost. The $450+ tier buys Dyneema fabrics, sub-3-pound weights, and sophisticated suspension tuning. The performance gains are real but diminishing—perfect for those where every ounce matters or who plan multiple expeditions.
Warranty and Repair Programs Worth Considering
A lifetime warranty means nothing if the company takes three months to repair your pack mid-hike. Research manufacturers with responsive repair programs and authorized repair centers near major trails. Some companies offer “thru-hiker” expedited service, understanding that time off-trail costs money and momentum. Others provide field repair kits with buckles, straps, and fabric patches.
Pay attention to user-replaceable components. Buckles that can be swapped without sewing, hip belts and shoulder straps that detach with simple hardware, and frame stays available as spare parts extend pack life indefinitely. A $50 replacement hip belt beats a $400 new pack when yours fails at mile 1,200. Companies that sell spare parts directly to consumers demonstrate confidence in their designs and respect for long-term users.
The Fitting Process: In-Store and At-Home Methods
The Goldilocks Method: Finding Your Perfect Match
Professional fitting at a specialty store provides invaluable expertise, but the real test happens at home. Start with the pack empty, adjusting torso length and hip belt position. Add 15 pounds of weight (bags of rice work perfectly) and walk around your neighborhood for 30 minutes. Pay attention to hot spots forming, not immediate comfort. A pack that feels perfect for 5 minutes can reveal pressure points after 30.
The next day, load it with 30 pounds (your realistic maximum) and repeat. This time, climb stairs, bend to tie shoes, simulate reaching for water bottles. The pack should move with you, not against you. Check for noise—creaks and squeaks amplify over thousands of steps. If possible, borrow the pack for a weekend overnight trip. Most quality retailers allow this, understanding that a $400 purchase deserves real-world testing.
Load Testing: Simulating Trail Conditions
Create a realistic load profile: sleeping bag and pad (bulk), tent (dense), food bag (heavy and awkward), water (liquid weight), and random gear filling the spaces. This mimics how weight distributes in real use, not how perfectly balanced sandbags sit in a store. Walk up and down stairs, jog briefly, and practice taking the pack on and off. The process should feel intuitive, not like wrestling an octopus.
Check weight distribution with a friend or mirror. The pack should sit upright, not pulling you backward. The load should feel centered over your hips, with shoulder straps making contact but not bearing weight. If you feel pressure on your shoulders, tighten the hip belt first, then the load lifters. If that fails, the pack doesn’t fit—no amount of strap adjustment fixes a fundamental size mismatch.
Breaking In Your Pack and On-Trail Adjustments
The Myth of Pack Break-In
Packs don’t break in like boots—their structure is designed to remain stable. What changes is your body’s adaptation and your learning of adjustment nuances. The foam softens slightly, and the fabric develops a slight “set” from repeated loading, but a pack that hurts in Week 1 will hurt in Week 20, just more familiarly. Comfort should be immediate, with refinement over time.
What does improve is your ability to pack efficiently and adjust for conditions. You’ll learn to position your sleeping pad for optimal back panel feel, to tighten straps in a specific sequence, to recognize when hip belt pressure means “tighten” versus “loosen.” The pack remains constant; your mastery evolves. Don’t accept discomfort hoping it will disappear—it won’t.
Daily Adjustment Strategies for Changing Conditions
Your pack adjustments should change throughout the day. Start with the hip belt snug but not tight, load lifters engaged, and shoulder straps lightly tensioned. As you warm up and your hips settle, tighten the belt a half-inch. Before steep climbs, loosen the hip belt slightly and tighten shoulder straps to bring weight higher. For descents, do the opposite—tighten the belt and loosen shoulder straps to lower your center of gravity.
Hot spots require immediate attention, not endurance. A slight hip belt adjustment, repositioning a strap by a quarter-inch, or shifting gear inside can prevent a blister-like sore that festers for weeks. Carry a small piece of closed-cell foam to place between strap and skin as a temporary pressure relief. Your pack is a dynamic system, not a static load—treat it as such.
Maintenance and Repair in the Field
Common Field Repairs Every Thru-Hiker Should Know
A broken buckle ends your hike if you can’t fix it. Carry spare buckles that match your pack’s size (measure before leaving) and learn to replace them using a lighter to melt the webbing end, preventing fray. Tenacious Tape, a strong adhesive fabric patch, repairs holes in minutes and lasts for hundreds of miles. Dental floss makes surprisingly strong thread for sewing torn seams—its wax coating helps it slide through fabric.
Frame stay issues require creativity. A bent stay can sometimes be straightened by wedging it between rocks and carefully bending it back. If it snaps, a sturdy stick carved to length and lashed in place with duct tape can get you to town. The key is carrying repair materials: 10 feet of duct tape wrapped around your trekking pole, a needle and floss, Tenacious Tape, and spare hardware. These weigh ounces but save pounds of misery.
Cleaning and Care for Longevity
Salt from sweat degrades fabrics and corrodes hardware. Monthly, rinse your pack in a bathtub or stream (use biodegradable soap sparingly). Pay attention to hip belt padding and shoulder straps where salt accumulates. Never machine wash—agitators destroy stitching and delaminate waterproof coatings. Air dry completely in shade; UV damages nylon and fades colors.
Lubricate zipper sliders with a graphite pencil or specialized zipper wax monthly. Check all stitching for fraying, especially at stress points. A dab of Seam Grip on worn stitches prevents unraveling. Store your pack loosely stuffed, not compressed, when in town to maintain foam loft. These simple habits can double your pack’s trail life.
When to Replace Your Expedition Pack
Warning Signs of Pack Failure
Catastrophic failures announce themselves early: a buckle cracking, fabric tearing at a stress point, a stay poking through its sleeve. More insidious is gradual suspension breakdown. Foam compresses permanently, losing its rebound. Frame stays develop micro-cracks that reduce their stiffness. Webbing loses tensile strength from UV exposure and abrasion.
Pay attention to comfort changes not explained by body adaptation. If your trusted pack suddenly develops pressure points after months of comfort, the suspension may be failing. Check for permanent hip belt deformation—if it no longer springs back to shape when unloaded, it’s not distributing weight properly. Visible UV fading indicates deeper material degradation.
Mileage Benchmarks for Replacement
Quality expedition packs survive 3,000-5,000 miles of trail use before critical failure. This covers a single PCT or AT thru-hike with life left, but a triple crown aspirant will need replacement mid-journey. Budget for a new pack every 4,000 miles as insurance. Some hikers push packs to 7,000+ miles, but by then they’re carrying a shadow of the original suspension.
If you’re hiking a single long trail, a quality pack should last the entire journey. Start with new gear—don’t tempt fate with a pack that’s already seen 2,000 miles. The $300-400 investment pales compared to the cost of leaving trail for a replacement or enduring 1,000 miles of increasing discomfort. Your pack is your home; don’t start with a fixer-upper.
Frequently Asked Questions
How do I know if my pack is too heavy before I even start?
If your empty pack weighs over 5 pounds, scrutinize every feature. Modern expedition packs under 4 pounds offer the same durability and comfort. Weigh each component—brain, frame stays, hip belt pockets. If removing them saves significant weight you’ll never miss, consider a simpler design. Your loaded pack should never exceed 20% of your body weight for a six-month hike.
Can I use a lighter pack if I’m going ultralight?
Yes, but define “ultralight” honestly. If your base weight is truly under 10 pounds and you’ve tested 25-pound total loads in that pack for multi-day trips, it can work. The danger is resupply variability—your 1.5-pound pack handles 25 pounds beautifully but suffers at 35. Six months introduces variables; build in a 5-pound buffer when choosing pack capacity and suspension.
How often should I adjust my pack during the day?
Check your adjustments every 2-3 hours or after significant elevation changes. Hip belts loosen as you move and compress clothing. Shoulder straps stretch slightly. A quick 30-second tune-up prevents hot spots. Before long breaks, fully loosen all straps to restore circulation, then retighten systematically when you resume.
What’s the single most important fit measurement?
Hip belt placement overrides everything. Even with a perfect torso length, if the belt sits too high (on your waist) or too low (on your glutes), weight transfer fails. The belt’s center should align with your iliac crest, with padding extending 3 inches above and below. All other adjustments cascade from this foundation.
Should I choose a pack with a ventilated back for desert hiking?
Ventilation helps in hot, dry conditions, but consider the entire trail. If you’re hiking the PCT, the desert section lasts 700 miles; the Sierra and Washington are cold. A ventilated pack in snow feels like carrying a refrigerator on your back. Choose based on the majority of conditions, and manage heat with moisture-wicking clothing instead.
How do I prevent hip belt chafing over thousands of miles?
Keep the belt clean—salt buildup is the primary chafe culprit. Apply anti-chafe balm (Body Glide, Squirrel’s Nut Butter) to your hips before hiking, not after you feel irritation. Wear seamless, synthetic underwear with a low profile. If chafing persists, a thin layer of closed-cell foam between belt and body, cut from a sleeping pad, can redistribute pressure.
Are load lifters necessary on an expedition pack?
Absolutely. Without load lifters, the pack pulls backward and rests on your lower back rather than your hips. They should angle 30-45 degrees from your shoulder to the pack. If your pack lacks load lifters or they attach at the wrong angle, you’ll fight the pack all day. This is non-negotiable for loads over 25 pounds.
Can I repair a torn pack fabric in the field?
Yes. Clean the area, apply Tenacious Tape to both sides for a permanent-feeling repair. For larger tears, sew with dental floss using a baseball stitch, then tape over the seam. Carry a small piece of fabric from the pack manufacturer (request this when purchasing) for color-matched repairs. Avoid duct tape on fabric—it leaves residue and fails quickly under flex.
How do I know when it’s time to replace my hip belt?
When the foam no longer rebounds after unloading, or you can feel the internal stiffener through compressed padding, replacement is due. Also replace if the belt develops permanent creases or cracks in the fabric covering. A failing hip belt transfers weight to your shoulders, creating a cascade of discomfort. Most manufacturers sell replacement belts for $40-60.
Is a $500 pack really worth it for one thru-hike?
The math: a $500 pack that lasts 4,000 miles costs $0.125 per mile. A $200 pack that fails at 1,500 miles costs $0.133 per mile, plus the expense of in-town replacement and shipping. Premium packs offer better resale value post-hike (often 60-70% of retail) and superior warranty support. The real value is comfort—$300 extra for a pack that doesn’t cause pain is the best investment you’ll make.
See Also
- 10 Best Frameless Backpacks for Appalachian Trail Thru-Hikes in 2026
- 10 Most Comfortable Kids Camping Backpacks for All-Day Hikes
- We Tested 50 Expedition Backpacks—Here Are the 10 Best for Arctic Treks in 2026
- 10 Most Comfortable Internal Frame Backpacks for Plus-Size Hikers in 2026
- 10 Expedition Backpacks That Fit in Small Bush-Plane Overhead Bins in 2026