Table of Contents
The moment you shoulder your pack and step onto the trail alone, something shifts. The world gets bigger, your senses sharpen, and every piece of gear you carry becomes more than equipment—it’s your safety net, your shelter, your home. For solo female backpackers, the weight of this responsibility feels particularly real, especially when the weather turns and daylight fades. That’s why quick-setup tarp tents have become the secret weapon of experienced women on the trail: they offer freedom without sacrificing security, and speed without compromising protection.
But not all tarp shelters are created equal, and what works for a duo on a casual weekend might leave you exposed and anxious when you’re solo. This guide dives deep into the configurations, features, and skills that transform a simple piece of fabric into a reliable sanctuary. We’ll explore how to choose systems that prioritize your specific needs—whether that’s a 90-second pitch in a downpour, discreet camping near trailheads, or the confidence that comes from gear you can trust with your life.
Top 10 Tarp Tent Shelters
Detailed Product Reviews
1. FREE SOLDIER Waterproof Portable Tarp Multifunctional Outdoor Camping Traveling Awning Backpacking Tarp Shelter Rain (Brown 10×10.5ft)
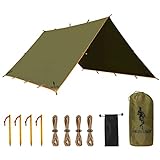
Overview: The FREE SOLDIER tarp targets serious outdoor enthusiasts who prioritize durability over ultralight weight. Measuring 118" × 126" and weighing 1.2kg, this 210T ripstop polyester shelter offers robust protection for two people. Its brown color provides natural camouflage, while the 2500 PU waterproof rating handles moderate to heavy rainfall. Designed for versatility, it functions as a hammock rain fly, ground sheet, or standalone awning.
What Makes It Stand Out: Heat-sealed seams and reinforced ridgeline construction set this apart from budget alternatives. The 19 guy points plus 5 grommet locations create exceptional setup flexibility for complex configurations. The puncture-resistant fabric undergoes a melting process that eliminates water penetration at seams—a critical feature for extended storms. This engineering focus on structural integrity makes it reliable for multi-day expeditions.
Value for Money: At its price point, this tarp delivers professional-grade weather protection that rivals premium brands costing significantly more. The included four nylon guy lines with tensioners and stuff sack add immediate value. While heavier than minimalist options, the trade-off is legitimate durability. You’re investing in fabric thickness and reinforced stress points that prevent catastrophic failure when conditions deteriorate.
Strengths and Weaknesses: Pros include exceptional seam construction, multiple attachment points for versatile pitching, true waterproof performance, and reinforced fabric that withstands abrasion. Cons are its weight (42oz) which may deter ounce-counting backpackers, the single color option, and the 2500mm rating which lags behind some competitors offering 3000mm+. The size may also prove excessive for solo ultralight hikers.
Bottom Line: Ideal for car campers, hunters, and backpackers who value bombproof construction over minimal weight. If you expect harsh weather and need a tarp that won’t fail, this is your reliable companion. Not for ultralight purists, but perfect for those who’ve experienced gear failure at the worst possible moment.
2. Azarxis Waterproof Camping Tent Tarp Hammock Rain Fly Footprint Ground Cloth Shelter Sunshade Beach Picnic Blanket Mat for Outdoor Camping Park Lawn (Army Green, 5 x 7 ft)

Overview: The Azarxis tarp serves as an entry-level, multi-purpose ground cloth and minimalist shelter for casual outdoor activities. Available in three sizes, this 5x7ft version uses 420D Oxford cloth with professional waterproof treatment. Weighing significantly less than heavy-duty alternatives, it packs into an included storage pouch for effortless transport. The army green color and metal grommets provide basic functionality for picnics, beach outings, and light camping.
What Makes It Stand Out: Its primary distinction lies in accessibility—multiple size options at an extremely competitive price point. The 420D Oxford construction offers decent durability for the weight and cost. Metal grommet eyelets provide reliable tie-down points compared to plastic alternatives common in this price range. The versatility to function as tent footprint, picnic blanket, or sunshade makes it appealing for families seeking one item for various weekend uses.
Value for Money: This represents exceptional budget value. You’re getting a functional waterproof barrier for less than the cost of a restaurant meal. While it won’t withstand alpine conditions, it adequately protects against morning dew, light rain, and ground moisture. For occasional campers or festival-goers, the cost-per-use ratio is outstanding. Comparable products from outdoor brands cost 2-3 times more for similar specifications.
Strengths and Weaknesses: Pros include affordability, compact packed size, lightweight design, multiple size options, and simple setup. Cons are the unspecified waterproof rating (likely lower than premium options), limited attachment points, basic construction without reinforced seams, and smaller dimensions that restrict coverage. The fabric, while durable, lacks the ripstop grid of more expensive tarps.
Bottom Line: Perfect for beginners, families, and fair-weather adventurers who need basic protection without breaking the bank. Don’t expect it to survive a monsoon, but for beach days, park picnics, and summer car camping, it delivers exactly what you pay for. Upgrade if you face serious weather regularly.
3. Unigear Hammock Rain Fly Waterproof Tent Tarp, 9.8x9.8ft, UV Protection and PU 3000mm Waterproof, Lightweight for Camping, Backpacking and Outdoor Adventure

Overview: Unigear’s 9.8x9.8ft tarp strikes an impressive balance between weight savings and weather protection for hammock campers and backpackers. Constructed from 210D rip-stop Oxford fabric with a 3000mm PU waterproof rating, this 10x10ft shelter provides robust defense against heavy rain and wind. The package includes six stakes and ropes, enabling immediate deployment. Its square design suits various pitch configurations from A-frame to diamond setups.
What Makes It Stand Out: Triangle dual-layer reinforcement at all eight fix points prevents the ripping and leaking that plague lesser tarps. Double-stitched reinforcement throughout stress zones ensures longevity despite repeated tensioning. The PU inner coating delivers UV protection beyond simple water resistance. This attention to critical failure points demonstrates Unigear’s understanding of real-world backpacking abuse where guy-out points endure constant stress.
Value for Money: Positioned in the mid-range price bracket, this tarp offers premium features typically found in higher-priced alternatives. The included aluminum stakes and reflective guy lines eliminate hidden costs. With a 3000mm waterproof rating—exceeding many competitors’ 2000mm standards—you’re getting genuine three-season protection. The weight-to-durability ratio makes it suitable for both weekend warriors and extended trail users.
Strengths and Weaknesses: Pros include excellent reinforcement at attachment points, high waterproof rating, lightweight portability, included accessories, and UV protection. Cons are limited color choices, the square shape may not provide optimal coverage for some hammock setups, and the 210D fabric, while durable, isn’t as puncture-resistant as heavier options. Some users may prefer more than eight tie-out points for complex pitches.
Bottom Line: An excellent choice for serious hammock campers and lightweight backpackers seeking reliable storm protection without excessive weight. The reinforced construction addresses common failure modes, making it trustworthy for remote adventures. If your trips involve unpredictable mountain weather, this tarp deserves serious consideration.
4. VEVOR Carport Replacement Canopy Cover Top + Side Wall 10 x 20 ft, Garage Tent Shelter Tarp Heavy-Duty Waterproof & UV Protected, Easy Installation with Ball Bungees,Grey (Frame Not Included)

Overview: This VEVOR product is specifically a replacement canopy cover for existing 10x20ft carport frames—not a portable camping tarp. Constructed from 210g PE woven plastic (top) and 180g PE side panels, it features a 16x16 weave pattern with double-layer heat-sealed seams. The five-panel front door includes dual zippers for access. Designed for semi-permanent installation, it provides vehicle storage and event shelter solutions.
What Makes It Stand Out: The 5-panel door configuration with dual zippers offers superior accessibility compared to single-panel designs. UV50+ protection combined with PU waterproof coating on both sides ensures year-round weather resistance. The 16x16 weave pattern creates a dense, water-shedding surface that prevents pooling. Velcro attachments and ball bungees facilitate tool-free installation, making it practical for DIY replacement of worn canopy covers.
Value for Money: As a replacement cover, it delivers significant savings versus purchasing a complete new carport system. The heavy-duty PE construction matches or exceeds original equipment quality on many consumer-grade carports. However, the “frame not included” limitation means hidden costs if you don’t already own a compatible structure. For those needing replacement, it’s priced competitively against OEM parts while offering enhanced UV protection.
Strengths and Weaknesses: Pros include durable PE construction, excellent UV protection, easy installation system, reinforced seams, and versatile application for storage or events. Major cons: requires existing frame (not a standalone product), not portable for camping, unsuitable for arch-shaped frames, and the 2-4 inch gap needed for bungee tension may reduce weather protection. The weight and packed size make it impractical for backpacking.
Bottom Line: Only purchase this if you own a compatible 10x20ft carport frame needing replacement. It excels as a durable, weather-resistant cover for vehicle storage or backyard events. Do not mistake this for a camping tarp—it’s a semi-permanent structure component. For its intended purpose, it’s a cost-effective, quality replacement.
5. GEERTOP 17 × 10 ft Large Camping Tent Tarp Outdoor Waterproof Flame Retardant Hammock Rain Fly Backpacking Tent Tarp Shelter for Hiking Travel Picnic(Not Includes Poles)
Overview: GEERTOP’s massive 17x10ft tarp redefines group shelter possibilities while maintaining a remarkable 3.3-pound weight. Made from thickened 210T polyester with PU3000mm waterproofing and UV50+ protection, it covers four-person tents, double hammocks, or vehicles with ease. The included eight reflective ropes and aluminum stakes enable rapid setup. Notably, it’s flame-retardant—a rare safety feature in recreational tarps. Poles are not included, requiring creative pitching or separate purchase.
What Makes It Stand Out: The size-to-weight ratio is exceptional, offering nearly double the coverage of standard 10x10ft tarps for only marginally more weight. Flame-retardant treatment provides critical safety when cooking underneath or using near campfires—addressing a genuine hazard most manufacturers ignore. The 210T polyester with thickened treatment balances durability and packability. Eight reflective guy lines enhance nighttime visibility, reducing trip hazards in busy campsites.
Value for Money: Despite premium materials and massive coverage, this tarp remains competitively priced against smaller, less-featured alternatives. The flame-retardant treatment alone justifies the cost for safety-conscious campers. While poles aren’t included, the savings versus buying a comparable pre-configured shelter system are substantial. For group leaders or families, one tarp replaces multiple smaller units, offering excellent economies of scale.
Strengths and Weaknesses: Pros include extraordinary coverage area, lightweight for size, flame-retardant safety rating, high waterproof/UV protection, and included quality stakes/ropes. Cons: poles must be purchased separately, the large footprint requires ample campsite space, and setup complexity increases with size. Solo backpackers will find it overkill, and the thin fabric, while durable, demands careful handling to avoid punctures.
Bottom Line: The ultimate choice for group camping, family outings, or basecamp setups where space and safety matter. The flame-retardant feature makes it uniquely suitable for kitchen shelters. If you need maximum coverage without maximum weight and prioritize fire safety, this tarp is unmatched. Not for minimalists, but essential for expedition leaders and car camping families.
6. Rhino Valley Waterproof Tent Tarp, 9.8 × 9.8 Ft Large Outdoor Shelter Cover with Light Strings, Lightweight Portable Tarp Shelter Rain Tarp Camping Canopy for Hiking Traveling Backpacking, Black

Overview: The Rhino Valley Waterproof Tent Tarp merges traditional shelter functionality with integrated ambient lighting for a distinctive camping experience. This 9.8×9.8 ft square tarp features built-in LED light strings that create a cozy atmosphere after sunset. Constructed from tear-resistant polyester with waterproof coating, it comfortably accommodates 2-3 people while offering versatile setup options for various outdoor scenarios.
What Makes It Stand Out: The integrated light strings differentiate this tarp from conventional shelter options. The 10-meter illumination system clips directly to the tarp edges, eliminating separate lighting gear requirements. Twenty fixing clips and six reinforced guy lines enable multiple pitching configurations, while four ground stakes ensure stability across diverse terrain. This all-in-one design simplifies campsite lighting management.
Value for Money: Purchasing a comparable tarp and separate string lights typically costs 20-30% more than this integrated package. The comprehensive accessory bundle—stakes, ropes, clips, and lighting system—eliminates additional purchases. Multi-functionality as a picnic mat or ground sheet enhances utility, making it economical for recreational campers who prioritize evening ambiance without complexity.
Strengths and Weaknesses: Strengths include unique lighting integration, complete accessory package, versatile setup options, and decent polyester durability for casual use. The lightweight design suits travel applications. Weaknesses involve potential moisture vulnerability of electrical components if improperly maintained, limited brand reputation data, and fixed dimensions that may not fit all hammock configurations. The light strings require power management and add minimal weight.
Bottom Line: Ideal for car campers and festival-goers valuing atmosphere alongside functionality. The Rhino Valley tarp excels at creating inviting evening spaces, though ultralight backpackers may prefer simpler alternatives. A solid choice for recreational users seeking ambiance without added complexity.
7. KALINCO Waterproof Camping Tarp Tent Hammock Rain Fly, 10X10FT/10X15FT, Mutifunctional Tent Footprint Lightweight Tarp for Camping, Hiking and Survival Shelter

Overview: KALINCO’s Waterproof Camping Tarp delivers professional-grade protection in an ultralight package. Available in 10×10 ft or 10×15 ft sizes, this 210T polyester tarp features a 3000mm PU waterproof rating with taped seams for reliable shelter. Weighing merely 1.8 pounds, it serves backpackers seeking maximum versatility without bulk, functioning as a rain fly, footprint, or survival shelter.
What Makes It Stand Out: Nineteen reinforced attachment loops, including three along the ridgeline, provide exceptional pitching flexibility. Double-stitched reinforcement at all stress points prevents ripping under tension—critical for survival scenarios. Quick-drying fabric maintains performance during extended wet weather, while the comprehensive guy line system enables complex configurations from simple A-frames to plow point setups.
Value for Money: At its price point, KALINCO offers specifications comparable to premium brands costing twice as much. Six stakes, guy lines, and a storage bag eliminate additional purchases. The 10×15 ft option provides exceptional coverage-per-dollar for group camping or basecamp setups, making it economical for serious outdoor enthusiasts who need reliable, adaptable shelter systems without brand premiums.
Strengths and Weaknesses: Strengths include extensive tie-out points, robust waterproofing, lightweight design, and multi-functional versatility. Reinforced stitching and quality materials ensure longevity. Weaknesses involve limited brand recognition versus established competitors, potential color fading with prolonged sun exposure, and the 10×10 ft size feeling cramped for two people plus gear. Included stakes are adequate but not exceptional.
Bottom Line: An excellent choice for backpackers and survivalists prioritizing functionality over brand prestige. KALINCO’s tarp punches above its weight class in durability and features, making it a smart investment for frequent adventurers who demand adaptable shelter systems.
8. Amazon Basics Waterproof Camping Tarp, 9.5 Feet x 11.3 Feet, Dark Green

Overview: The Amazon Basics Waterproof Camping Tarp provides reliable, no-frills protection for budget-conscious outdoor enthusiasts. Measuring 9.5×11.3 ft, this dark green tarp utilizes rip-stop polyethylene fabric with dual-sided lamination for waterproof performance. As an Amazon brand product, it offers predictable quality and customer service backing for occasional campers and emergency preparedness kits.
What Makes It Stand Out: Reinforced rip-stop construction prevents tear propagation—crucial for maintaining shelter integrity in harsh conditions. Strategically placed grommets at corners and edges provide secure tie-down points without premium pricing. Amazon’s streamlined distribution ensures consistent availability and straightforward returns, removing purchase risk for casual users who need dependable basic protection without specialized features.
Value for Money: This tarp represents exceptional value, typically priced 40-50% below specialized outdoor brands. While lacking advanced features like reinforced tie-out loops or UV coatings, it delivers fundamental weather protection effectively. Versatility for car covers, firewood protection, and ground sheets maximizes utility per dollar, making it ideal for multi-purpose home and outdoor use rather than technical backpacking.
Strengths and Weaknesses: Strengths include affordable pricing, durable rip-stop material, reinforced corners, and Amazon’s customer support. Polyethylene construction offers robust waterproofing for typical camping scenarios. Weaknesses involve heavier weight compared to polyester alternatives, limited attachment points restricting pitching options, and absence of specialized coatings for UV or extreme weather. The basic design prioritizes cost savings over technical performance.
Bottom Line: Perfect for backyard camping, emergency preparedness, or vehicle storage needs. While not suited for ultralight backpacking, it provides dependable protection for recreational users who camp occasionally and value simplicity and savings over advanced technical features.
9. Waterproof Camping Tarp 10 x 10ft Survival Tent Backpacking Portable Tarp Multifunctional Anti-UV Shelter for Outdoor (Mud Green)

Overview: AICALL’s Waterproof Camping Tarp balances technical performance with practical portability in a 10×10 ft package. Constructed from 150D ripstop polyester with a 3000mm PU rating and UV50+ protection, this mud green tarp addresses multiple environmental challenges. Eight aviation-grade aluminum stakes and eight 4-meter guy lines provide comprehensive setup options for varied terrain and weather conditions.
What Makes It Stand Out: The UV50+ sun protection coating distinguishes this tarp from waterproof-only alternatives, making it ideal for exposed beach or desert camping. Nylon webbing reinforcement at all 19 hanging points ensures stability in high winds, while double-needle seam construction enhances tear resistance. The included aluminum stakes offer superior strength-to-weight ratio compared to typical steel pegs, reducing pack weight without sacrificing holding power.
Value for Money: This mid-priced tarp includes premium accessories that would cost $15-25 separately, adding significant value. The combination of UV protection, robust waterproofing, and quality hardware positions it competitively against higher-priced alternatives. At 2.2 pounds, it strikes an excellent balance between durability and portability for the feature set, making it economical for UV-conscious adventurers.
Strengths and Weaknesses: Strengths include comprehensive UV protection, quality aluminum stakes, dense fabric construction, and versatile setup configurations. Reinforced stress points and quality coatings ensure reliable performance. Weaknesses involve AICALL’s limited market presence and warranty support compared to established brands. The mud green color may absorb more heat than lighter alternatives, and the 10×10 ft size requires careful pitching for two-person hammock coverage.
Bottom Line: A strong contender for campers seeking sun and rain protection without premium pricing. The AICALL tarp suits beach camping, desert expeditions, and tropical environments where UV exposure rivals precipitation concerns, offering professional features at a mid-market price.
10. FREE SOLDIER Camping Tarp Waterproof Portable Multifunctional Outdoor Camping Traveling Awning Backpacking Shelter Rain Tarp (Brown 13×13ft)

Overview: The FREE SOLDIER Camping Tarp delivers military-inspired durability in an expansive 13×13 ft footprint. Weighing just 2.65 pounds despite generous dimensions, this brown tarp shelters two people plus gear comfortably. The 150D ripstop polyester construction features heat-sealed seams and a 3000mm PU waterproof rating for reliable all-weather performance in demanding conditions.
What Makes It Stand Out: The oversized coverage area distinguishes this tarp from standard 10×10 ft models, enabling more comfortable group shelter or comprehensive hammock protection. Heat-sealed ridgeline seams prevent connector failure during continuous storms—a critical feature for extended backcountry stays. The tactical aesthetic appeals to bushcraft enthusiasts and survivalists seeking authentic gear styling with professional-grade construction methods.
Value for Money: Few tarps offer this square footage at such low weight and price. The 13×13 ft dimension provides 69% more coverage than standard models while adding minimal cost. Nineteen guy points and five reinforced grommet points enable professional-grade pitching configurations typically found in premium brands costing significantly more, making it economical for space-conscious adventurers.
Strengths and Weaknesses: Strengths include exceptional size-to-weight ratio, robust heat-sealed construction, comprehensive attachment options, and military-grade aesthetics. Ripstop fabric and reinforced seams ensure durability. Weaknesses involve the brown color showing dirt readily, potential complexity for beginners managing numerous guy points, and the size potentially being overkill for solo ultralight hikers. The 2.65-pound weight, while impressive for its size, may still deter absolute ounce-counters.
Bottom Line: Excellent for basecamp setups, duo backpacking, or survival scenarios requiring maximum coverage. The FREE SOLDIER tarp serves hunters, bushcrafters, and group campers who prioritize space and durability over minimalist weight savings, delivering professional features with tactical styling.
Why Tarp Tents Are a Game-Changer for Solo Female Backpackers
When you’re the only one responsible for setup, every second counts. Traditional tents with their color-coded poles and finicky rainflies can feel like solving a puzzle while your hands freeze. Tarp tents strip away complexity without stripping away protection. Their modular nature means you’re carrying only what you need, and many configurations can be pitched with a single trekking pole—a crucial advantage when you’re managing everything alone.
The psychological benefit is just as important as the practical one. There’s something profoundly empowering about mastering a shelter system that relies on your skill rather than a manufacturer’s engineering. You learn to read terrain, predict weather, and adapt on the fly. This confidence compounds with each trip, turning the anxiety of solo camping into the anticipation of solitude.
Understanding the 10 Core Quick-Setup Configurations
Before diving into features, you need to understand the fundamental shelter shapes that experienced backpackers rely on. Each configuration offers different trade-offs between setup speed, weather resistance, and livable space.
The Classic A-Frame: Your Reliable Foundation
The A-frame remains the gold standard for quick deployment because it requires minimal stakes and uses simple geometry. You’ll need two anchor points—trees, trekking poles, or a combination—and a rectangular tarp. The key to speed lies in pre-attaching guy-lines with tensioners and using a continuous ridgeline that you can slide the tarp along. For solo use, a 9x7 foot tarp creates a snug but adequate space, pitching in under two minutes once you’ve practiced the sequence.
Pyramid and Teepee Variants: Maximum Weather Protection
These shapes excel in serious weather, shedding wind and snow efficiently. The single central support (your trekking pole) makes them incredibly fast to erect—simply stake the four corners, insert the pole, and tension. The learning curve involves perfecting the stake placement geometry, but once mastered, you can achieve a taught pitch in under 90 seconds. The enclosed feeling also provides psychological security that many solo female backpackers appreciate in exposed locations.
The Diamond Pitch: Ultralight Stealth Camping
When you need to disappear into the landscape, the diamond configuration uses a square tarp pitched diagonally over a single trekking pole. It’s the fastest setup—often under a minute—with only four stake points. The trade-off is limited headroom and a smaller footprint, making it ideal for fair-weather trips or emergency shelter. The asymmetrical shape naturally deflects wind when oriented correctly, and its low profile makes it nearly invisible from a distance.
Lean-To and Half-Pyramid: The Social Shelters
These open-front designs prioritize views and ventilation over complete enclosure. While not ideal for storm conditions, they pitch in seconds and create a welcoming space for cooking or drying gear. For the solo female backpacker, they work best in established campsites or when you’re confident in the weather forecast. The psychological openness can feel less claustrophobic, though it requires careful site selection for privacy.
Body Bag and Bivy Hybrid Pitches
For true minimalist missions, wrapping your tarp around your sleeping bag creates a waterproof cocoon. This setup takes mere seconds and requires no poles—just stake the head and foot ends. It’s a survival technique rather than a comfort choice, but understanding this configuration gives you a backup plan when injured, exhausted, or caught in unexpected weather. The key is using a breathable bivy sack underneath to manage condensation.
The Plow Point and Modified Wedge
These advanced configurations create more vertical walls and living space by using additional guy-out points. While slightly slower to pitch than an A-frame, they reward you with standing room to change clothes—an underrated luxury when you’re solo and there’s no one to hold a towel. The plow point specifically angles the tarp to create a vestibule area for gear storage, keeping your sleeping space clean and dry.
The Tarp Tent with Integrated Bug Netting
Many modern designs blend tarp versatility with tent-like protection by incorporating bug netting skirts or full inner nets. These hybrids pitch as quickly as pure tarps but eliminate the mosquito anxiety that can ruin a summer night. For solo female backpackers, the ability to see out while keeping bugs in check provides both security and comfort. Look for designs where the netting attaches with clips rather than zippers for faster setup.
Essential Features That Actually Matter in the Field
When evaluating any quick-setup system, certain features separate frustrating gear from reliable shelter. These details determine whether you’ll be pitching confidently in a gale or fighting with your gear while darkness falls.
Color-Coded and Reflective Attachment Points
In fading light, fumbling to find tie-out points wastes precious minutes. High-visibility attachment points with reflective stitching let you locate critical connections with your headlamp without destroying your night vision. Some manufacturers use different colored webbing for ridgeline versus side pull-outs, creating a visual map that speeds up muscle memory development.
Pre-Attached Guy-Lines with Tensioning Systems
The fastest setups use guylines that stay attached permanently, eliminating the risk of dropping critical pieces in the dark. Look for systems with Lineloc or similar tensioners that allow one-handed adjustment. This is particularly valuable when you’re staking with one hand while holding a pole with the other. The ability to fine-tune tension from inside your shelter is a solo backpacker’s luxury.
Reinforced Ridgelines and Stress Points
A tarp that fails at 2 a.m. in a storm isn’t just inconvenient—it’s dangerous. Double-stitched and bar-tacked reinforcements at ridgeline centers and corner tie-outs prevent catastrophic tears. For solo female backpackers who might not have the upper body strength to muscle a failing tarp into submission, structural integrity isn’t negotiable.
Catenary Cuts and Curved Edges
Flat tarps may be versatile, but catenary-cut designs pitch tighter with less effort. The curved edges reduce flapping and require fewer adjustments after initial setup. This means you can achieve a drum-tight pitch faster, and the shelter will maintain its structure through wind gusts without constant monitoring—freeing you to focus on camp tasks or simply relaxing.
Material Science: What Your Tarp Is Made Of Matters
Your tarp’s fabric determines not just weight, but how it handles weather, how it packs, and how long it lasts. Understanding these materials helps you choose the right tool for your specific adventures.
Silnylon vs. Silpoly: The Weight vs. Water Performance Trade-off
Silnylon (silicone-impregnated nylon) dominates the ultralight market because it’s incredibly strong for its weight and packs down tiny. However, it stretches when wet, requiring mid-storm re-tensioning—a challenge when you’re solo and already stressed. Silpoly (silicone-impregnated polyester) resists stretch better, maintaining a taught pitch through temperature and humidity changes. It’s slightly heavier but often worth the peace of mind for solo backpackers who don’t want to venture out at 3 a.m. to retighten guylines.
DCF (Dyneema Composite Fabric): The Premium Choice
Formerly known as Cuben Fiber, DCF is the gold standard for ultralight tarps that don’t compromise on strength. It’s waterproof, doesn’t stretch, and weighs roughly half what silnylon does. The downside? It’s crinkly loud in wind and costs significantly more. For solo female backpackers who’ve invested in reducing base weight to increase safety margins, DCF represents a worthwhile long-term investment, especially for tarps you’ll use for decades.
Coated Polyester: The Budget Workhorse
Heavier but incredibly durable, coated polyester tarps offer an affordable entry point. They’re less packable and add pounds to your pack, but their durability means you can practice setup repeatedly without fear of damage. This makes them excellent for building skills before investing in premium materials. The weight penalty is real, but so is the confidence gained from mastering your system with forgiving gear.
Weather Protection Strategies Beyond the Tarp Itself
A tarp is only as good as its pitch and the surrounding environment. Solo backpackers must think holistically about weather protection, anticipating challenges before they become emergencies.
Site Selection as Your First Defense
The fastest tarp setup fails if you’ve chosen a poor location. Look for natural windbreaks like dense shrubs or rock formations, but avoid dead trees that could drop branches. Slight elevation prevents pooling, while proximity to water sources requires balancing convenience with condensation risk. For solo female backpackers, visibility matters too—a site visible from the trail deters unwanted attention while still offering privacy.
Groundsheet Integration and Protection
Your tarp blocks rain from above, but moisture comes from below too. A groundsheet that extends 6-8 inches up the walls creates a bathtub floor, preventing splash-back and ground seepage. Some solo backpackers use a bivy sack as their groundsheet, creating redundancy. If using a separate groundsheet, ensure it’s slightly smaller than your tarp footprint to prevent water from pooling between the layers.
Storm Pitching Techniques
When weather turns violent, lowering your profile and increasing stake angles becomes critical. Pitch your tarp closer to the ground than usual, orient the ridgeline perpendicular to prevailing winds, and use deadman anchors in soft soil. Carry extra stakes for redundant tie-outs—having four points fail simultaneously is unlikely. Practice these storm pitches in your backyard during windy days; muscle memory is your best friend when you’re solo and conditions deteriorate.
Weight and Packability: The Solo Backpacker’s Calculus
Every ounce you carry matters more when there’s no one to share the load. Quick-setup tarps excel here, but understanding the full system weight prevents unpleasant surprises.
The “System Weight” Concept
Your tarp might weigh 12 ounces, but add stakes, guylines, groundsheet, and pole, and you’re looking at 2-3 pounds total. Calculate this completely before committing. For solo female backpackers, this often means choosing trekking pole-supported designs over those requiring dedicated tent poles, saving both weight and money while increasing versatility.
Compression and Pack Shape
DCF packs down to the size of a water bottle, while coated polyester might fill half your pack. Consider how your tarp’s packed shape integrates with your pack’s design. A long, thin stuff sack slides neatly against your pack’s back panel, while a bulky roll creates dead space. Some backpackers skip the stuff sack entirely, using the tarp as pack padding or stuffing it loosely to fill gaps.
The Multi-Use Philosophy
The tarp itself becomes a gear storage area, a cooking shelter, or emergency rain gear. Your trekking poles serve as structure. Your stakes can double as trowels or pot lifters in a pinch. This multi-use approach, championed by ultralight experts, reduces overall pack weight while increasing resilience. For solo travelers, gear that serves multiple purposes reduces decision fatigue and simplifies your kit.
Safety and Security: Addressing the Unique Concerns of Solo Female Backpackers
Let’s address the elephant on the trail: safety concerns that are disproportionately felt by women adventuring alone. Your shelter choice can either amplify or alleviate these valid anxieties.
Campsite Selection for Privacy and Visibility
The ideal solo site balances discretion with defensibility. Choose locations visible enough that you could call for help if needed, but not so exposed that you feel like you’re on display. Pitch your tarp with the entrance facing your gear or a natural barrier rather than outward toward potential approaches. This creates a psychological sense of security and makes it harder for anyone to approach unnoticed.
Wildlife Awareness and Food Storage
Quick-setup tarps mean you’re not hiding in a tent; you’re part of the environment. This requires diligent food storage—use bear canisters even where not required, and store them 200 feet from your shelter. The open nature of tarps means cooking in your shelter is risky; instead, create a separate cooking area downwind. The speed of tarp setup becomes an asset here, allowing you to quickly establish a safe camp perimeter.
Emergency Communication and Exit Strategies
Always know your exit route. Before pitching, identify two ways to leave your site quickly if needed. Keep your headlamp, shoes, and a jacket within arm’s reach, not buried in your pack. Some solo female backpackers sleep with a whistle and pepper spray accessible. Your tarp’s quick-setup nature means you can break camp in minutes if a situation feels wrong—trust your instincts and never hesitate to relocate.
Mastering the 90-Second Pitch: Technique Over Strength
Speed comes from sequence, not force. Developing a repeatable, efficient setup routine transforms tarp camping from a chore into a confident ritual.
The Stake-First Method for Open Ground
On exposed ridgelines or desert floors, stake your four corners first, creating a defined footprint. Then raise the ridgeline using your trekking pole, adjusting tension from the inside. This method works in any weather because you’re never fighting a flapping tarp while trying to drive stakes. Practice until you can stake by feel, keeping your eyes on approaching weather rather than your hands.
The Ridgeline-First Method for Forested Sites
When trees are available, establish your ridgeline first using a trucker’s hitch or taut-line hitch. This gives you an immediate shelter framework to work under while staking the sides. In rain, you can drape the tarp over the ridgeline and secure corners progressively, staying relatively dry throughout the process. The key is pre-tying your ridgeline cord with loops at the correct distances for your tarp size.
One-Handed Adjustments and Tensioning Tricks
Solo setup means your hands are always full. Learn to tighten Linelocs with one hand by using your thumb as a fulcrum. Use your foot to hold stakes while driving them with a rock or multitool. Practice adjusting pole height while kneeling under the tarp, using your shoulder to support the pole as you fine-tune. These micro-techniques save seconds that add up to minutes when you’re racing the sunset.
Common Setup Mistakes That Cost You Time and Security
Even experienced backpackers fall into these traps. Recognizing them before you’re cold and tired prevents the cascade of frustration that can ruin a solo trip.
Over-Tensioning in Dry Conditions
Silnylon and even DCF can be over-tensioned, creating stress points that fail in wind. Pitch taut but not drum-tight in dry conditions, allowing for material expansion if rain arrives. Check tension by plucking guy-lines—they should have a slight musical note, not a tight twang. Over-tensioning also makes stakes pull out more easily in soft ground.
Ignoring Guy-Out Point Geometry
Stakes should be driven at 45-degree angles away from the tarp, not straight down. This angle increases holding power and prevents the stake from levering out under load. For critical corners, use a “V” stake configuration: two stakes in a V shape sharing the load. This redundancy takes an extra 30 seconds during setup but prevents catastrophic failure at 2 a.m.
Poor Door Management in Storms
Many tarp configurations have overlapping doors or beaks. In wind-driven rain, always pitch with doors on the leeward side and ensure overlaps face away from prevailing wind. Use twigs or spare stakes to prop doors open for ventilation when weather allows, reducing condensation. Nothing’s worse than waking soaked because a door flap inverted in a gust.
Seasonal Adaptations: From Summer Swarms to Winter Whiteouts
Your quick-setup tarp must adapt across seasons, or you’ll own multiple shelters—defeating the weight-saving purpose. Understanding seasonal tweaks maximizes versatility.
Summer: Bug Protection and Ventilation
In mosquito season, a tarp without netting is torture. Use a separate bug bivy or choose a hybrid design with integrated netting. Pitch higher for airflow, using additional guy-out points to create vertical walls. Reflective tarps can be pitched to create shade structures during midday breaks, doubling as sun protection. The speed of setup means you can take shelter during afternoon thunderstorms without breaking stride.
Fall and Spring: Variable Weather Mastery
Shoulder seasons demand maximum versatility. Carry extra stakes and practice the “storm pitch” where you lower the tarp to within inches of the ground. Use natural materials like leaves or snow to seal gaps between tarp and earth. The ability to quickly reconfigure from airy to bombproof in minutes is where tarp skills truly shine. This adaptability is why many solo female backpackers choose tarps over tents for unpredictable shoulder season trips.
Winter: Snow Load and Wind Resistance
Snow is heavy, and flat tarp sections sag under load. Use steep pitches (60-degree angles) that shed snow automatically. Carry snow stakes or use stuff sacks filled with snow as deadman anchors. Practice building snow walls for wind protection—these take time but transform an exposed site into a fortress. Your tarp’s quick setup becomes less about speed and more about efficiency in brutal conditions where every minute exposed increases risk.
Budget vs. Premium: Making the Investment Decision
The price range for tarp systems spans from $30 to $600+. Understanding what you’re paying for helps allocate your limited gear budget wisely.
Entry-Level Options for Skill Building
A basic coated polyester tarp from a hardware store teaches you configurations without financial risk. The weight penalty is real, but the learning is invaluable. Use this phase to identify which configurations you prefer before investing in premium materials. Many solo female backpackers keep a cheap tarp as a loaner for friends or as a backup for particularly abusive trips where gear damage is likely.
Mid-Range Sweet Spot
Silpoly tarps in the $100-200 range offer the best performance-per-dollar. They’re light enough for serious backpacking, durable enough for years of use, and affordable enough to replace if damaged. This is where most experienced solo backpackers land after experimenting. The money saved versus DCF can fund other safety-enhancing gear like a satellite communicator or premium first aid kit.
Premium DCF: Long-Term Investment
If you backpack more than 30 nights a year and have dialed in your preferred configuration, DCF’s weight savings and durability justify the cost. It’s particularly valuable for long-distance trails where every ounce impacts daily mileage and injury risk. The fabric’s longevity means you’ll own it for a decade or more, amortizing the initial expense. For solo female backpackers pushing their limits on challenging routes, the performance edge can be the difference between success and turning back.
Maintenance and Field Repairs: Self-Sufficiency on Trail
When you’re solo, there’s no borrowing your partner’s gear if yours fails. Understanding maintenance keeps your tarp reliable trip after trip.
Seam Sealing and Waterproofing
Even premium tarps need seam sealing. Apply silicone seam sealer to all stitched areas before your first trip, then touch up annually. In the field, Tenacious Tape or duct tape can patch small holes. Carry a small tube of seam grip for emergency repairs. For DCF, specialized repair tape adheres better than standard options. Test your seam sealing by setting up the tarp and spraying it with a hose before trusting it in a storm.
Stake and Guy-Line Management
Replace worn guy-lines before they fail. Carry spare cordage—25 feet of 2mm Dyneema weighs almost nothing but can replace any guy-line or serve as emergency bear bag line. Clean stakes after muddy trips to prevent rust (for metal) or degradation (for plastic). Store tarps loosely at home, not compressed, to preserve waterproof coatings. A well-maintained tarp system lasts thousands of miles.
Cleaning Without Damaging Waterproofing
Never machine wash your tarp. Use a bathtub with mild soap, rinse thoroughly, and air dry completely before storage. Body oils from handling degrade waterproofing over time; periodic washing restores performance. For DCF, a simple wipe-down with a damp cloth usually suffices. Silnylon and silpoly benefit from occasional DWR (durable water repellent) spray treatments to restore water beading.
Adapting to Terrain: From Desert Sand to Alpine Rock
The ground beneath your tarp changes everything about your setup strategy. Quick adaptation prevents damage and ensures security.
Soft Ground and Sand Techniques
Standard stakes pull out of sand like knives through butter. Use sand stakes with wider profiles, or bury stakes horizontally as deadman anchors attached to cords. Fill stuff sacks with sand and bury them as anchors. Pitch lower to reduce wind load, and use all available tie-out points to distribute force. The speed of your setup matters less here than the security of each anchor point.
Rocky and Alpine Sites
When you can’t drive stakes, use rocks as anchors. Wrap guy-lines around rocks and position them to pull in the correct direction. In alpine zones, use ice axes, skis, or trekking poles buried in snow as anchors. Pitch on durable surfaces like rock slabs or established tent sites to minimize environmental impact. The ability to pitch without stakes is a critical skill for solo backpackers in technical terrain.
Forested Sites and Tree Anchors
Use tree-friendly straps rather than wrapping cord directly around bark. Pitching between trees is often faster than staking, but measure your ridgeline length before committing. Be aware of “widowmakers”—dead branches that could fall. The sound of wind through trees can be amplified under a tarp; earplugs help some backpackers sleep while still allowing you to hear larger hazards.
DIY vs. Commercial: Building Skills Through Creation
Sewing your own tarp teaches you more about shelter dynamics than any amount of reading. The process demystifies gear and creates a profoundly personal connection to your system.
Myog (Make Your Own Gear) Advantages
A simple flat tarp requires only straight seams and basic sewing skills. Kits from cottage manufacturers include pre-cut fabric and instructions, costing half what a commercial tarp does. The customization lets you add exactly the tie-out points you want, in colors you prefer. Many solo female backpackers find the creative process empowering, and the resulting gear carries stories that mass-produced equipment lacks.
When Commercial Makes Sense
If sewing isn’t your thing, commercial tarps offer refined designs with catenary cuts, reinforced stress points, and warranty support. The time investment of DIY might not make sense if you backpack infrequently. Commercial options also undergo testing you can’t replicate at home. There’s no shame in buying expertise—your time and safety are valuable.
Hybrid Approaches
Some backpackers buy a basic commercial tarp, then modify it—adding extra tie-outs, replacing guy-lines with preferred cordage, or seam-sealing with extra care. This approach gives you a reliable foundation while allowing personalization. It’s also a great way to refresh an older tarp, extending its life and adapting it to your evolving skills.
Building Your Skills Progression: From Backyard to Backcountry
Expertise comes from deliberate practice, not just reading. Create a training plan that builds confidence before you’re miles from help.
Backyard Practice Protocol
Set up your tarp 10 different ways in your yard. Time yourself. Do it in the dark. Do it in the rain. Do it with gloves on. Each variation builds neural pathways that activate automatically when you’re tired and stressed. Film yourself to identify inefficiencies. This deliberate practice is what separates those who merely own gear from those who wield it effectively.
Car Camping as a Testing Ground
Before committing to a week-long solo trip, spend a weekend at a campground with your tarp system. The safety net of your car means you can experiment fearlessly. Test different configurations each night, note condensation patterns, and practice breaking camp quickly. This low-stakes environment is perfect for identifying which features you actually use versus those that just add weight.
Short Solo Overnights: The Final Exam
Your first solo tarp trip should be an overnight close to home on a night with good weather forecast. Choose a site where you can bail if needed. The psychological comfort of knowing you can leave builds confidence without recklessness. Each successful trip extends your range, but only after you’ve proven your system and skills in controlled conditions. This methodical approach is how expert solo backpackers are made, not born.
Frequently Asked Questions
How long should it realistically take to set up a quick-setup tarp tent?
With practice, most solo backpackers can achieve a secure pitch in 90-180 seconds. The key is pre-attached guy-lines and a practiced sequence. Your first attempts might take 10 minutes, but after a dozen practice sessions, muscle memory takes over. Time yourself in your backyard until the process feels automatic.
Are tarp tents actually safe for solo female backpackers?
Yes, when used skillfully. The open nature requires different safety practices than tents—primarily careful site selection and wildlife protocols. Many solo female backpackers report feeling more aware of their surroundings under a tarp, which increases rather than decreases safety. The ability to quickly break camp if a situation feels wrong is a significant advantage.
What’s the minimum experience level needed before trying a tarp solo?
You should be comfortable with basic camping skills—navigation, water treatment, and Leave No Trace principles. Tarp-specific skills can be learned in 2-3 dedicated practice sessions. There’s no shame in doing your first few solo trips in a tent while you master tarp setup in safe environments. Build skills progressively rather than jumping straight into a week-long tarp solo trip.
How do I handle menstrual hygiene in an open tarp shelter?
Use a dedicated pee cloth or wipes stored in a waterproof bag. Many solo female backpackers use a small trowel to dig a cathole near their site for discreet disposal. A tarp with a beak or vestibule provides privacy for changing products. Consider a dark-colored tarp for additional discretion, and always pack out used products in odor-proof bags stored away from your sleeping area.
What’s the best tarp color for both safety and stealth?
Olive green or brown tarps blend into most environments for discreet camping. For safety, add a small piece of reflective tape to a guy-line (not the tarp itself) that’s visible from the trail. This helps rescuers find you without making your site obvious to casual passersby. Avoid bright colors like orange or yellow unless you’re in hunting territory where visibility is a safety requirement.
Can I really use my trekking poles for all tarp configurations?
Most configurations work with trekking poles, but you’ll need to adjust techniques. For A-frames, use one pole at each end or a single pole with a tree anchor. For pyramids, a single extended pole works perfectly. Carry a small pole jack or extender if your poles don’t reach the required height. Test your specific poles with your tarp before relying on them in the field.
How do I deal with bugs if my tarp doesn’t have netting?
A separate bug bivy is the lightest solution, adding 6-8 ounces. In a pinch, treat your tarp with permethrin (never apply to skin-contact surfaces) and use a headnet while sleeping. Pitching near a breeze or water source can reduce bugs, but never compromise on site safety for bug management. Some backpackers hang a no-see-um net from the ridgeline like a curtain, creating an improvised enclosed space.
What if I arrive at an established campground with designated tent pads?
Most tent pads work fine for tarps, though the wooden platforms require creativity. Use rocks or provided anchors rather than stakes. The defined space can actually speed up your setup since site selection is done. Be aware that tarps offer less privacy than tents in crowded campgrounds—consider a hybrid design with full netting if you frequently use developed sites.
How do I maintain privacy when tarp camping near popular trails?
Choose low-profile configurations like the diamond pitch that blend into terrain. Use natural screens like boulders or dense vegetation. Set up after dark and break camp at dawn when fewer people are moving. A dark-colored tarp with doors creates a visual barrier. Remember that most backpackers are too focused on their own experience to notice you, but trust your instincts and relocate if you feel observed.
What’s the realistic lifespan of a quality tarp tent system?
A silnylon or silpoly tarp lasts 5-10 years with heavy use, longer with proper care. DCF can exceed a decade even with regular use. Guy-lines need replacement every 2-3 years as UV degrades them. Stakes last indefinitely unless bent or lost. The key is proper storage (loose, dry, and dark) and prompt field repairs. Your tarp is a long-term investment that, unlike tents, rarely becomes obsolete.
See Also
- 10 Game-Changing Tarp Tent Shelters for Family Camping Trips in 2026
- 10 Best Tarp Tent Shelters with Bug-Net Floors for Swampy Trails in 2026
- 10 Expert-Tested Tarp Tent Shelters for Couples Seeking Privacy in 2026
- Stop Mold: 10 Breathable Tarp Tent Shelters for Humid Climates
- 10 Two-Person Tarp Tent Shelters for Lightweight Thru-Hiking Couples 2026