Table of Contents
There’s nothing quite like the primal satisfaction of pitching a tarp shelter in the backcountry—watching it catch the wind, staking it taut against an approaching storm, and crawling beneath its protective canopy as the first raindrops fall. But that satisfaction can turn to dismay when a single needle hole or stressed seam transforms your fortress into a dripping disappointment. The difference between a tarp that weeps and one that truly shields you from the elements rarely comes down to the fabric itself; it’s the invisible armor applied along every stitch line that makes or breaks your shelter system.
As we look toward 2026, the seam sealing landscape has evolved dramatically, with new formulations offering unprecedented durability, flexibility, and environmental consciousness. Whether you’re a thru-hiker counting ounces, a basecamp hunter building a seasonal fortress, or a weekend warrior patching up a beloved old tarp, understanding the nuances of modern seam sealers isn’t just helpful—it’s essential for staying bone-dry when Mother Nature tests your resolve.
Top 10 Tarp Seam Sealers
Detailed Product Reviews
1. GEAR AID Seam Grip SIL Silicone Sealant for Silnylon Tents and Tarps, Clear, 1.5 oz

Overview: The GEAR AID Seam Grip SIL is a specialized silicone sealant engineered explicitly for silicone-treated fabrics like silnylon. This 1.5-ounce tube delivers a permanent, flexible bond that cures to a transparent, elastic seal, making it indispensable for ultralight backpackers and outdoor enthusiasts who rely on silnylon tents, tarps, and backpacks. Unlike standard sealants, this formula chemically adheres to silicone surfaces where others fail.
What Makes It Stand Out: Its singular compatibility with silnylon sets it apart in a market of generic sealants. The sealant maintains flexibility in extreme temperatures from scorching summers to freezing winters, refusing to crack or peel even under constant fabric stress. A single tube covers up to 24 feet of seams, offering significant coverage for its compact size. The clear finish ensures repairs remain virtually invisible, preserving both aesthetics and functionality of high-end ultralight gear.
Value for Money: While priced higher than generic alternatives, this specialty product justifies its cost by potentially saving $300+ ultralight tents from retirement. The 1.5-ounce size is perfectly proportioned for periodic maintenance without waste, making it economical for dedicated users who understand silnylon requires specific care.
Strengths and Weaknesses: Pros: Permanent silicone-to-silicone bonding; extreme temperature resistance; clear, flexible finish; excellent coverage per ounce. Cons: Useless on non-silicone fabrics; requires careful application technique; small quantity unsuitable for large family tents.
Bottom Line: For silnylon gear owners, this is non-negotiable insurance. It performs one job flawlessly—sealing silicone-treated fabrics with professional-grade results that generic sealants simply cannot match.
2. GEAR AID Seam Grip FC Fast Cure Sealant for Sealing Seams on Tents, Rainflies, Shelters, Awnings, Tarps and Pop-ups Made of Nylon, Vinyl, Clear, 2 fl oz

Overview: GEAR AID Seam Grip FC is a water-based seam sealant designed for rapid application on conventional outdoor fabrics. This 2-ounce bottle seals up to 60 feet of seams on nylon, polyester, and canvas gear, curing in just 2 hours at room temperature. Formerly Seam Sure, it’s ideal for tents, rainflies, tarps, and awnings needing quick waterproofing restoration before the next adventure.
What Makes It Stand Out: The 2-hour cure time dramatically reduces downtime compared to traditional 24-hour sealants. Its water-based formula cleans up easily with water and lacks harsh solvents, making it safer for indoor application. The included applicator brush ensures precise, mess-free delivery along seams and stress points, creating an almost invisible protective layer.
Value for Money: Covering 60 feet per bottle, this offers exceptional coverage for the price. It’s significantly cheaper than professional re-waterproofing services and extends the life of mid-range camping gear effectively. The water-based formula also means no additional solvent purchases are needed, adding to its cost-effectiveness for budget-conscious outdoor enthusiasts.
Strengths and Weaknesses: Pros: Fast 2-hour cure; versatile fabric compatibility; easy water cleanup; generous coverage; user-friendly applicator. Cons: Not for silicone-treated fabrics; water-based may require reapplication sooner than solvent-based alternatives; less durable under extreme abrasion.
Bottom Line: Perfect for campers needing quick, effective seam sealing without harsh chemicals. It balances speed, ease of use, and performance for standard nylon and polyester gear admirably.
3. GEAR AID Seam Grip WP Waterproof Sealant and Adhesive for Jackets, Tents, Tarps, Rain Gear and Outdoor Fabric, Repairs Rips and Seals Seams on Nylon, Canvas, Vinyl, 1 oz Tube Seals 12 ft, 2 Pack

Overview: GEAR AID Seam Grip WP is a versatile waterproof sealant that doubles as a fabric adhesive. This two-pack of 1-ounce tubes repairs rips and seals seams on tents, tarps, sleeping pads, and outdoor gear. It bonds to nylon, polyester, canvas, leather, and vinyl, creating a flexible rubber seal that moves with fabric and withstands harsh conditions without failing.
What Makes It Stand Out: Its dual-action capability sets it apart—functioning as both seam sealer and tear repair adhesive. The formula cures into a durable, abrasion-resistant rubber that won’t peel or crack under heavy use. Each tube covers 12 feet of seams, making the two-pack ideal for comprehensive gear maintenance or emergency field repairs when damage occurs miles from home.
Value for Money: The two-pack configuration provides excellent value, offering enough product for multiple repairs at a lower per-unit cost. It’s far more economical than replacing expensive technical gear like Therm-a-Rest pads or premium tents, potentially saving hundreds of dollars in replacement costs while keeping trusted equipment in service.
Strengths and Weaknesses: Pros: Dual-purpose repair and sealing; bonds to multiple fabric types; highly durable; portable 1-oz size; includes applicator brush. Cons: Smaller coverage per tube; requires 24-hour cure time; not suitable for silicone-treated fabrics; may need multiple packs for large projects.
Bottom Line: An essential addition to any gear repair kit. Its versatility and durability make it invaluable for both emergency field repairs and home gear maintenance across multiple fabric types.
4. 1DFAUL 120ml Tent Seam Sealer Waterproof, Seam Sealer Tent Sealant Repair Kit Clear Strong Seal, Fast Curing, for Tents & Outdoor Fabric

Overview: The 1DFAUL 120ml Tent Seam Sealer is a comprehensive repair kit designed for waterproofing and fabric restoration. This 4-ounce bottle seals seams and repairs damage on tents and outdoor fabrics, curing to a transparent, flexible finish. The kit includes adhesive patches and applicator tools, offering an all-in-one solution for campers and outdoor enthusiasts who want everything in one package.
What Makes It Stand Out: This kit’s inclusion of repair patches distinguishes it from competitors, allowing users to address larger holes beyond simple seam sealing. The 120ml quantity provides substantial coverage, while its compatibility with nylon, polyester, canvas, and leather makes it versatile for various gear types. The fast-curing formula reduces wait time compared to some alternatives.
Value for Money: As a budget-friendly alternative to premium brands, this kit delivers impressive value by bundling sealant, patches, and tools. The 4-ounce size offers more product than many competitors at a similar price point, making it accessible for casual campers and families who need occasional repairs without investing in specialized products.
Strengths and Weaknesses: Pros: Complete kit with patches; generous 120ml volume; transparent flexible finish; versatile fabric compatibility; affordable price point. Cons: 24-hour cure time; lesser-known brand may lack long-term durability testing; not specialized for silicone fabrics; instructions may be less detailed.
Bottom Line: A solid choice for budget-conscious campers seeking a comprehensive repair solution. While not specialized like premium brands, it capably handles most common tent repairs and seam sealing needs.
5. GEAR AID Seam Grip TF Tent Fabric Sealer for Waterproofing and Restoring Polyurethane Coating (PU) on Nylon Tent Floors, Rainflies and Tarps, Treats up to 85 sq. ft, Clear, 4 fl oz, 1 Pack
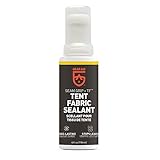
Overview: GEAR AID Seam Grip TF is a specialized tent fabric sealer formulated to restore deteriorating polyurethane coatings on nylon tent floors and rainflies. This 4-ounce bottle treats up to 85 square feet, addressing the common problem of flaking, sticky, or degraded PU coatings that plague aging tents after years of use, storage, and UV exposure.
What Makes It Stand Out: Unlike standard seam sealers, TF specifically targets PU coating restoration—a critical but often overlooked maintenance need. Its water-based formula rejuvenates waterproofing without adding significant weight, breathing new life into expensive tents that would otherwise require replacement. The treatment prevents further degradation and restores factory-level performance.
Value for Money: Restoring a premium tent’s PU coating for a fraction of replacement cost represents exceptional value. The 85 square foot coverage efficiently handles most tent floors and rainflies, making it a cost-effective alternative to purchasing new shelter systems that could cost $300-500, essentially paying for itself with one use.
Strengths and Weaknesses: Pros: Specialized for PU coating restoration; large 85 sq ft coverage; water-based and lightweight; extends tent lifespan significantly; nearly invisible finish. Cons: Not a seam sealer for new gear; limited to PU-coated nylon; requires thorough surface prep; 24-hour cure time.
Bottom Line: Essential for owners of aging tents with failing PU coatings. This niche product performs a specific, valuable job that generic sealants cannot, making it a wise investment for extending the life of quality nylon shelters.
6. AmazingSpark 4 Pcs Tent Seam Sealer Waterproof Fast Dry Clear Sealant for Tents, Tarps, Awnings

Overview: The AmazingSpark 4 Pcs Tent Seam Sealer delivers a comprehensive solution for outdoor enthusiasts battling leaky shelters. This kit includes four 1.7-ounce tubes totaling 6.8 ounces of waterproof sealant, accompanied by four applicator brushes. Designed for nylon tarps, rainwear, and tent seams, it creates a clear, flexible barrier against moisture intrusion while doubling as a repair adhesive for tears and holes.
What Makes It Stand Out: The built-in precision needle tip sets this product apart, allowing meticulous application to narrow seams and small repair areas. The innovative cap design includes a needle that prevents clogging and drying between uses—a thoughtful feature that extends product life. The 15-minute drying time is exceptionally fast compared to competitors, with full cure within 24 hours. The four-tube package provides exceptional coverage for multiple tents or seasonal reapplication.
Value for Money: With 6.8 ounces of sealant, this kit offers substantial savings over purchasing individual tubes. For families or camping groups maintaining several shelters, the bulk packaging eliminates repeat purchases. Each tube remains fresh thanks to the anti-clog caps, reducing waste from dried-out product. Casual campers might find the quantity excessive, but serious adventurers will appreciate the preparedness.
Strengths and Weaknesses: Strengths include rapid drying, precision application, anti-clog technology, and generous quantity. The clear finish remains flexible without cracking in extreme temperatures. However, the multi-tube packaging may be overkill for solo campers with a single tent. Storage requires careful attention to ensure caps are tightened properly to prevent premature drying.
Bottom Line: This is an excellent investment for frequent campers, families, or anyone maintaining multiple pieces of gear. The fast-drying formula and precision application make seam sealing less tedious, while the bulk packaging provides long-term value.
7. AmazingSpark 2 Pcs Tent Seam Sealer Waterproof Fast Dry Clear Sealant for Tents, Tarps, Awnings

Overview: The AmazingSpark 2 Pcs Tent Seam Sealer offers the same high-performance waterproofing formula in a more compact package. Containing two 1.7-ounce tubes for 3.4 ounces total, this kit includes two applicator brushes and targets campers who need quality seam sealing without bulk purchase commitment. It effectively waterproofs nylon tarps, shelters, and rainwear while patching tears and holes.
What Makes It Stand Out: This kit retains the standout precision needle tip design that prevents clogging and enables accurate application along narrow seams. The 15-minute drying time remains a significant advantage over slower-curing alternatives. The two-tube quantity hits the sweet spot for individual campers or couples with a single tent, providing enough product for initial treatment plus a backup tube for future touch-ups or repairs.
Value for Money: While the per-ounce cost runs higher than the four-pack version, this kit requires lower upfront investment. It’s perfect for those unsure about their long-term camping frequency or with limited storage space. The anti-clog caps ensure both tubes remain usable for extended periods, preventing the waste common with larger quantities that may dry before use.
Strengths and Weaknesses: Strengths include fast drying, precision application, and practical quantity for most users. The clear, flexible seal withstands extreme temperatures without cracking. Weaknesses include less economical pricing compared to bulk options, and two tubes may still be excessive for one-time emergency repairs. The packaging lacks variation for different fabric types.
Bottom Line: A smart choice for solo adventurers or couples seeking reliable seam sealing without over-purchasing. The fast-drying formula and user-friendly applicator make tent maintenance straightforward and efficient.
8. GEAR AID Seam Grip FC Fast Cure Sealant for Sealing Seams on Tents, Rainflies, Shelters, Awnings, Tarps and Pop-ups Made of Nylon, Vinyl, Clear, 2 fl oz, 2 Pack

Overview: GEAR AID Seam Grip FC (formerly Seam Sure) provides a water-based sealing solution for outdoor fabrics in a convenient two-pack of 2-fluid-ounce bottles. Designed for nylon, polyester, vinyl, and canvas, this sealant treats up to 60 feet of seams per bottle. The formula cures in approximately two hours at room temperature, creating a nearly invisible, flexible barrier against moisture.
What Makes It Stand Out: As a product from the reputable GEAR AID line, this sealant benefits from years of outdoor gear innovation. The water-based composition offers easier cleanup and reduced odor compared to solvent-based alternatives. Its versatility across fabric types—including canvas and polyester—makes it suitable for awnings, pop-ups, and tarps beyond just tents. The included applicator brush ensures smooth, even coverage.
Value for Money: Each 2-ounce bottle delivers impressive coverage, sealing up to 60 feet of seams. The two-pack provides backup for multiple projects or future reapplication. While priced at a premium compared to generic brands, the GEAR AID name assures quality and reliability. The water-based formula may require more frequent reapplication than heavy-duty alternatives, potentially affecting long-term cost efficiency.
Strengths and Weaknesses: Strengths include broad fabric compatibility, reputable brand backing, easy application, and clean finish. The two-hour cure time is reasonable for most users. However, water-based sealants typically offer less aggressive adhesion than polyurethane formulas, especially on heavily used gear. The packaging variation mentioned may confuse some buyers expecting a specific design.
Bottom Line: An excellent choice for campers seeking a versatile, user-friendly sealant from a trusted brand. Ideal for those prioritizing fabric compatibility and easy cleanup over ultra-fast drying times.
9. Tent Repair Glue Seam Sealer, Waterproof & Flexible Sealant Adhesive for Tent, Sleeping Pads, Awning & Groundsheet Repair and Outdoor Fabric, Works on Nylon, Canvas and Vinyl - 60ml / 2.12oz

Overview: The GleamGlee Tent Repair Glue positions itself as a professional-grade polyurethane adhesive designed for serious outdoor gear repair. This 60ml (2.12-ounce) tube creates a flexible, waterproof seal on nylon, vinyl, canvas, and even PVC plastics. Marketed as both an adhesive and sealant, it promises to withstand high winds, UV exposure, and temperature fluctuations while maintaining a permanent bond.
What Makes It Stand Out: The polyurethane formula offers superior strength and flexibility compared to standard silicone or water-based sealants. Its abrasion-resistant properties make it ideal for high-stress areas and rugged use. The versatility extends beyond tents to sleeping pads, awnings, and groundsheets, with claimed coverage exceeding 60 feet per tube. The flexible rubber seal moves with fabric, preventing cracks from repeated folding and packing.
Value for Money: While a single tube costs more than basic alternatives, the professional-grade performance justifies the investment for frequent adventurers. The extensive coverage and multi-material compatibility eliminate the need for multiple specialized products. For those camping in harsh conditions, the durability reduces reapplication frequency, saving money long-term. Casual campers may find the performance excessive for occasional use.
Strengths and Weaknesses: Strengths include exceptional bonding power, true flexibility, weather resistance, and broad material compatibility. The polyurethane formula excels in extreme conditions. However, the cure time isn’t explicitly stated as fast, potentially requiring longer wait times. Brand recognition lags behind established names like GEAR AID, and the “professional-grade” claim lacks third-party verification.
Bottom Line: Perfect for serious backpackers and expedition campers requiring maximum durability. The superior flexibility and strength make it worth the premium for gear subjected to harsh, frequent use.
10. INNOVAYOU Tent Seam Sealer 120ml, No Sew Solution Waterproof Fast Cure Seam Sealer Tent, for Tents and Outdoor Fabric, Clear

Overview: The INNOVAYOU Tent Seam Sealer offers the largest volume in this comparison at 120ml, positioning itself as a no-sew solution for tent and fabric repairs. This clear gel adhesive features a precision needle tip for accurate application and claims compatibility with an impressive range of materials including cotton, flannel, denim, leather, polyester, and nylon. It promises permanent waterproof bonds after a 24-hour cure period.
What Makes It Stand Out: The substantial 120ml quantity provides extensive coverage for multiple repairs or large tents without frequent repurchasing. The no-sew positioning appeals to users uncomfortable with needle-and-thread repairs. The precision tip enables mess-free application on small tears and seams. The broad fabric compatibility extends utility beyond outdoor gear to household items, making it a versatile addition to any repair kit.
Value for Money: The generous volume offers excellent per-milliliter value if priced competitively. For users needing a multi-purpose fabric adhesive, the versatility adds significant value. However, the 24-hour cure time demands advance planning, potentially requiring backup shelter options. This slower setting period may offset volume savings for campers needing quick turnarounds between trips.
Strengths and Weaknesses: Strengths include large capacity, precision application, and remarkable fabric versatility. The clear gel formulation works on natural and synthetic fibers. The primary weakness is the lengthy 24-hour cure time—significantly slower than competitors. The generic marketing claims lack specificity about temperature resistance and long-term flexibility compared to specialized outdoor formulas.
Bottom Line: Best suited for campers who plan maintenance days ahead and value versatility over speed. The large volume and multi-fabric compatibility make it ideal for comprehensive gear maintenance, though the slow cure limits emergency repair usability.
Understanding Tarp Seam Sealers: The Unsung Heroes of Waterproofing
Seam sealers are specialized compounds designed to close the microscopic gaps created when fabric is stitched together. Every needle puncture creates a potential leak point, and even the tightest stitching leaves tiny voids where water can wick through capillary action. Modern seam sealers work by creating a flexible, waterproof membrane that bonds directly to the fabric and thread, effectively bridging these gaps without compromising the material’s integrity.
The chemistry behind these products has come a long way from the stiff, crack-prone formulas of decades past. Today’s sealers must balance multiple competing demands: they need to be fluid enough to penetrate stitching holes, yet viscous enough to stay in place on vertical surfaces; flexible enough to withstand folding and packing, yet durable enough to survive months of UV exposure; and strong enough to adhere to everything from silnylon to Dyneema Composite Fabric (DCF) without degrading the base material.
Why Seam Sealing Matters More Than Ever for Tarp Shelters
Tarp shelters have surged in popularity among ultralight backpackers, bushcrafters, and emergency preparedness enthusiasts, but their minimalist design leaves zero margin for error. Unlike double-wall tents with built-in redundancy, a tarp’s single layer means every seam is a potential failure point. Water intrusion doesn’t just create discomfort—it can compromise insulation, damage gear, and in extreme conditions, pose genuine safety risks.
The physics of water pressure explains why seam sealing is non-negotiable. When rain hits your tarp, it creates hydrostatic pressure that forces water through even the tiniest openings. A single unsealed seam on an 8x10 tarp can leak up to a liter of water during a sustained downpour. Factor in wind-driven rain that increases pressure exponentially, and you’ve got a recipe for a miserable night. Proper seam sealing doesn’t just prevent drips; it maintains the structural integrity of your shelter by preventing water from soaking into seams, which can lead to mildew, delamination, and fabric degradation over time.
Types of Tarp Seam Sealers: Choosing Your Waterproofing Weapon
Liquid Polyurethane Sealers: The Workhorse Choice
Liquid polyurethane seam sealers remain the most versatile and widely used option for tarp maintenance. These one-part moisture-cure formulations create a flexible, rubber-like coating that adheres aggressively to most fabrics. The application process involves carefully running a thin bead along the seam, then working it into the stitching with an applicator brush or foam swab. What makes polyurethane sealers particularly effective is their ability to self-level, filling microscopic voids while maintaining a low profile that won’t catch or snag.
The best formulations for 2026 feature improved solvent systems that reduce toxicity while enhancing penetration into modern coated fabrics. They’re available in both glossy and matte finishes, with the latter being preferable for tarps as it reduces light reflection and visual signature. Cure times typically range from 2-8 hours depending on humidity and temperature, with full strength developing over 24-48 hours. The resulting seal can last 2-4 years of heavy use before requiring touch-ups.
Seam Tapes: The Heat-Bonded Alternative
Seam tape represents a different philosophy in waterproofing—rather than applying a liquid that cures in place, this method uses pre-coated adhesive strips that are heat-activated to bond with the fabric. Originally developed for factory production, seam tape has become increasingly accessible to DIY users through the availability of controlled-heat application tools. The advantage is immediate: no curing time, no mess, and a perfectly consistent application thickness.
Modern seam tapes feature multi-layer constructions with a PU or TPU adhesive layer backed by a protective film. When properly applied with the correct temperature and pressure, they create a mechanical bond that’s often stronger than the base fabric. The key limitation is material compatibility; tape works best on thermoplastic-coated fabrics like PU-coated nylon or polyester, but struggles with siliconized materials like silnylon or DCF, which require specialized primers or simply won’t bond reliably.
Spray-On Formulations: The Speed Demon’s Option
Sprayable seam sealers have gained traction for their ability to cover large areas quickly, making them ideal for oversized tarps or those with complex geometries. These aerosol or pump-spray products dispense a fine mist of sealing compound that settles into seams and stitching. The application technique requires careful masking of areas you don’t want coated and multiple light passes rather than heavy applications.
The formulation challenges for spray sealers are significant—they must remain suspended in solution without clogging the nozzle, yet cure to a flexible, non-tacky finish. The best 2026 formulations use low-VOC propellants and feature adjustable spray patterns from narrow stream to wide fan. While convenient, spray sealers generally don’t penetrate as deeply as brush-applied liquids, making them better suited for maintenance coats on previously sealed seams rather than initial treatments.
Hybrid and Specialty Compounds: The Niche Solutions
Emerging categories include UV-cured sealers that harden under sunlight within minutes, two-part epoxy-based systems for extreme durability, and silicone-modified polyurethanes that offer the best of both worlds for siliconized fabrics. These specialty products cater to specific use cases: the UV-cured option excels for quick field repairs, while the two-part systems are favored by expedition outfitters building semi-permanent installations.
Key Features to Consider When Choosing a Seam Sealer
Material Compatibility: The Make-or-Break Factor
Your tarp’s fabric composition dictates which sealer will work—and which might destroy it. Silnylon, with its silicone impregnation, repels water-based and many solvent-based sealers, requiring either silicone-specific formulations or careful surface priming. PU-coated nylon and polyester are more forgiving, accepting most polyurethane sealers readily. Dyneema Composite Fabric presents unique challenges; its olefin-based fibers have low surface energy, requiring specialized primers or sealers specifically formulated for UHMWPE composites.
Always test your chosen sealer on a scrap piece or interior corner before committing to the entire seam. Apply a small amount, let it cure fully, then perform a destructive test by trying to peel it off. Good adhesion means the sealer stretches before releasing; poor adhesion results in clean separation that indicates eventual failure.
Weather Resistance and Temperature Performance
A sealer that works beautifully in mild conditions can turn brittle in freezing temperatures or gooey in tropical heat. Look for products with a specified service temperature range that exceeds your expected use case. Quality sealers maintain flexibility down to -20°F and stability up to 150°F without significant degradation. For four-season use, consider formulations with plasticizers that remain active across extreme temperature swings.
Hydrolysis resistance is another critical factor—cheaper polyurethane sealers can break down when exposed to constant moisture and heat, turning cloudy and losing adhesion. Premium formulations include anti-hydrolysis additives that extend service life in wet, humid environments. If you’re sealing a tarp for tropical or marine use, this feature should be non-negotiable.
Application Method and Ease of Use
The difference between a professional-looking job and a messy disaster often comes down to application tools. Liquid sealers require precision applicator bottles with needle tips for fine control along narrow seams. Look for products that include or recommend specific applicators rather than leaving you to improvise with toothpicks or brushes that can introduce air bubbles.
Viscosity matters tremendously. Too thin, and the sealer runs off vertical seams before curing; too thick, and it won’t penetrate stitching holes. The ideal consistency is similar to heavy cream—flowing enough to self-level but viscous enough to stay put. Some manufacturers offer thixotropic formulations that thin under application pressure then thicken when at rest, providing the best of both worlds.
Curing Time and Flexibility Trade-offs
Fast-curing sealers use aggressive solvents that flash off quickly, allowing you to pack your tarp within hours. However, this speed often comes at the cost of ultimate flexibility and longevity. Slower-curing formulations that require 24+ hours to reach handling strength typically develop better cross-linking, resulting in a more durable, flexible final product.
Consider your timeline and use pattern. If you’re doing pre-season maintenance at home, opt for slower-curing formulas. For field repairs, carry a fast-curing option that trades some longevity for immediate functionality. The sweet spot for most users is a sealer that reaches tack-free status in 4-6 hours and full cure overnight.
UV Resistance and Long-Term Durability
Ultraviolet radiation is the silent killer of seam sealers, breaking down polymer chains and causing cracking, chalking, and adhesion loss. Premium formulations include UV stabilizers and hindered amine light stabilizers (HALS) that scavenge free radicals before they can damage the polymer matrix. For tarps that see constant sun exposure, this feature can double or triple the time between reapplication.
The relationship between sealer thickness and UV protection is counterintuitive—thicker isn’t always better. A thin, properly applied coat with UV inhibitors often outlasts a thick layer without them, as the thicker application is more prone to internal stress cracking. Aim for just enough sealer to saturate the stitching without building up a heavy bead.
Weight Considerations for Ultralight Enthusiasts
For the ounce-counting backpacker, seam sealer weight adds up quickly. A typical 8x10 tarp with perimeter and ridge seams might require 15-25 grams of liquid sealer. While this seems negligible, some formulations are significantly lighter than others. Solvent-heavy sealers lose mass as they cure, while 100% solids formulas add their full weight permanently.
Some ultralight specialists are turning to minimalist approaches: applying sealer only to critical stress points, using diluted formulas that penetrate deeper with less mass, or selecting inherently waterproof construction methods like bonded seams that eliminate the need for sealers entirely. However, for standard sewn tarps, a quality sealer remains the most reliable waterproofing method.
Application Techniques for Professional-Grade Results
Surface Preparation: The Foundation of Success
Proper preparation separates lasting seals from immediate failures. Begin by setting up your tarp in a dry, dust-free environment with moderate temperature (65-75°F) and humidity (40-60%). Clean all seams thoroughly with isopropyl alcohol to remove factory finishes, skin oils, and silicone contaminants. For heavily used tarps, a gentle scrub with a soft brush and mild detergent may be necessary, followed by complete drying.
Examine every stitch line for fraying, loose threads, or needle damage. Clip any protruding threads flush with sharp scissors—long threads can wick water past the sealer. If you find damaged stitching, repair it before sealing. For silnylon tarps, a final wipe with a silicone-based primer can dramatically improve adhesion, though this adds weight and complexity.
Application Tools and Methods
The right tool depends on your sealer type and seam geometry. For liquid sealers, precision applicator bottles with 18-gauge needle tips offer surgical control along flat-felled seams. Foam swabs (not cotton, which leaves fibers) help work sealer into stitching without introducing bubbles. Some experts prefer small artist’s brushes for ridge seams where a slightly wider application is beneficial.
Apply sealant to the inside (non-coated side) of the fabric whenever possible. This protects the sealer from UV exposure and abrasion while leveraging the fabric’s coating as an additional barrier. Work in 12-inch sections, applying a thin, continuous bead then immediately working it into the stitching with a dabbing motion rather than brushing, which can pull sealer away from the seam.
Curing and Drying Best Practices
Once applied, the curing environment becomes critical. Ideal conditions mirror the application environment: moderate temperature, controlled humidity, and still air. Create a dust-free zone by hanging the tarp in a clean room or constructing a temporary plastic tent over it. Avoid the temptation to speed curing with heat guns or direct sunlight, which can cause the surface to skin over while trapping solvents underneath, leading to bubbling and poor adhesion.
For liquid sealers, wait until the surface is tack-free (usually 4-6 hours) before carefully moving the tarp. Full cure typically requires 24-48 hours, during which the tarp should remain pitched to prevent sticking. If you must pack it sooner, dust the sealed seams with talcum powder to prevent adhesion, though this will require cleaning before the next use.
Common Application Mistakes That Doom Your Efforts
The number one error is over-application. A thick bead of sealer looks impressive but flexes poorly, cracks under stress, and adds unnecessary weight. The correct amount barely fills the stitching holes without creating a raised ridge. Remember, you’re sealing, not caulking.
Applying sealer to damp fabric is another frequent failure point. Even condensation from your breath can interfere with adhesion. Use a moisture meter if you’re unsure—fabric should read below 10% moisture content. Similarly, sealing in high humidity can cause polyurethane sealers to foam as they cure, creating a weak, porous seal.
Maintaining and Repairing Sealed Seams for Longevity
Inspection Schedules and Touch-Up Protocols
Treat your sealed seams like you would tent guy lines—inspect them seasonally and after any major trip. Look for chalking, cracking, or areas where the sealer has pulled away from stitching. Pay special attention to stress points: corner reinforcements, ridgeline intersections, and anywhere the tarp experiences repeated folding.
Early intervention is key. When you spot a small failure, clean the area thoroughly and apply a thin patch of fresh sealer, extending 1/2 inch beyond the damaged area. This is far more effective than waiting for widespread failure and resealing the entire seam. Keep a small tube of compatible sealer in your repair kit for field touch-ups, even if it’s a faster-curing formula than your primary treatment.
When to Reapply Seam Sealer
Even the best seam sealer has a finite lifespan. For tarps used 30+ nights per year, plan on complete resealing every 2-3 years. Visual cues include widespread whitening of the sealer (indicating UV degradation), loss of flexibility (test by gently bending a sealed seam—it should flex without cracking), or persistent damp spots on the tarp’s interior after rain.
Before reapplying, you must remove the old sealer completely—a daunting task. Mechanical removal with a plastic scraper and fine-grit sandpaper works for stubborn areas, while chemical strippers designed for polyurethane can soften old sealer for easier removal. Always test strippers on a hidden area first, as they can damage some coatings.
Environmental Considerations and Responsible Use
The environmental impact of seam sealers extends beyond their chemical composition. VOCs (volatile organic compounds) in traditional solvent-based formulas contribute to air pollution and can be harmful in enclosed spaces. Water-based alternatives have improved dramatically, offering performance within 90% of their solvent-based counterparts while reducing environmental and health impacts.
Disposal presents another challenge. Cured sealer is generally inert and can go to standard landfills, but uncured product and solvent-soaked rags are hazardous waste. Follow local regulations for disposal, and consider the lifecycle of your tarp—sometimes replacing an old, frequently resealed tarp with a new model featuring factory-taped seams is more environmentally sound than repeated chemical applications.
Cost vs. Performance: Finding Your Sweet Spot
Seam sealer pricing ranges from $8 for basic hardware store options to $25+ for specialty outdoor formulations. The price difference often reflects resin quality, UV stabilizer content, and application convenience rather than raw sealing ability. A mid-range polyurethane sealer ($12-15) typically offers 80% of the performance of premium options at half the cost.
Calculate cost per application rather than price per tube. A $20 tube that seals three tarps completely is cheaper than a $10 tube that barely covers one. For most users, the performance plateau occurs around the $15 mark—beyond that, you’re paying for marginal gains or brand prestige. Invest the savings in proper application tools and surface preparation materials, which have a bigger impact on results than sealer price.
Innovations Shaping Seam Sealing in 2026
The seam sealing world is experiencing a materials revolution. Bio-based polyurethanes derived from castor oil and other renewable sources now match petroleum-based performance while reducing carbon footprint. Nanotechnology additives create self-healing properties—microcapsules of uncured resin that rupture when cracks form, automatically filling damage.
Smart sealers with color-changing indicators are entering the market, shifting from bright application colors to clear when fully cured, eliminating guesswork. For the tech-savvy, UV-LED curing systems paired with photosensitive sealers promise fully cured seams in under 30 minutes, though at a premium price point that currently limits them to professional outfitters.
DIY vs. Professional Seam Sealing: Making the Right Choice
While DIY seam sealing is accessible to anyone with patience and attention to detail, professional services offer advantages for high-value tarps or complex designs. Professional operations use hot air welding equipment that achieves factory-level consistency and can seam-tape materials that resist DIY methods. They also offer pressure testing, identifying leaks before you discover them in the field.
The DIY approach shines for maintenance and simple tarps. You develop an intimate knowledge of your shelter’s weak points, and the cost savings are substantial—professional sealing runs $50-150 depending on tarp size, while DIY materials cost under $20. For most recreational users, learning proper DIY technique is the better long-term investment.
Troubleshooting Common Seam Sealing Issues
Leaks after sealing typically trace to one of three causes: insufficient penetration into stitching (apply thinner coats and work them in better), contamination preventing adhesion (re-clean and try a primer), or missed spots (use a systematic grid pattern during application). If your sealer beads up like water on a freshly waxed car, you’ve got a surface energy mismatch—switch to a silicone-specific formula or use a dedicated primer.
Cracking and peeling often result from applying too thick a coat or using an incompatible sealer. The solution is removal and reapplication with proper technique. Bubbling indicates trapped solvents from curing too fast—strip the affected area and reapply in better conditions. If your sealed seams feel tacky after the stated cure time, you may have old product or contaminated material; unfortunately, the only fix is complete removal and resealing.
Seasonal Considerations for Seam Sealing Projects
Timing your seam sealing project to the season can dramatically improve results. Spring and fall offer the ideal temperature and humidity windows in most climates. Summer’s heat speeds curing but increases dust and insect contamination. Winter’s cold prevents proper curing altogether—most sealers won’t cure below 50°F, and even if they do, flexibility will be compromised.
For emergency winter repairs, carry a cold-weather formulation or rely on seam tape, which isn’t temperature-dependent. If you must seal in marginal conditions, create a microclimate using a space heater in a small room, but monitor humidity carefully—adding a dehumidifier prevents the foaming issues that plague high-humidity applications.
Frequently Asked Questions
How long does seam sealer typically last on a tarp shelter?
With proper application and normal use, quality polyurethane seam sealers last 2-4 years before requiring touch-ups. Factors like UV exposure, frequency of use, and folding patterns affect longevity. Tarps used only occasionally may go 5+ years, while those pitched for months in direct sun might need annual attention. Seam tape generally outlasts liquid applications but is harder to repair when it fails.
Can I use the same seam sealer on silnylon and PU-coated fabrics?
Generally, no. Silnylon’s silicone impregnation repels most polyurethane sealers, requiring silicone-specific formulations or a dedicated primer. Using standard PU sealer on silnylon results in poor adhesion and eventual failure. PU-coated fabrics accept most polyurethane sealers readily. Always check manufacturer compatibility charts, and when in doubt, test on a small interior section first.
What’s the best way to remove old, failing seam sealer?
Mechanical removal works best: use a plastic scraper to avoid fabric damage, followed by gentle abrasion with fine-grit sandpaper (400-600 grit). For stubborn areas, apply a polyurethane-specific chemical stripper, let it soften the old sealer for 10-15 minutes, then scrape. Always test strippers on a hidden area first. Complete removal is critical—new sealer won’t bond properly to partially degraded old material.
How do I know if I’ve applied enough seam sealer?
The seam should appear saturated but not flooded. When you hold the fabric up to light, you shouldn’t see any pinpricks of light through the stitching. A properly sealed seam feels slightly stiff but still flexible, with no raised bead. If you can see or feel a thick ridge of sealer, you’ve over-applied. The weight test is telling: a properly sealed 8x10 tarp should gain only 15-25 grams total.
Can seam sealer be applied in cold weather or high humidity?
Most polyurethane sealers require temperatures above 50°F and humidity below 70% for proper curing. Cold prevents the moisture-cure reaction, while high humidity causes foaming and weak seals. For emergency repairs in poor conditions, use seam tape or carry a cold-weather formulation. If you must apply in marginal conditions, create a controlled environment indoors or use a portable heater and dehumidifier.
Is seam sealer toxic, and can I apply it indoors?
Traditional solvent-based sealers contain VOCs that require ventilation—apply them outdoors or in a well-ventilated garage. Water-based formulas are safer for indoor use but still need airflow during curing. All sealers are safe once fully cured. Wear nitrile gloves during application, and if you’re sensitive to chemicals, use a respirator with organic vapor cartridges. Keep uncured sealer away from pets and children.
How much seam sealer do I need for a typical tarp?
A 1-ounce tube seals approximately 20-25 linear feet of seam on standard backpacking tarps. An 8x10 flat tarp with perimeter and ridge seams needs about 1.5-2 ounces. Catenary-cut tarps with curved edges require more due to increased seam length. Always buy slightly more than calculated—running out mid-project creates visible seams. For maintenance, a half-ounce mini-tube covers touch-ups for several trips.
Why are my sealed seams still leaking after application?
Leaks post-sealing usually indicate insufficient penetration into stitching, missed spots, or surface contamination preventing adhesion. Another common cause is applying sealer to damp fabric or sealing both sides of the fabric, which can trap moisture. Test by spraying water on the sealed seam—if water beads, the sealer is working; if it darkens the fabric, you have a leak. Re-clean and reapply to affected areas.
Can I paint or color my seam sealer for camouflage purposes?
Most seam sealers accept pigment additives designed for polyurethane paints, allowing you to create earth-toned or camouflage patterns. Add pigment before application, mixing thoroughly. Test the colored sealer on scrap fabric first, as some pigments can affect flexibility or cure time. Avoid heavy pigment loads, which can compromise waterproofing. Alternatively, apply clear sealer first, then paint over it once cured with flexible fabric paint.
What’s the difference between seam sealer and seam tape, and which is better?
Seam sealer is a liquid that cures to a flexible coating, offering deep penetration and easy field repairs. Seam tape is a pre-coated adhesive strip applied with heat, providing instant, consistent coverage but requiring equipment and skill to apply. Neither is universally better—sealer excels for DIY application and maintenance, while tape suits factory production and professional repairs. Many high-end tarps use both: tape for primary sealing and liquid sealer for reinforcement and touch-ups.
See Also
- 10 Seam Sealers That Keep Tarp Shelters Dry in 24-Hour Rain Tests
- 10 Tarp Seam Sealers That Keep Tarp Shelters Dry in 24-Hour Rain 2026
- 10 Tarp Seam Sealers to Stop Leaks in DIY Tarp Shelters This Year
- 10 Seam Sealers for Silpoly Tarp Shelters That Pass Hose Tests
- 10 Pro-Grade Tarp Seam Sealers Tested in 48-Hour Rain Simulations